Displaying Custom Queue Categories on the ILLiad Home Page
If you would like to distinguish your custom queues from the default ILLiad queues or sort the default queues into custom categories, you can create a new category to display those queues in the Requests Group.
For instance, in the Borrowing module, you can create a category called Custom Sort Queues, for your custom queues. When a request is moved to one of your custom queues, it will automatically display under the Custom Sort Queue category. When there are no requests within the queues under your category, the category will not display; when requests are added to those queues the category will display on the Client interface. Customizations are automatically saved for individual users, and can also be saved to a file, shared, and adapted by other users.
Creating a New Custom Queue Category
To create a new custom sort category within a list of queues in the ILLiad Client:
-
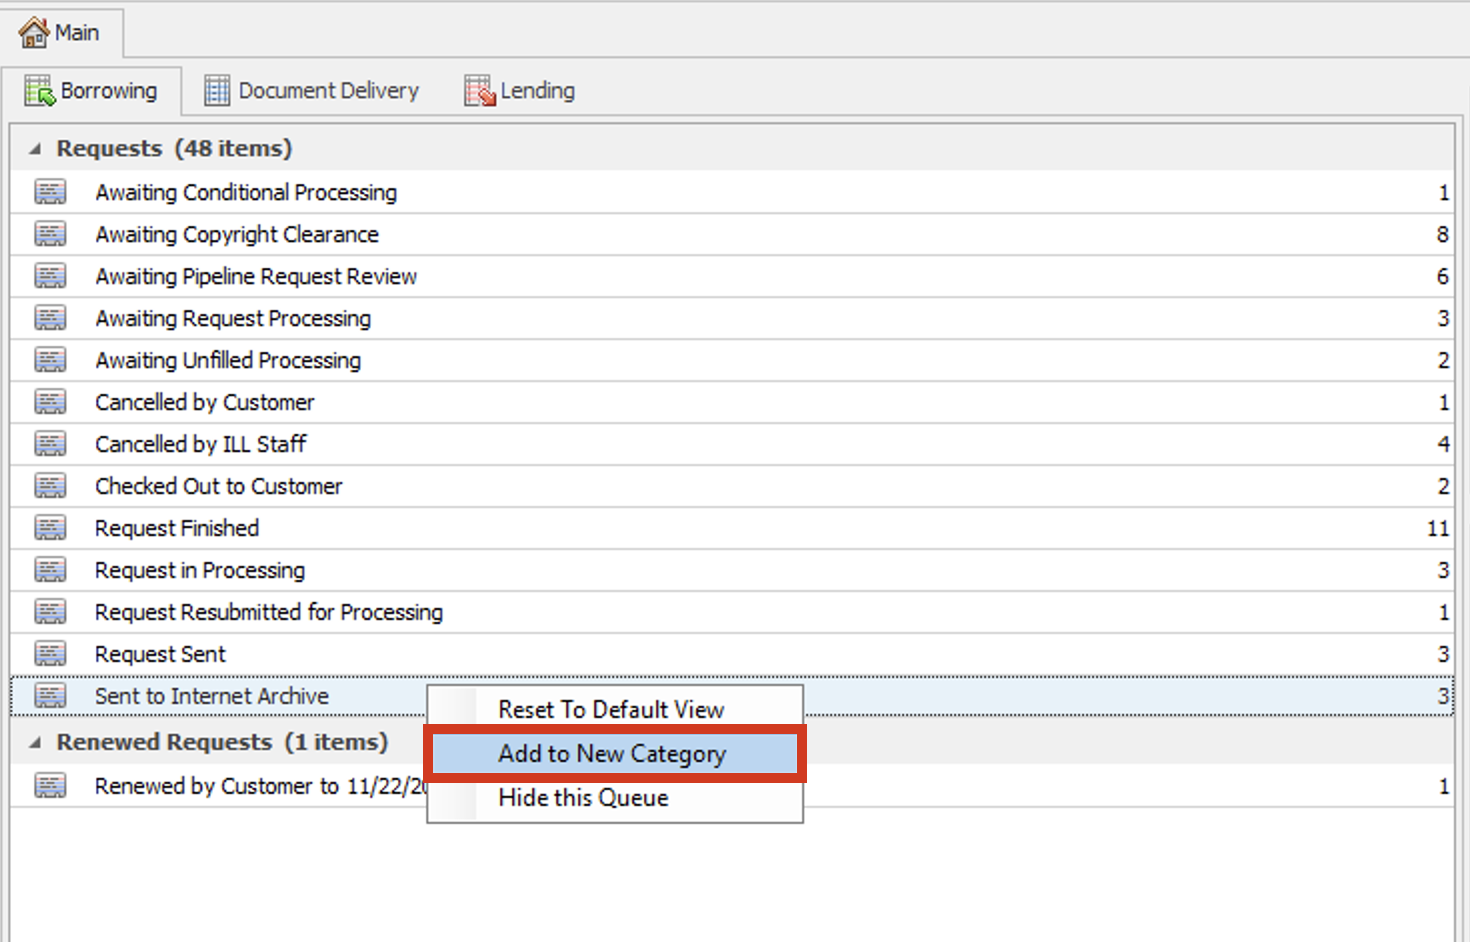
Right-click on the queue you want to add to the new category
-
Click Add to New Category:
-
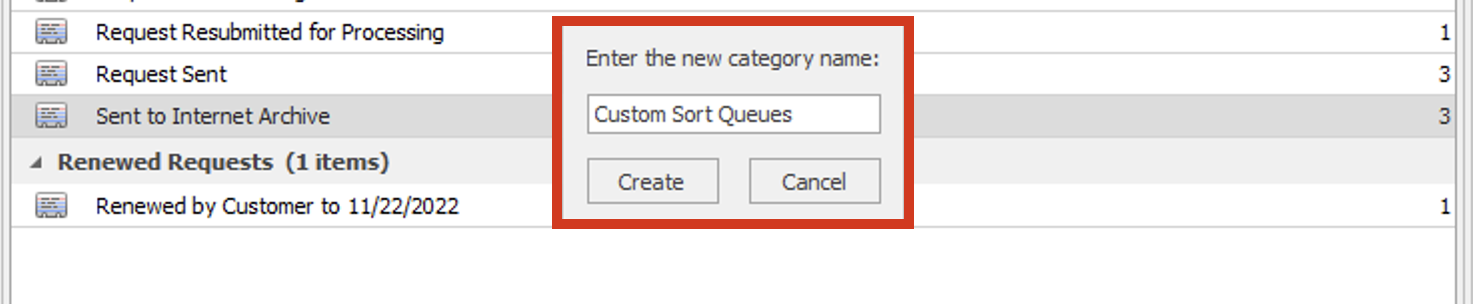
Enter the name for the new category, then click Create:
-
The queue will be added to the new category:

Editing and Reordering Categories
Once the new category is created, individual queues can be added or removed by simply clicking and dragging them into or out of that category within the list of queues. You can reorder the categories themselves by clicking and dragging the name of a category above or below other categories in the list. You cannot rename the category after it is created.
Deleting a Category
Once created, an individual category cannot be renamed or deleted without resetting the entire list of queues and categories within that tab in the ILLiad Client to the default view. To reset the tab to the default view:
-
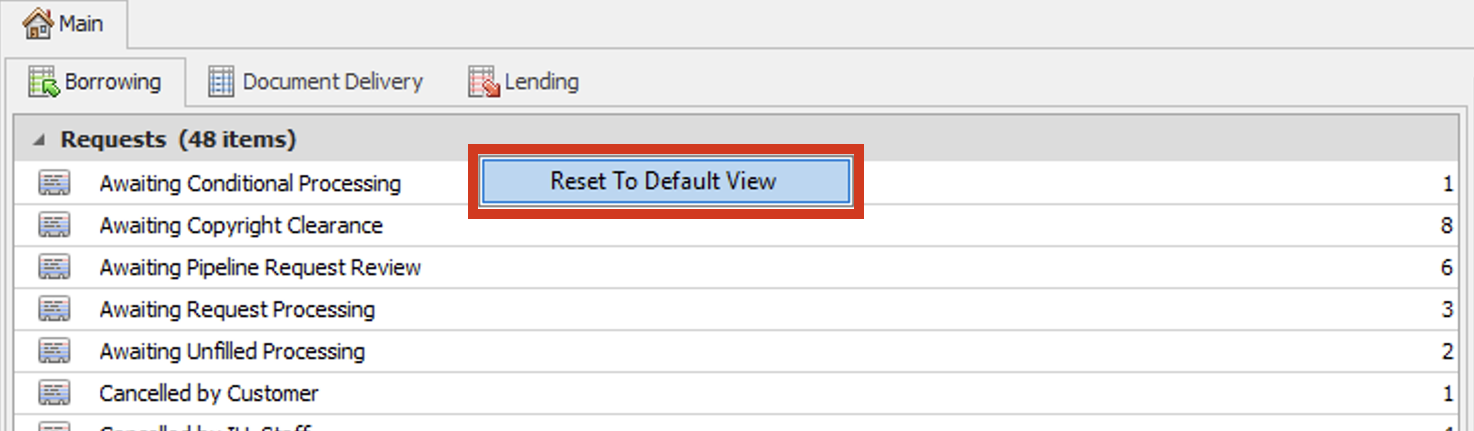
Right-click anywhere within the list of queues in the tab
-
Click Reset to Default View:
-
All custom categories will be removed and any reordering of individual queues or categories you have performed will be reset to the default order