Managing Restricted Fields
This Restricted Fields section of the Staff Administration page allows you to create groups of restricted fields and assign them as needed to each staff profile you have created in Managing Staff Profiles.
Overview | Restricting Individual Fields | Restricting Tables | Creating and Assigning Restricted Field Groups | Managing Fields in a Restricted Field Group
Overview
When a field is restricted for a profile, staff users assigned to that profile will not have access to view or modify information in that field within the Aeon Web Client. For example, if you have a profile created for student employees and would like to restrict certain user information from being displayed to those employees for privacy or security reasons, you can create a restricted field group containing the fields that should be restricted and assign it to the student employee profile. After the restricted field group has been configured for that profile, any staff users assigned to the student employee profile will not have access to view or modify the information in those fields while using the Aeon Web Client.
Restricting Individual Fields
Individual fields of the Users database table can be restricted (e.g., Address, Phone, etc). When an individual field is restricted for a profile, staff users assigned to that profile will not be able to see the data in that field or make changes to it. Data in that field will not display in any grids configured to display the field and the field's data will be removed from the User Information page. Hovering over an individual restricted field within the web client will display a "restricted" symbol to the user indicating that they do not have access to that particular field:
Note: The Username and Cleared fields in the Users table cannot be restricted.

Restricting Tables
The following database tables can be restricted in their entirety, however, individual fields within these tables cannot be restricted:
See Aeon Database Tables for a complete list of fields in each table.
- Activities
- Appointments: When this table is restricted, appointments will not show on the Calendar page or the Appointments section of the Dashboard.
- Transactions
- EmailCopies
- ReadingRoomHistory
- UserHistory
- UserChangeHistory
- UserNotes
When a table is restricted for a profile, staff users assigned to that profile will not be able to see the data in any of the fields in that table. Grids associated with that table within the web client will display a message to the staff user that the information is restricted. For example, restricting the Reading Room History table will block any data from displaying in the Reading Room History section of the User Information page:

Creating and Assigning Restricted Field Groups
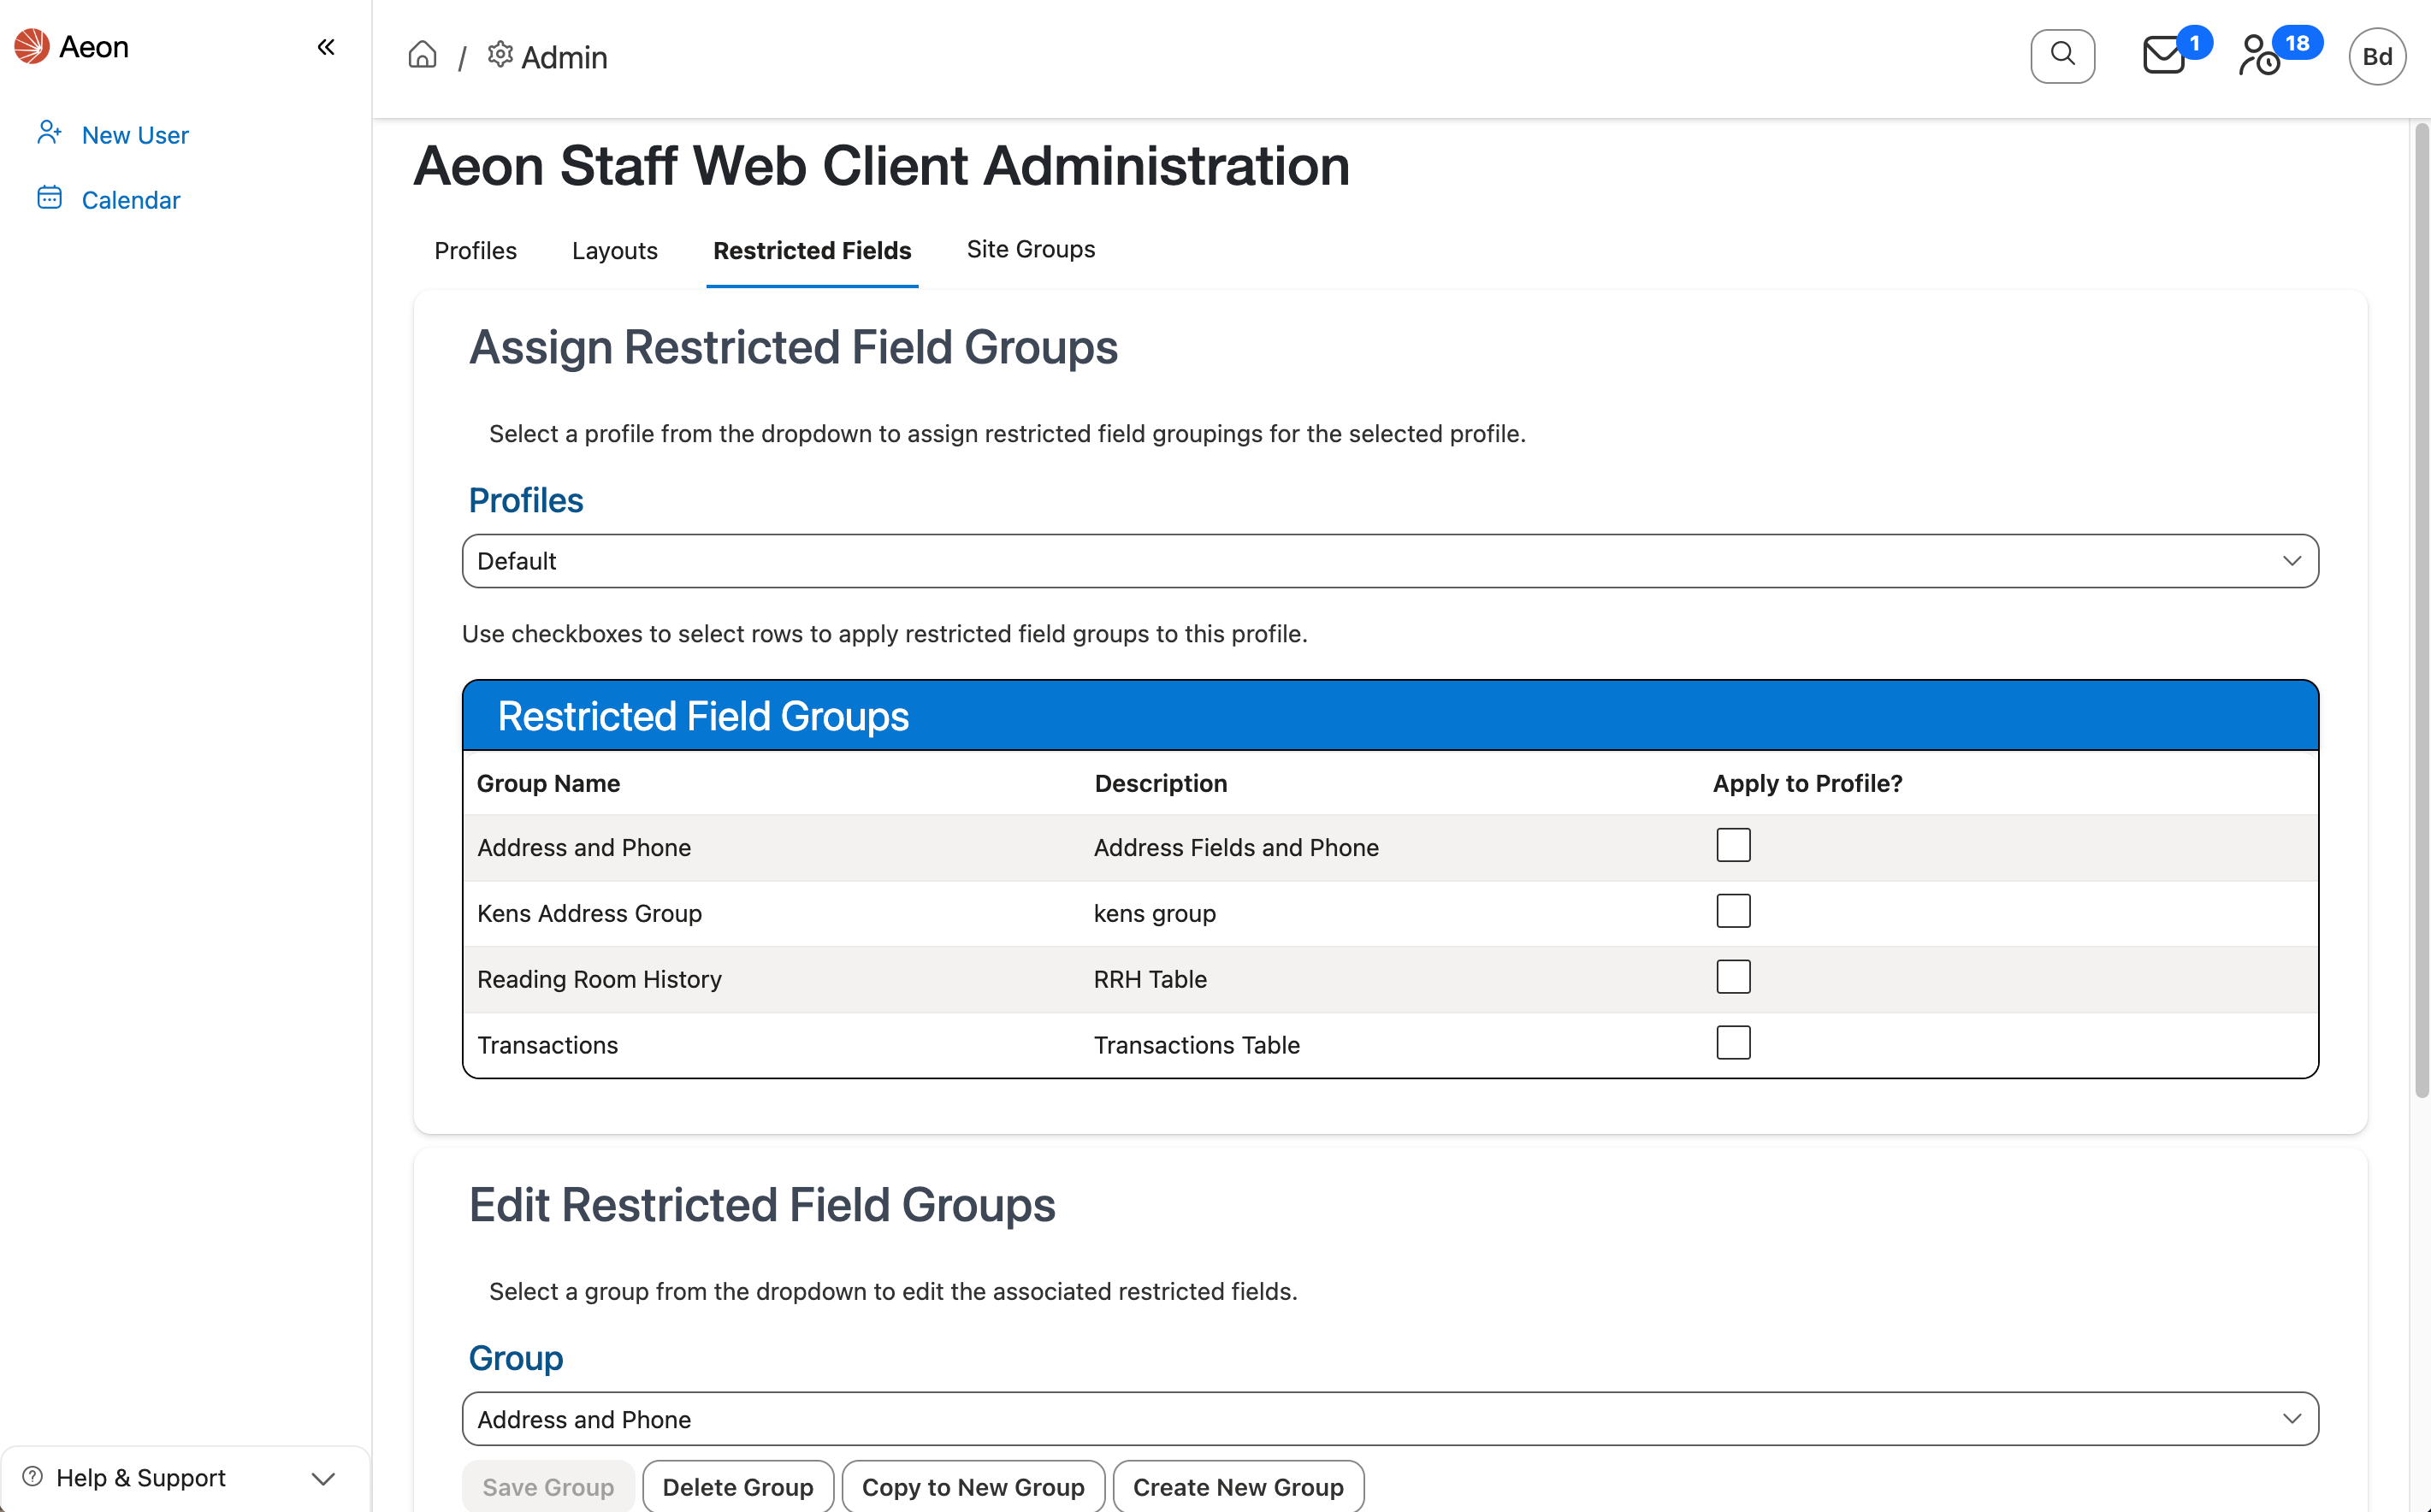
The Assign Restricted Fields Groups section at the top of the page contains controls for assigning restricted field groups to a profile. Restricted field groups are created, viewed, and modified in the Edit Restricted Field Groups section below the profile assignment controls. Use the tabs below to learn how to create, delete, and assign restricted field groups to a profile.
Creating Restricted Field Groups
To create a new group of restricted fields:
-
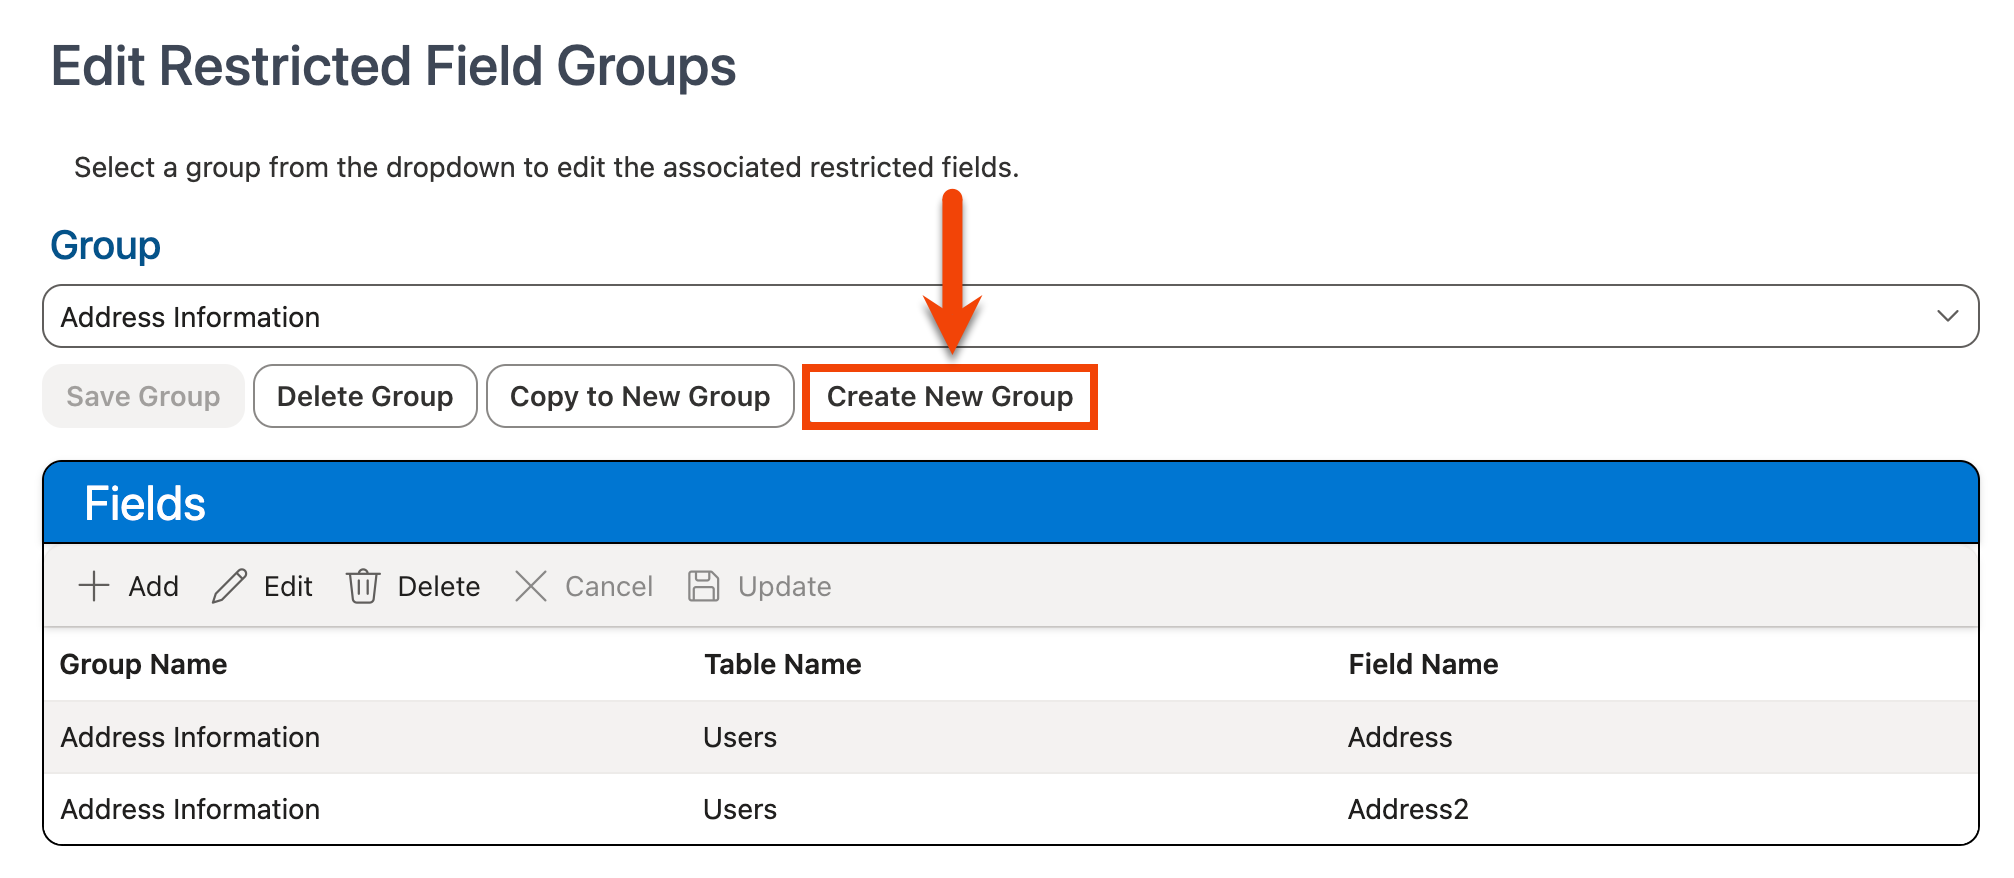
To create a blank new group, click Create New Group under the Group dropdown in the Edit Restricted Field Groups section of the page:
-
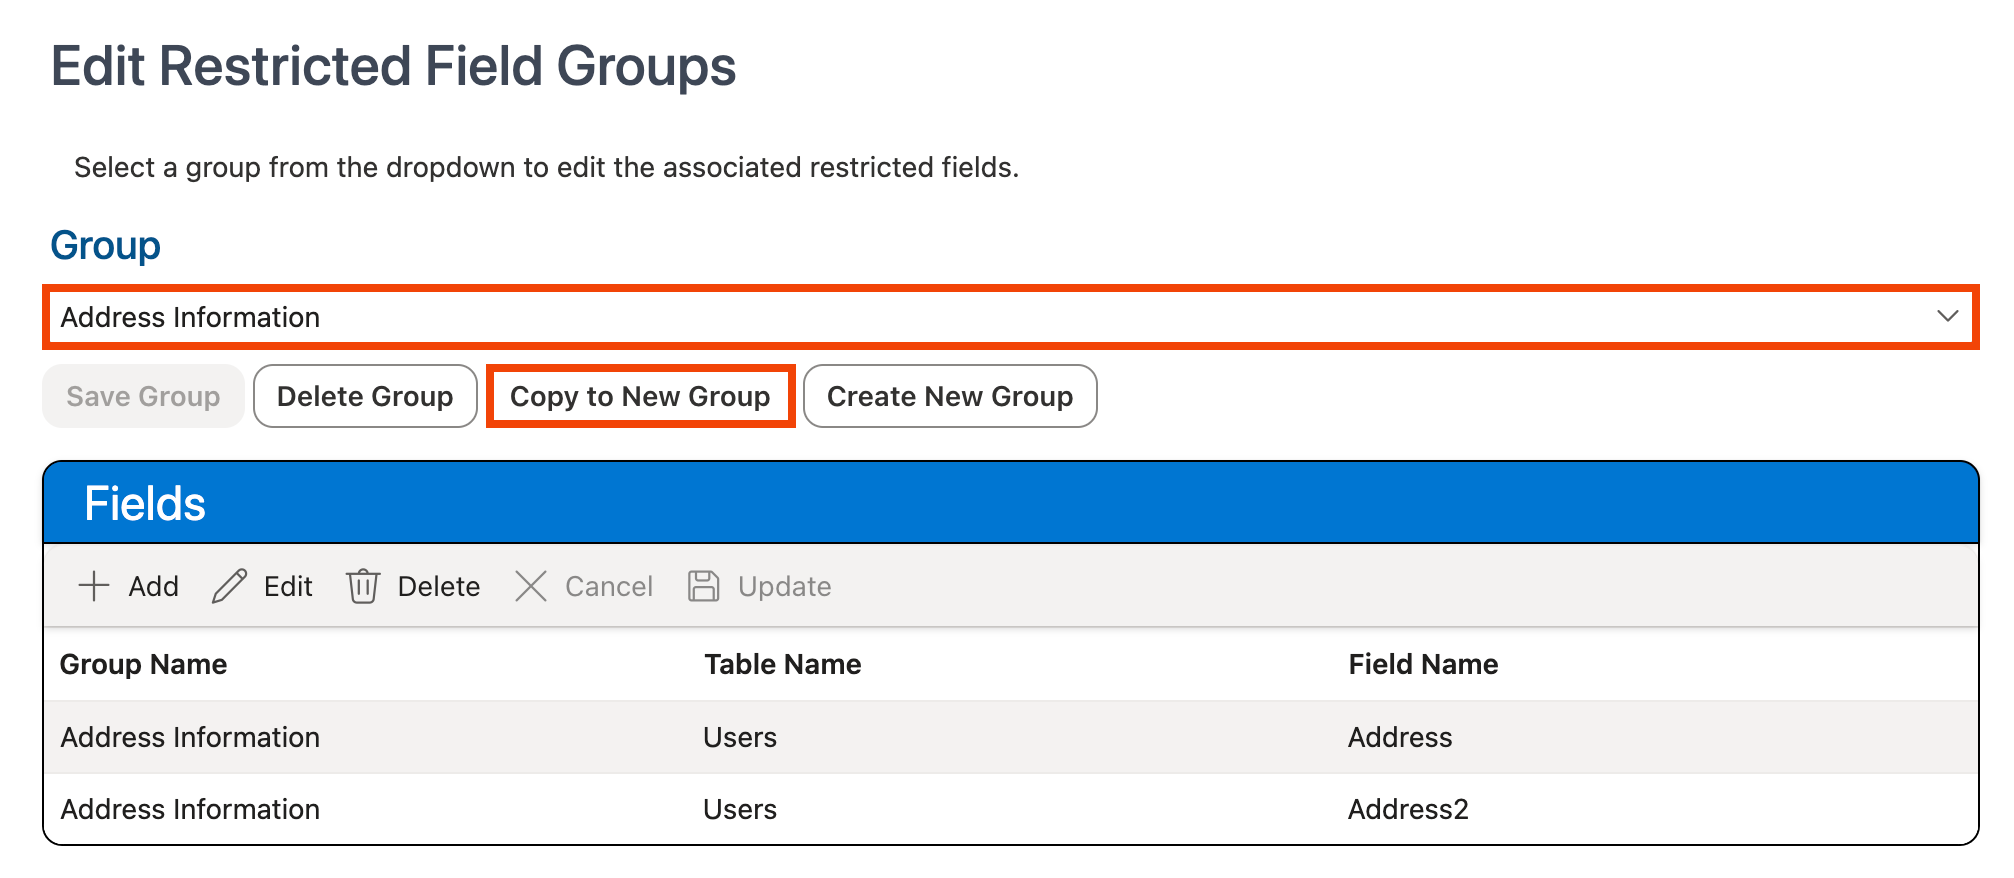
To create a new group by copying an existing group, select the group that should be copied and used as the base for the new group from the Group dropdown, then click Copy to New Group:
-
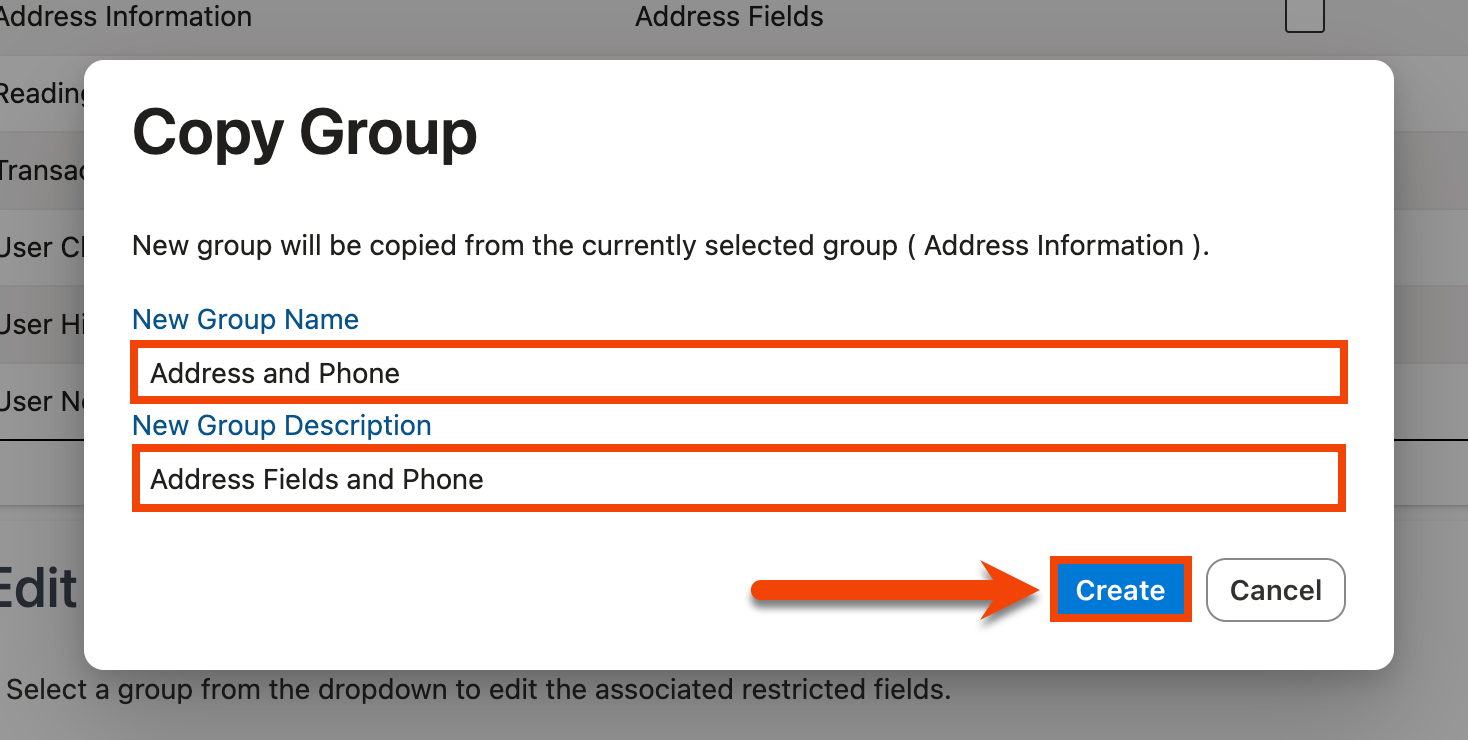
The Create/Copy Group window will appear. Enter the name that should be used for the group under New Group Name and, optionally, a description for the group under New Group Description.
Note: The group name and description cannot be modified once the group is created.
-
Click Create:
-
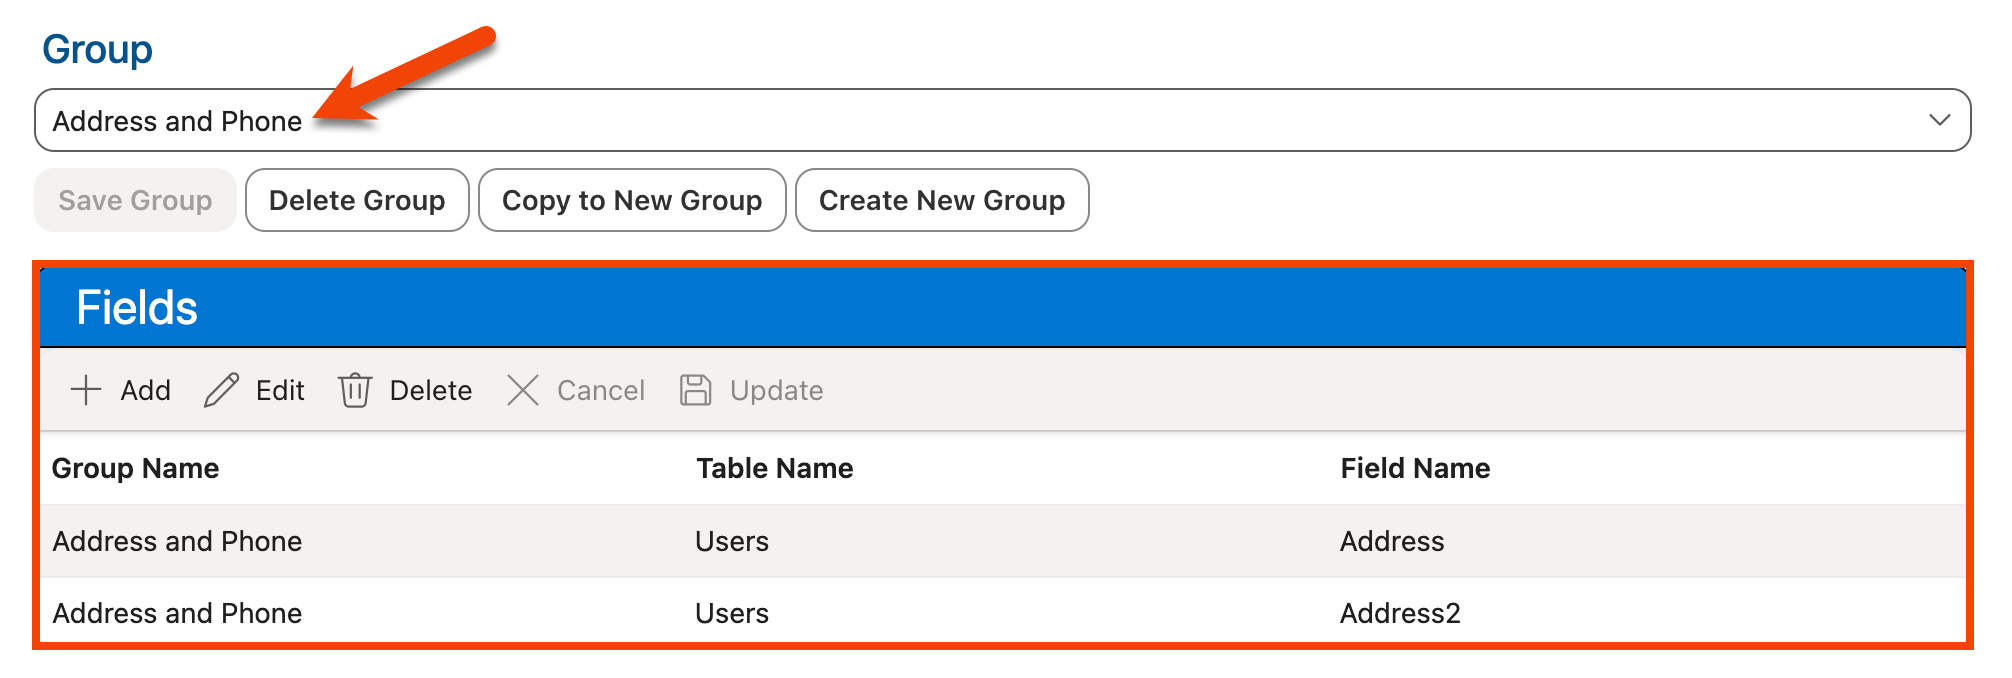
The group is created and is now selected in the Groups dropdown. If the Copy to New Group option was used, the fields from the copied group will be pre-configured for the new group in the Fields grid below:
-
Use the Fields grid to configure the restricted fields for the group.
See Managing Fields in a Restricted Field Group below for detailed instructions.
Deleting Restricted Field Groups
To delete a group of restricted fields:
-
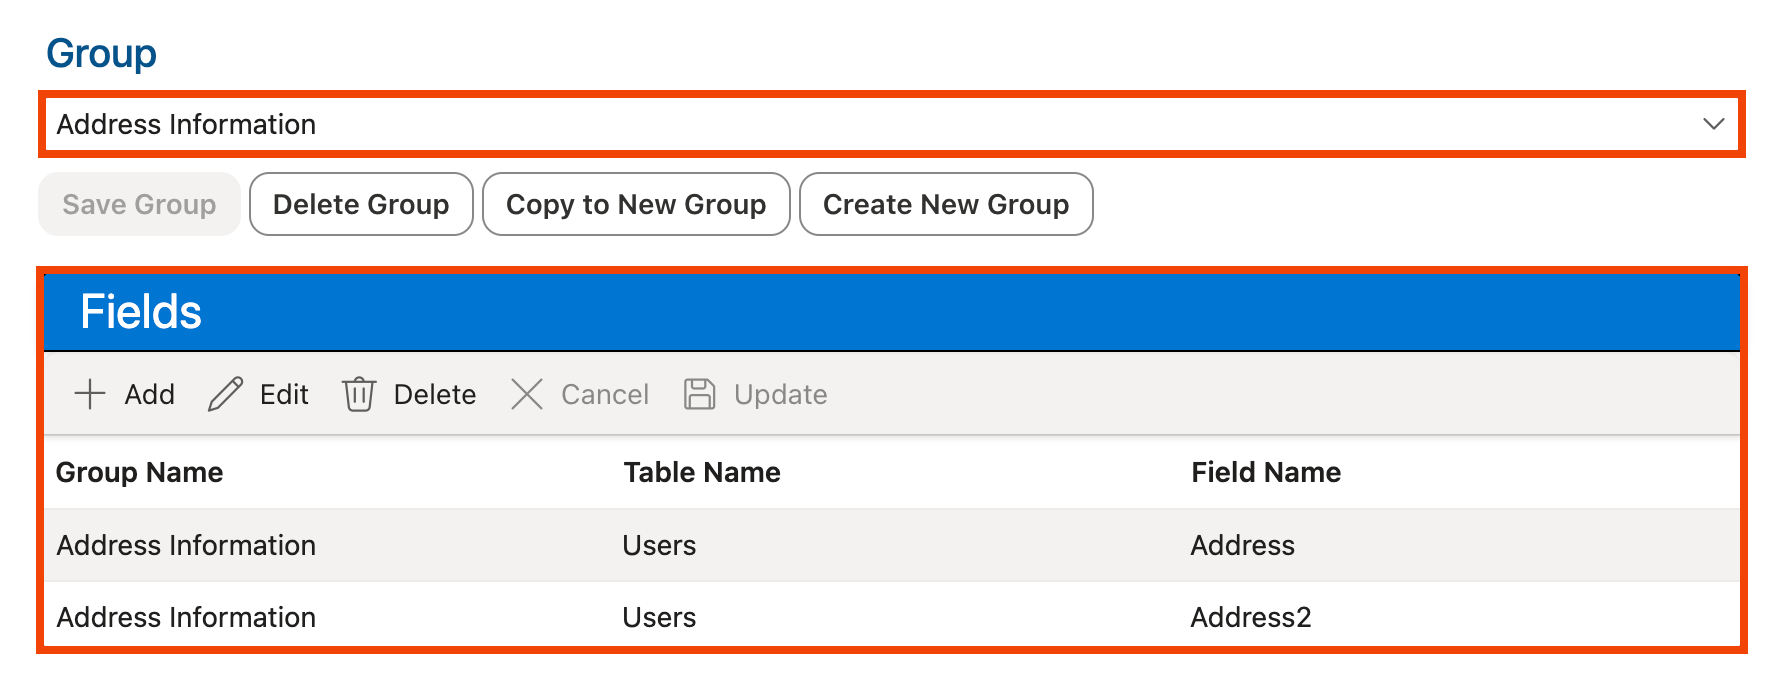
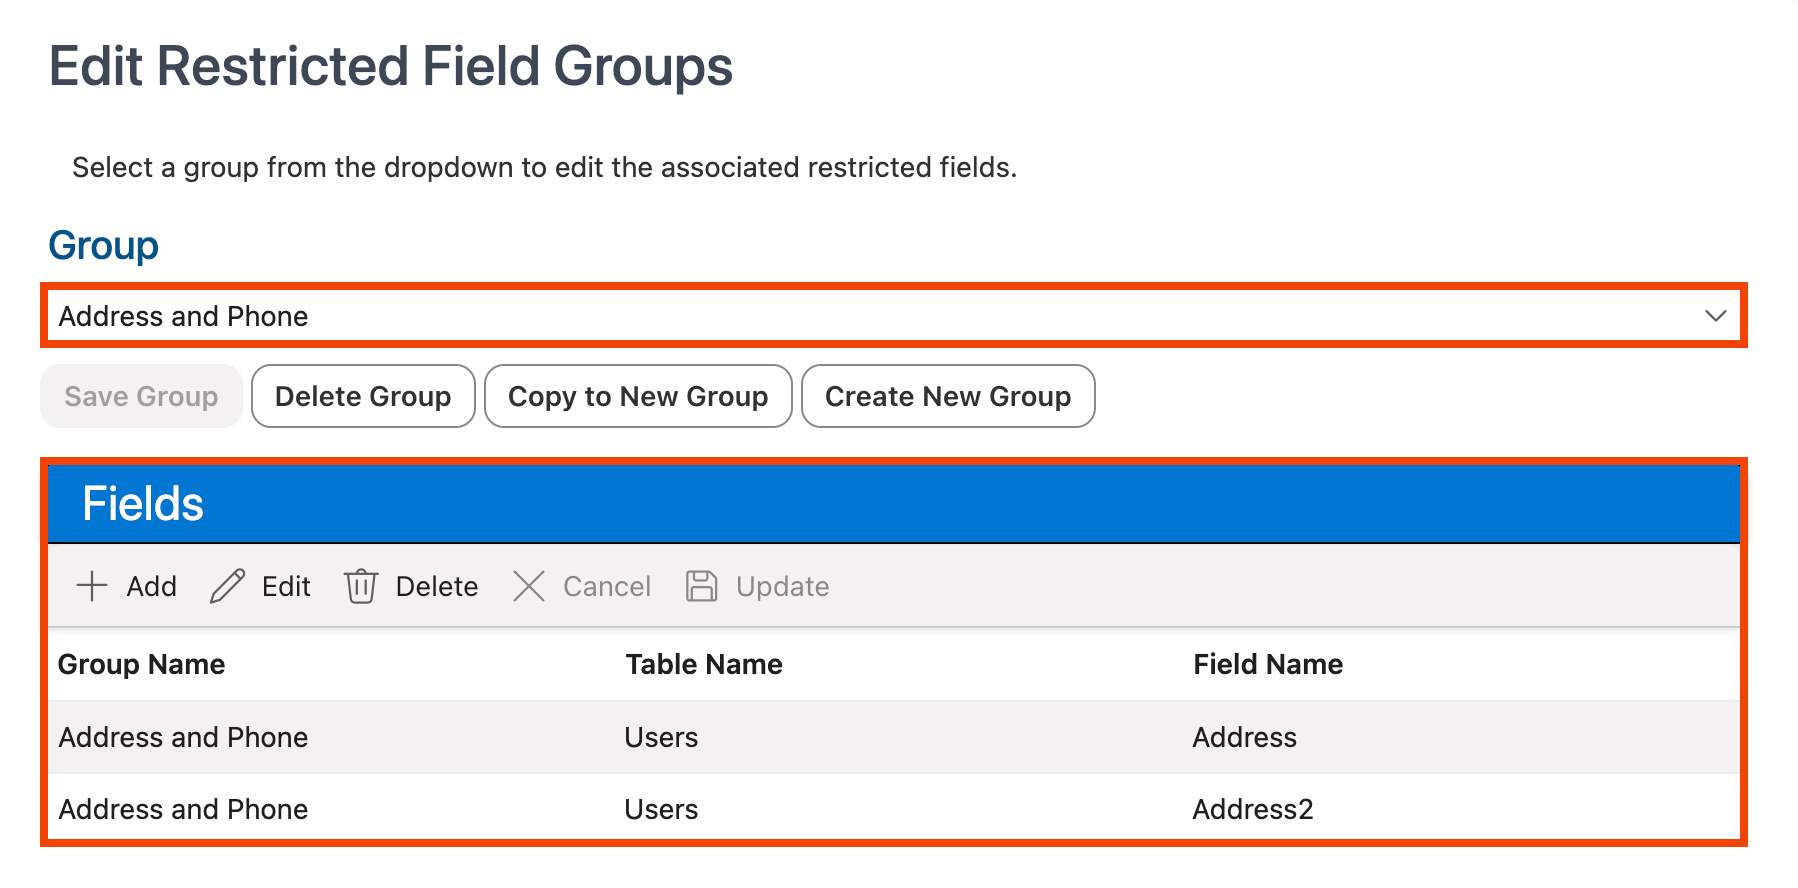
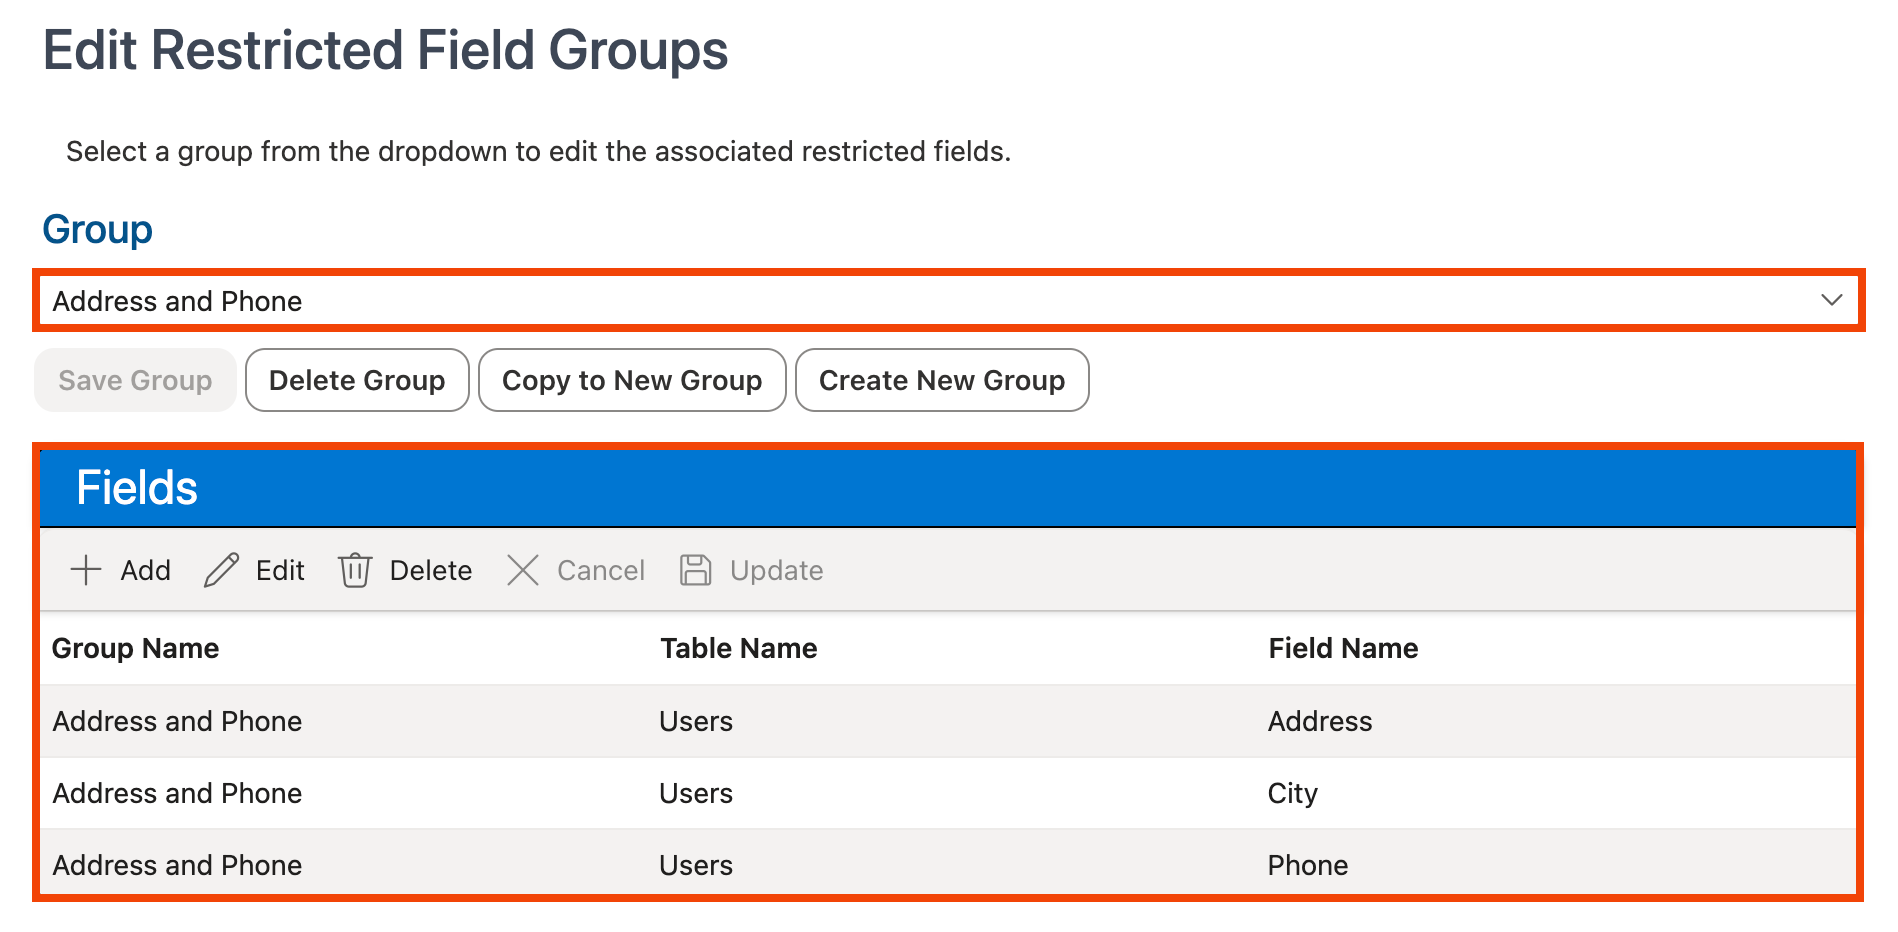
Select the group that should be deleted from the Group dropdown in the Edit Restricted Field Groups section of the page. The fields configured for that group will be displayed in the Fields grid below:
-
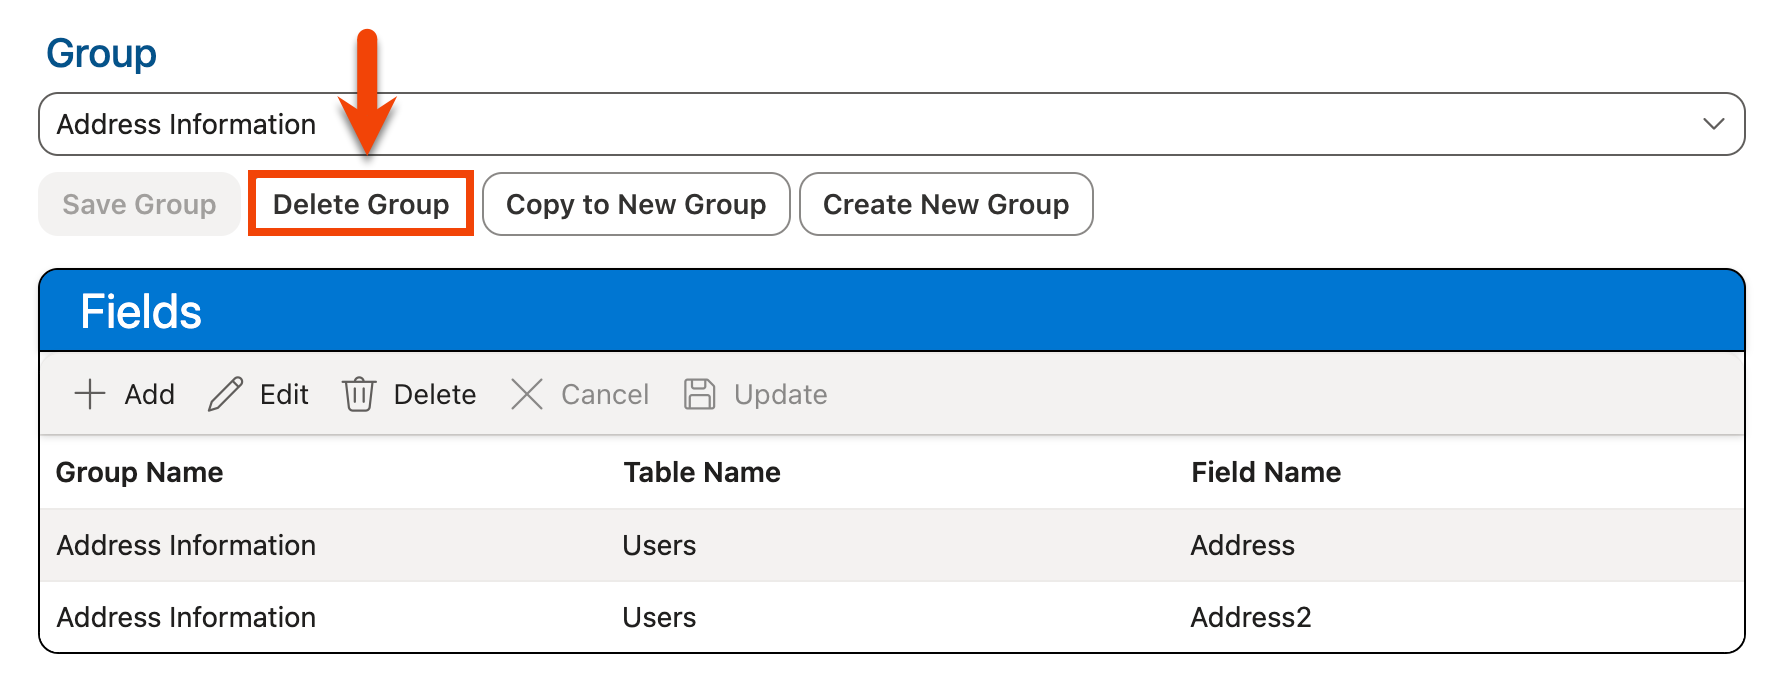
Click Delete Group:
-
The group is deleted and removed from the Group dropdown in the Edit Restricted Field Groups section and from the Restricted Field Groups grid in the Assign Restricted Field Groups section above.
Any profiles that were assigned to that restricted field group will now have access to the fields that were previously restricted (unless those fields have been restricted in another existing restricted field group assigned to that profile).
Assigning Restricted Field Groups to a Profile
To configure the restricted field groups assigned to a profile:
-
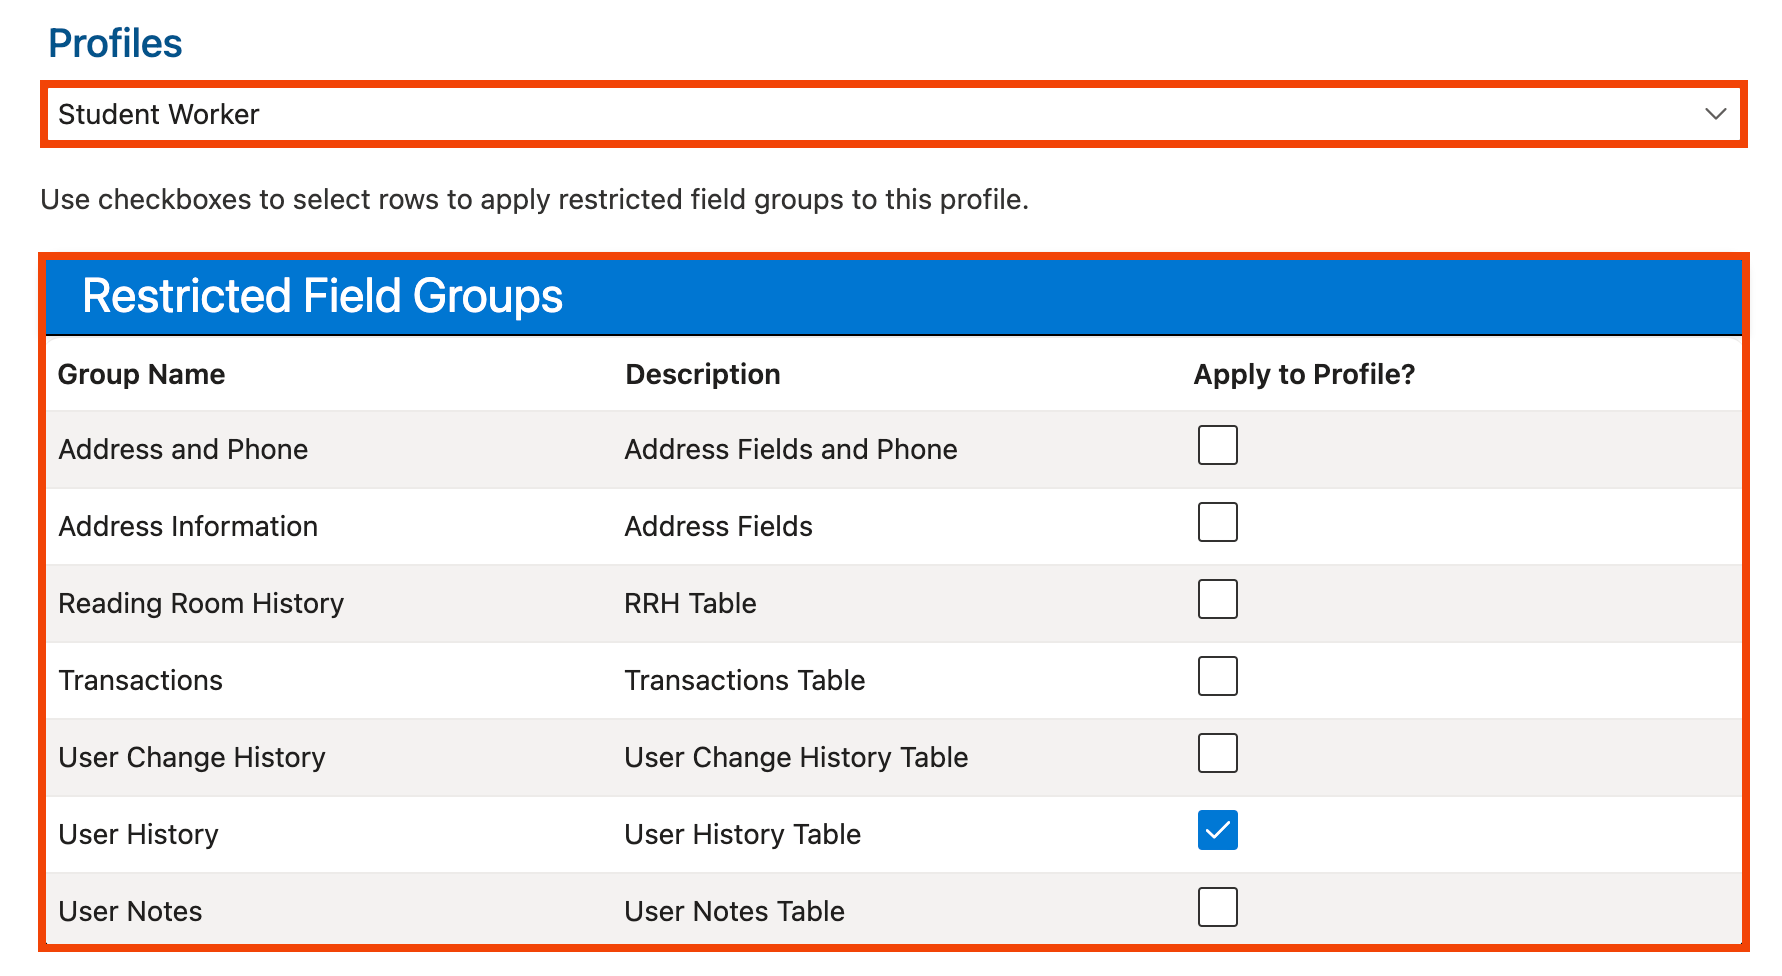
Select the profile for which you want to configure the restricted field group assignments from the Profiles dropdown in the Assign Restricted Field Groups section of the page.
-
The Restricted Field Groups grid below will display the current restricted field group assignments for that profile:
-
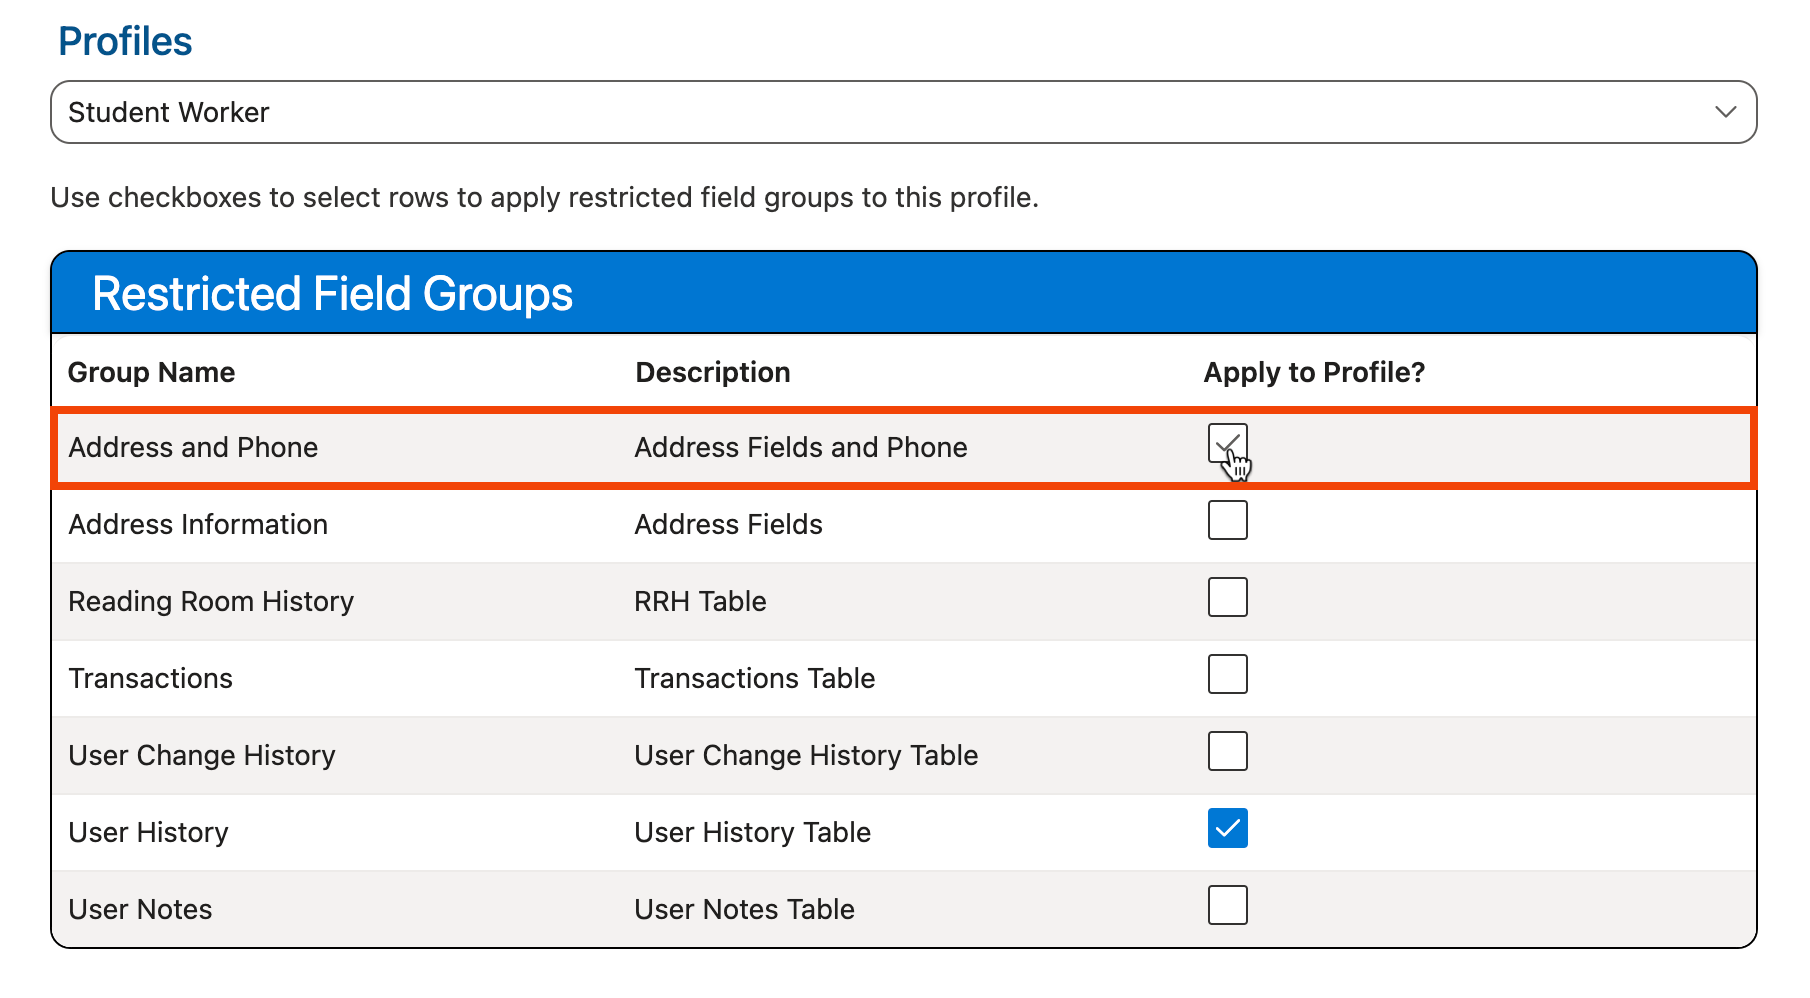
To assign a restricted field group to the profile, check the checkbox next to the group in the Restricted Field Groups grid. To unassign a restricted field group from that profile, uncheck the checkbox next to the group in the grid:
Tip: Use the Group dropdown located in the Edit Restricted Field Groups section below to view the fields within a restricted field group.
-
The selected profile will be automatically updated with the new restricted field group assignments. Any staff users assigned to that profile in Managing Staff Profiles will no longer have access to the fields in the assigned restricted field groups for the profile.
Managing Fields in a Restricted Field Group
The fields within a restricted field group are configured using the controls in the Edit Restricted Field Groups section at the bottom of the page. Click the tabs below to learn how to add, edit, or delete fields from a restricted field group.
Adding Fields to a Restricted Field Group
To add a field to a restricted field group:
-
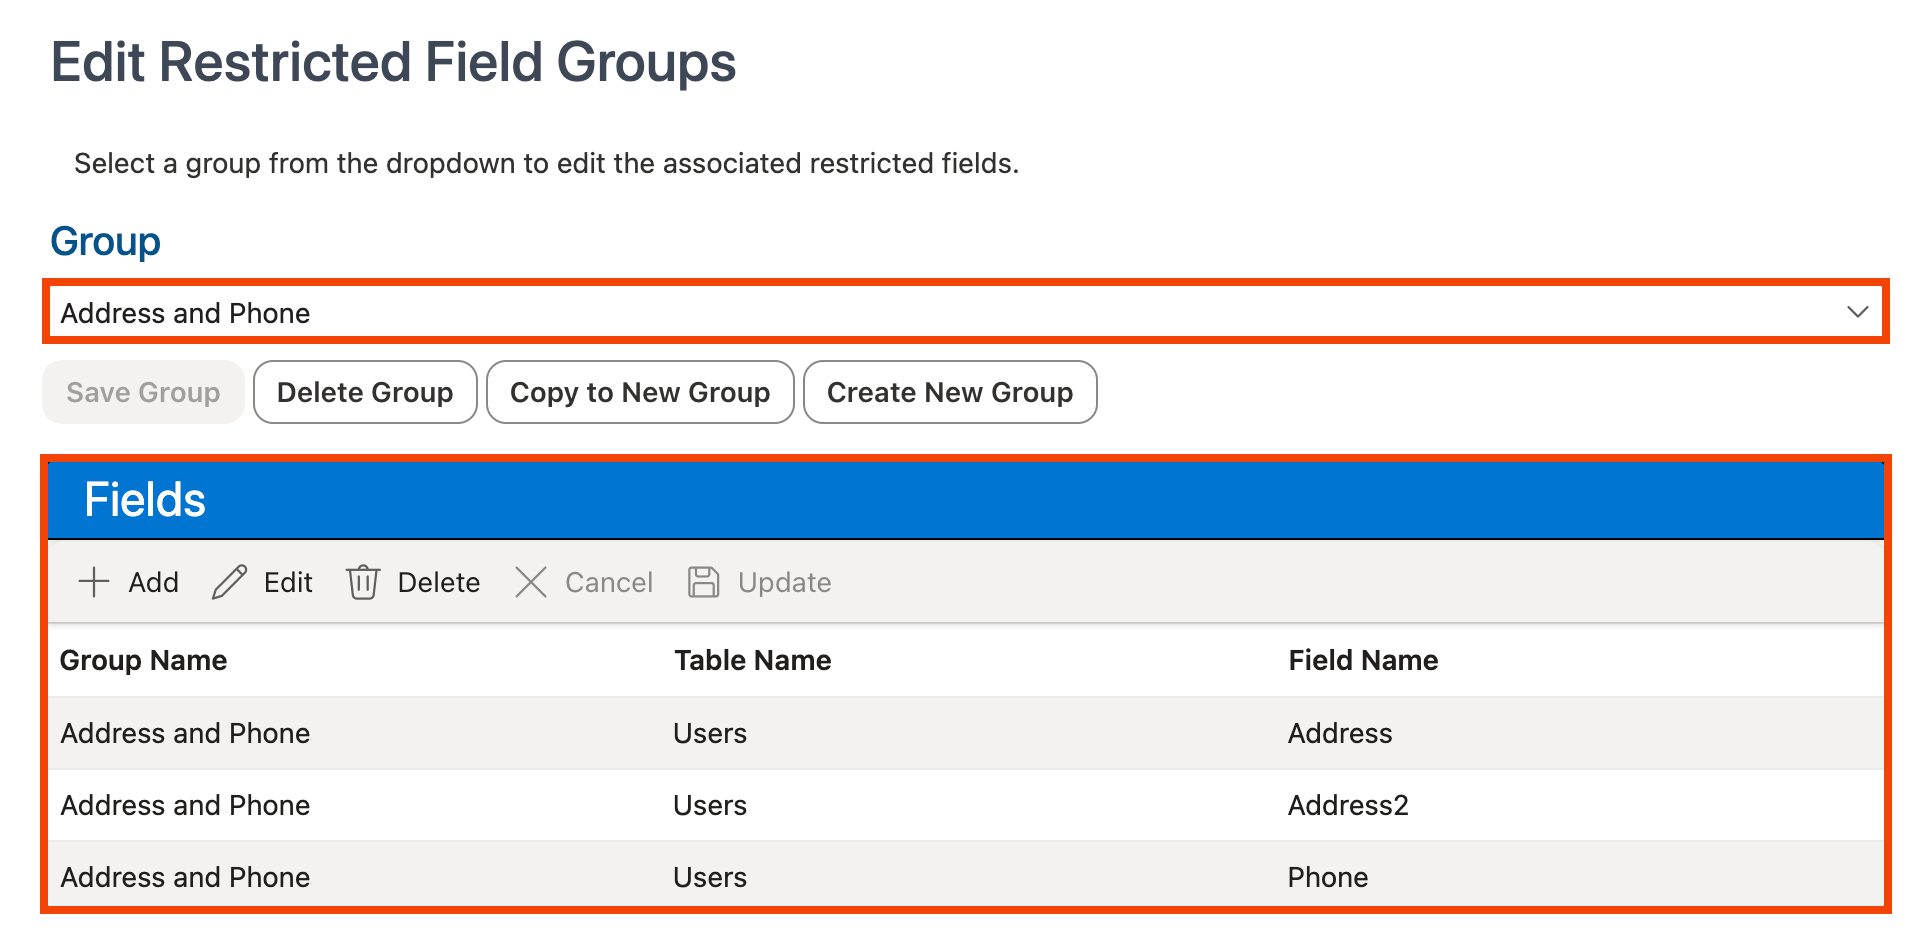
In the Edit Restricted Field Groups section at the bottom of the page, select the group to which the field should be added from the Group dropdown. The fields configured for that group will be displayed in the Fields grid below:
-
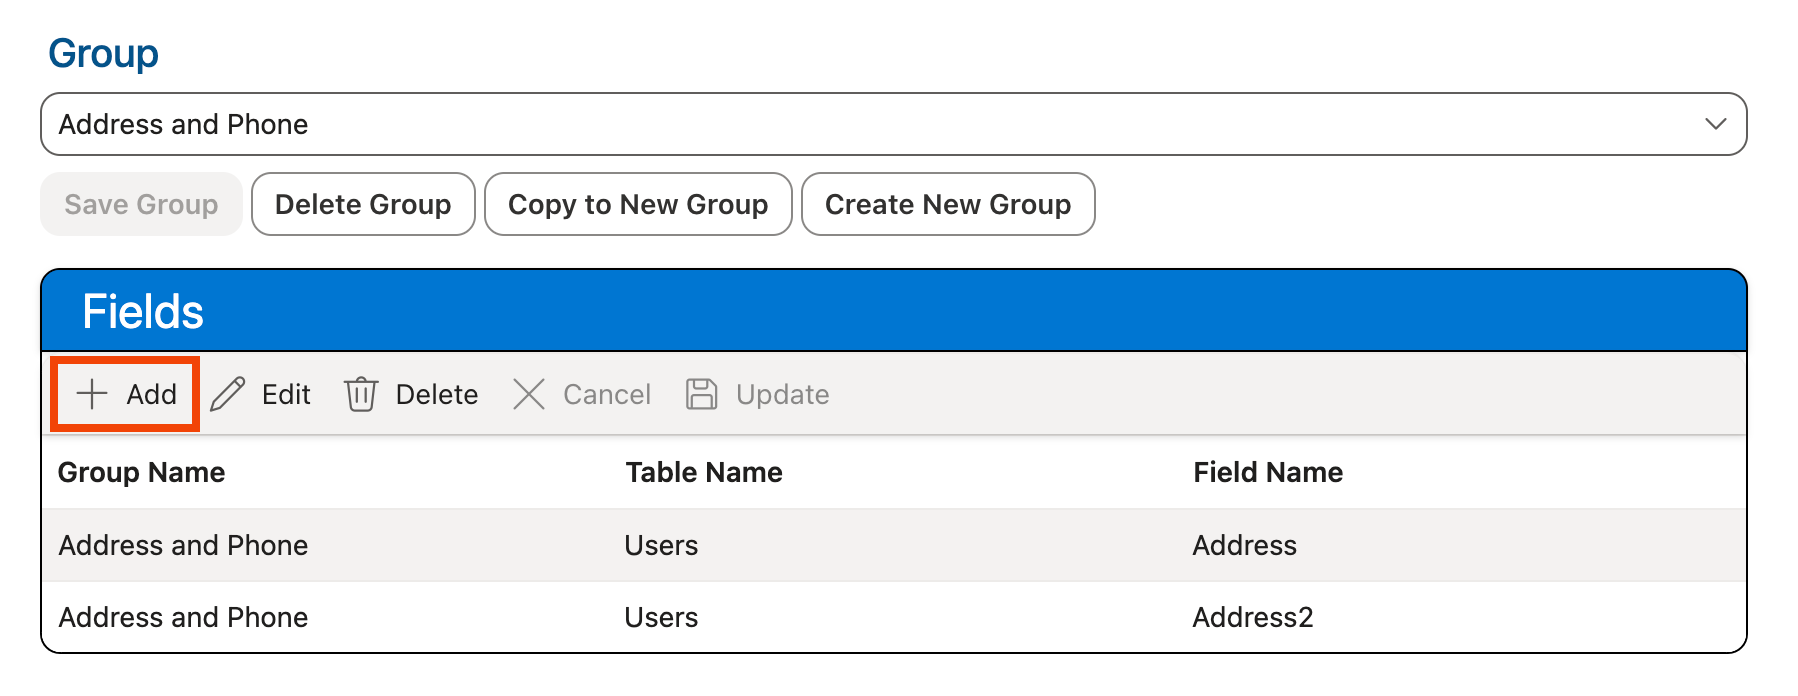
Click the + Add button in the Fields grid:
-
Select the database table where the field you want to add is located in the Table Name dropdown.
Note: Currently, individual fields can only be restricted from the Users database table. Several other database tables are available in the Table Name dropdown, but can only be restricted in their entirety and cannot have individual fields restricted. See Restricting Tables above for more information.
-
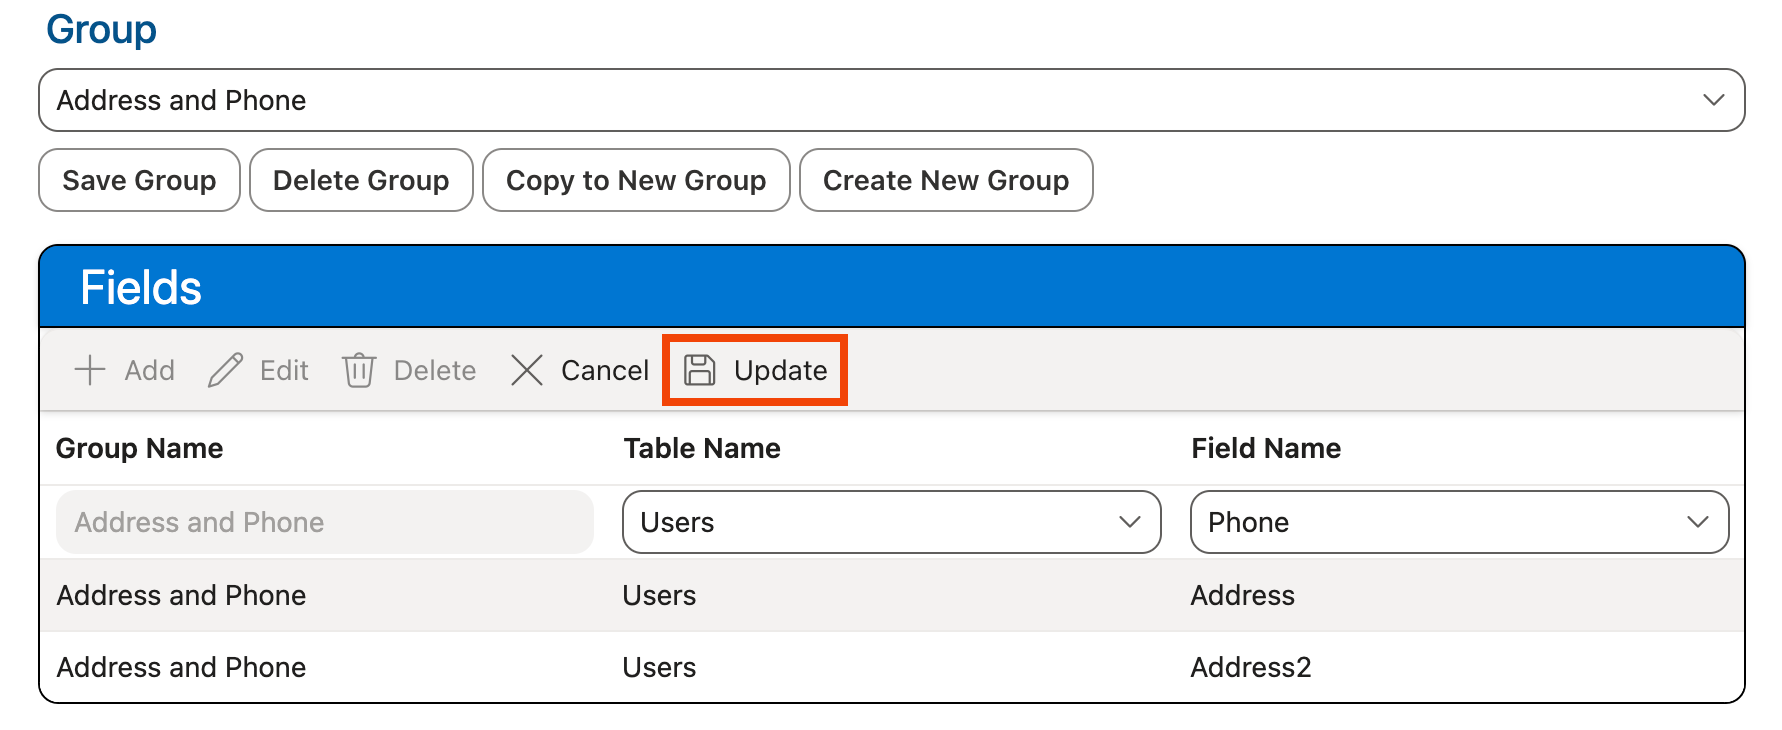
If restricting an individual field in the Users table, select the name of the field that should be added to the group from the Field Name dropdown. If restricting an entire database table, select * in the Field Name dropdown.
-
Click Update in the Fields grid:
-
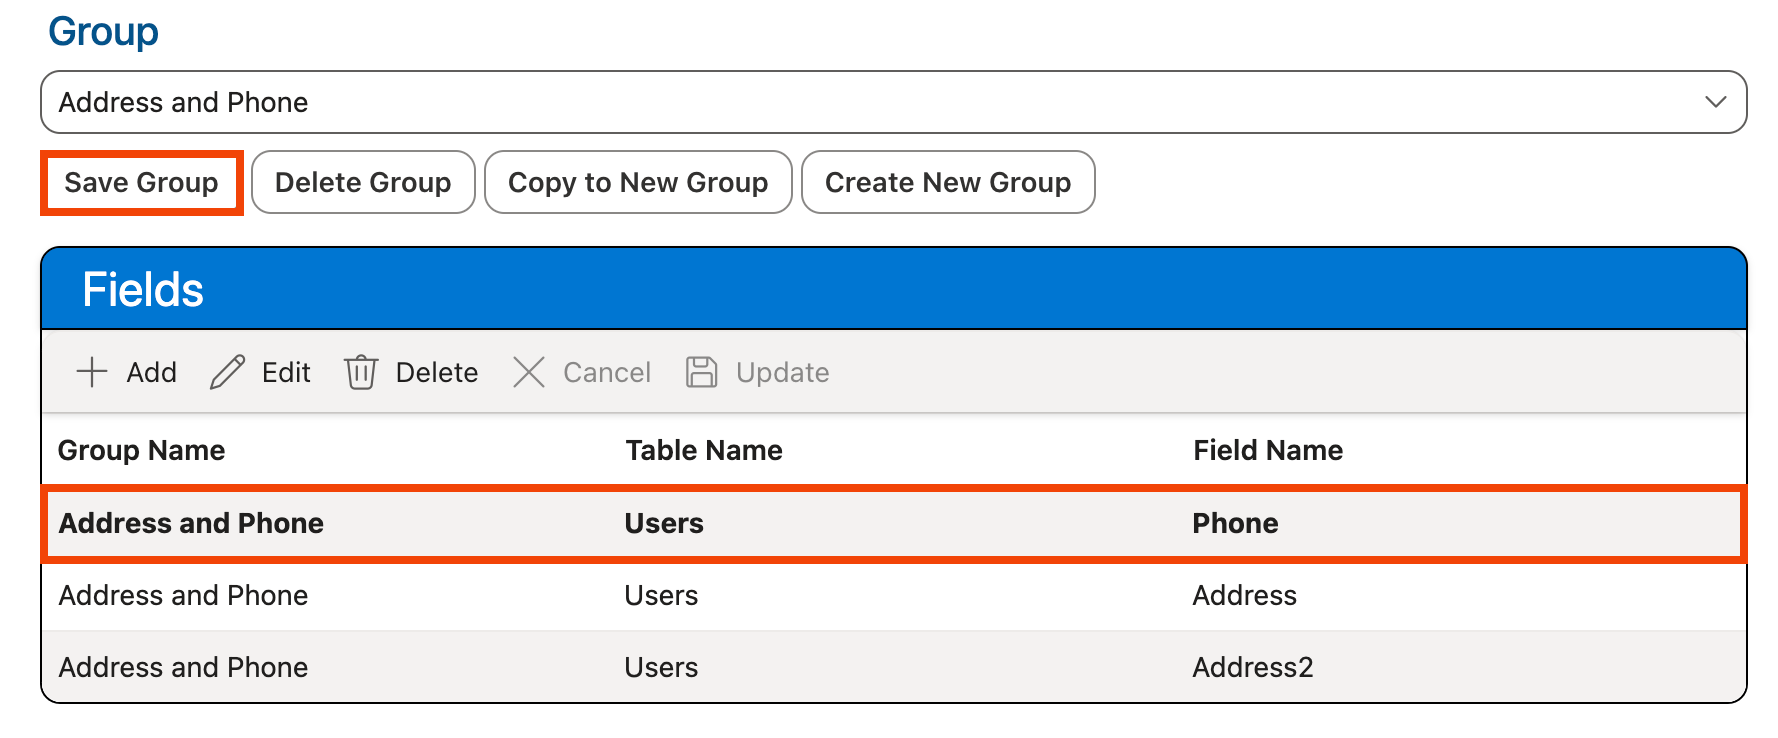
The new field/table is added to the Fields grid.
-
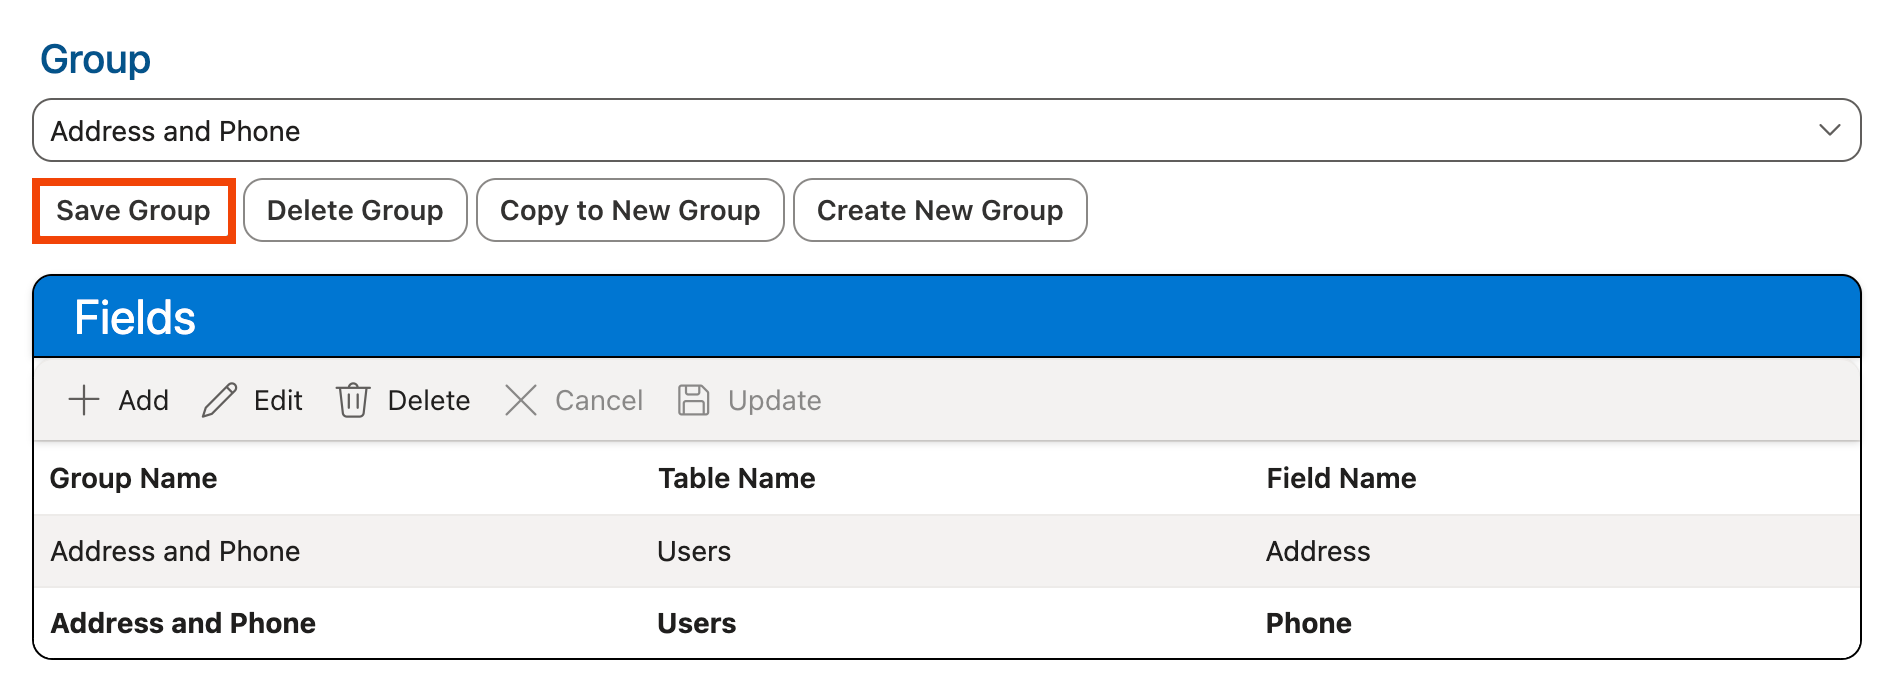
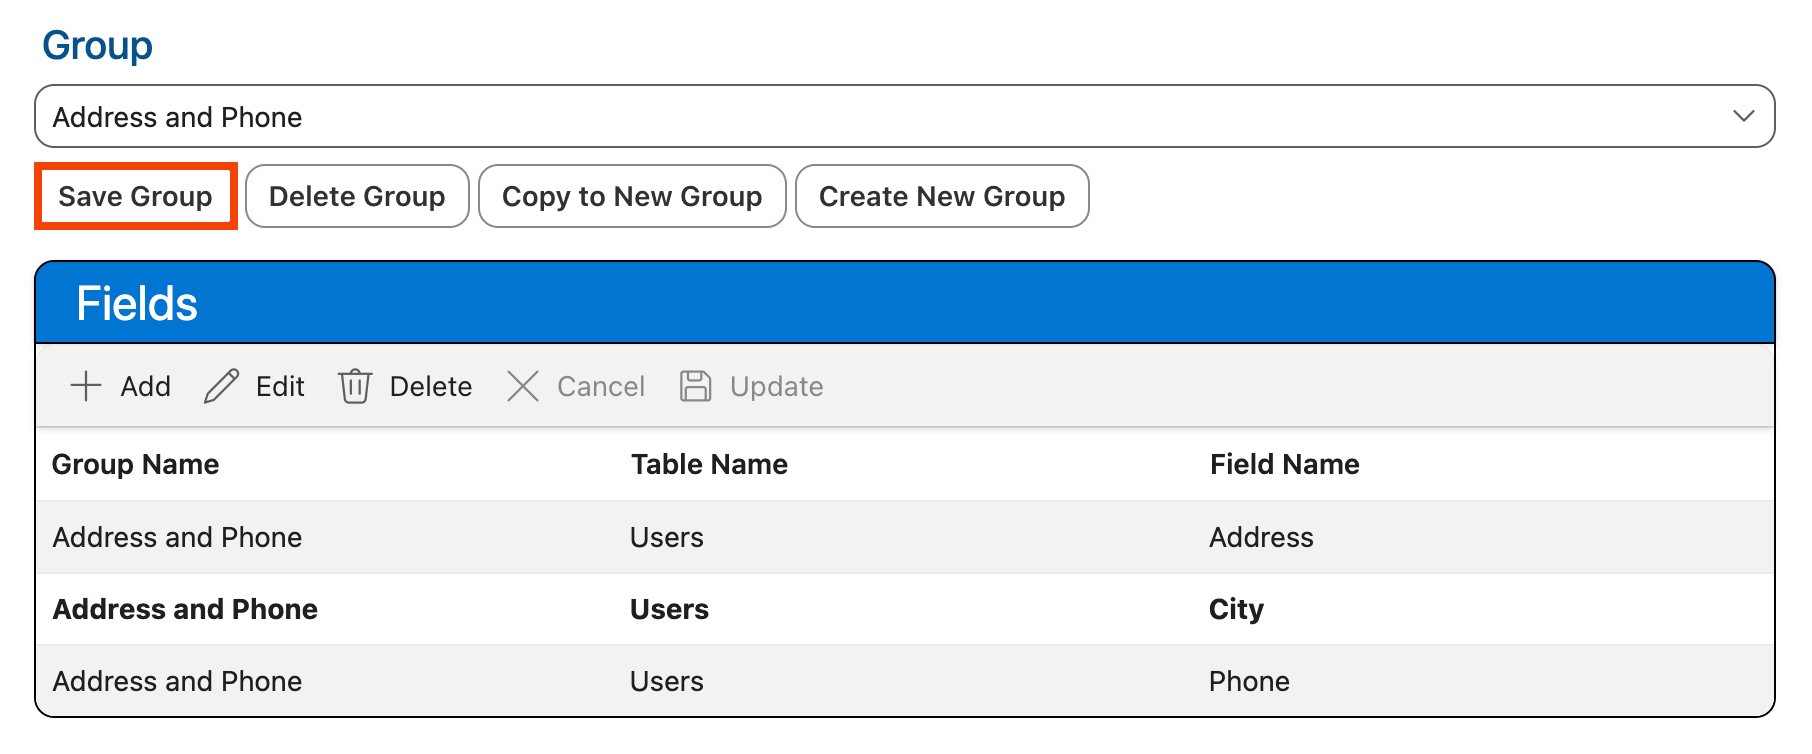
Use the keyboard shortcut CTRL-S (Windows)/Command-S (Mac) or click the Save Group button under the Groups dropdown to save your changes:
Editing Fields in a Restricted Fields Group
To modify an existing field in a restricted field group:
-
In the Edit Restricted Field Groups section at the bottom of the page, select the group where the field you want to modify is located from the Group dropdown. The fields configured for that group will be displayed in the Fields grid below:
-
Click on the field you want to edit in the Fields grid to select it, then click the Edit button:

-
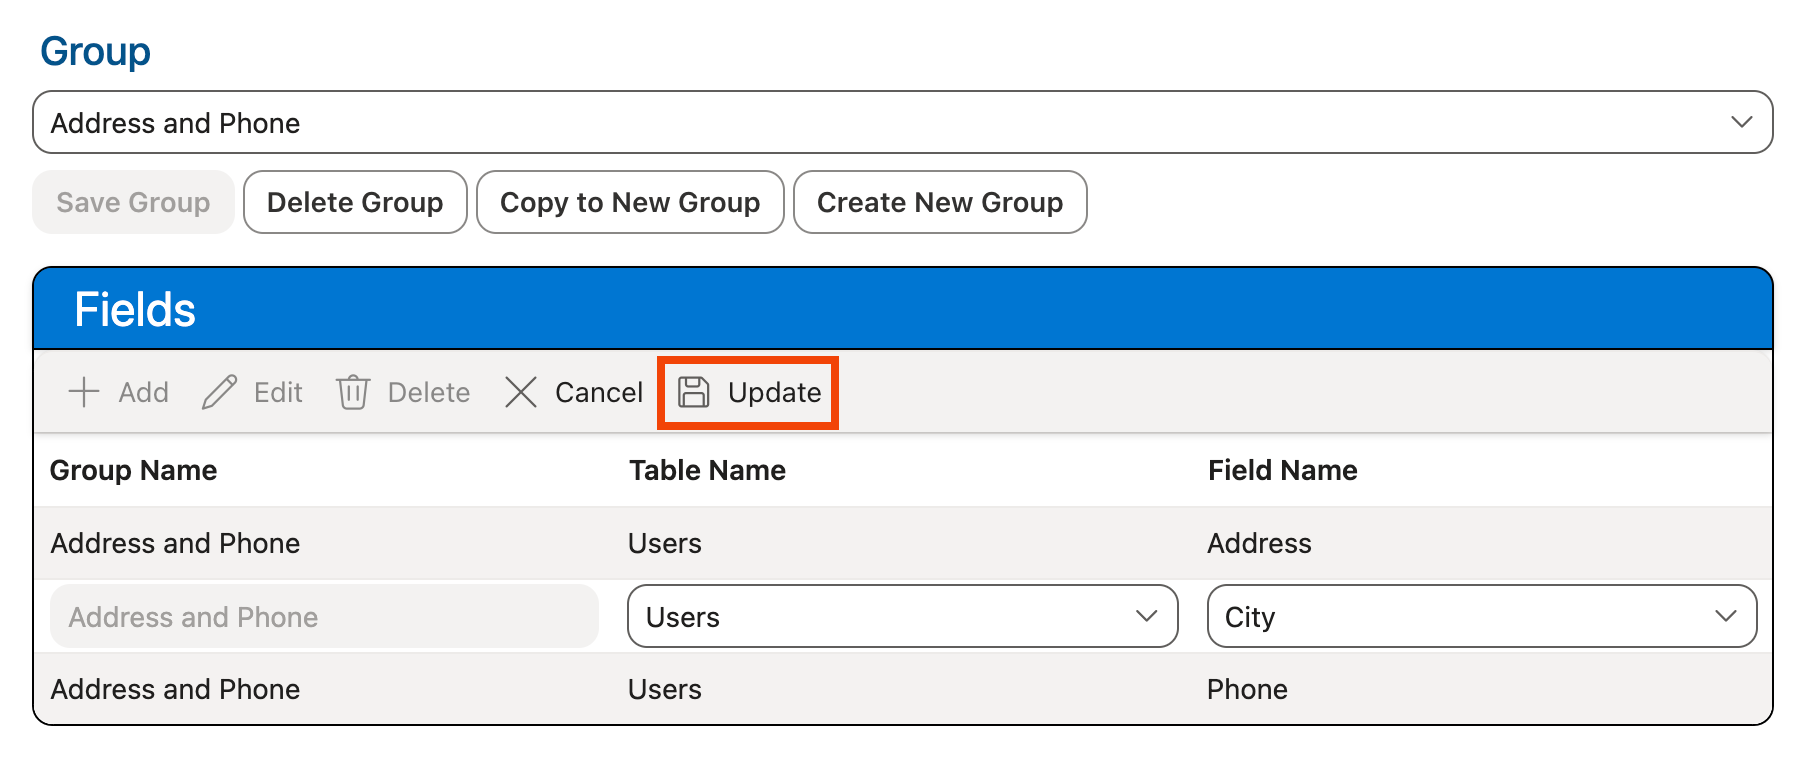
Use the Table Name and Field Name dropdowns to change the restricted field/table as needed. If restricting an individual field in the Users table, select the field that should be restricted from the Field Name dropdown. If restricting an entire database table, select * in the Field Name dropdown.
Note: Currently, individual fields can only be restricted from the Users database table. Several other database tables are available in the Table Name dropdown, but can only be restricted in their entirety and cannot have individual fields restricted. See Restricting Tables above for more information.
-
Click the Update button in the Fields grid:
-
The entry for the field is updated in the Fields grid.
-
Use the keyboard shortcut CTRL-S (Windows)/Command-S (Mac) or click the Save Group button under the Groups dropdown to save your changes:
Deleting Fields from a Restricted Fields Group
To delete an existing field from a restricted field group:
-
In the Edit Restricted Field Groups section at the bottom of the page, select the group in which the field you want to delete is located from the Group dropdown. The fields configured for that group will be displayed in the Fields grid below:
-
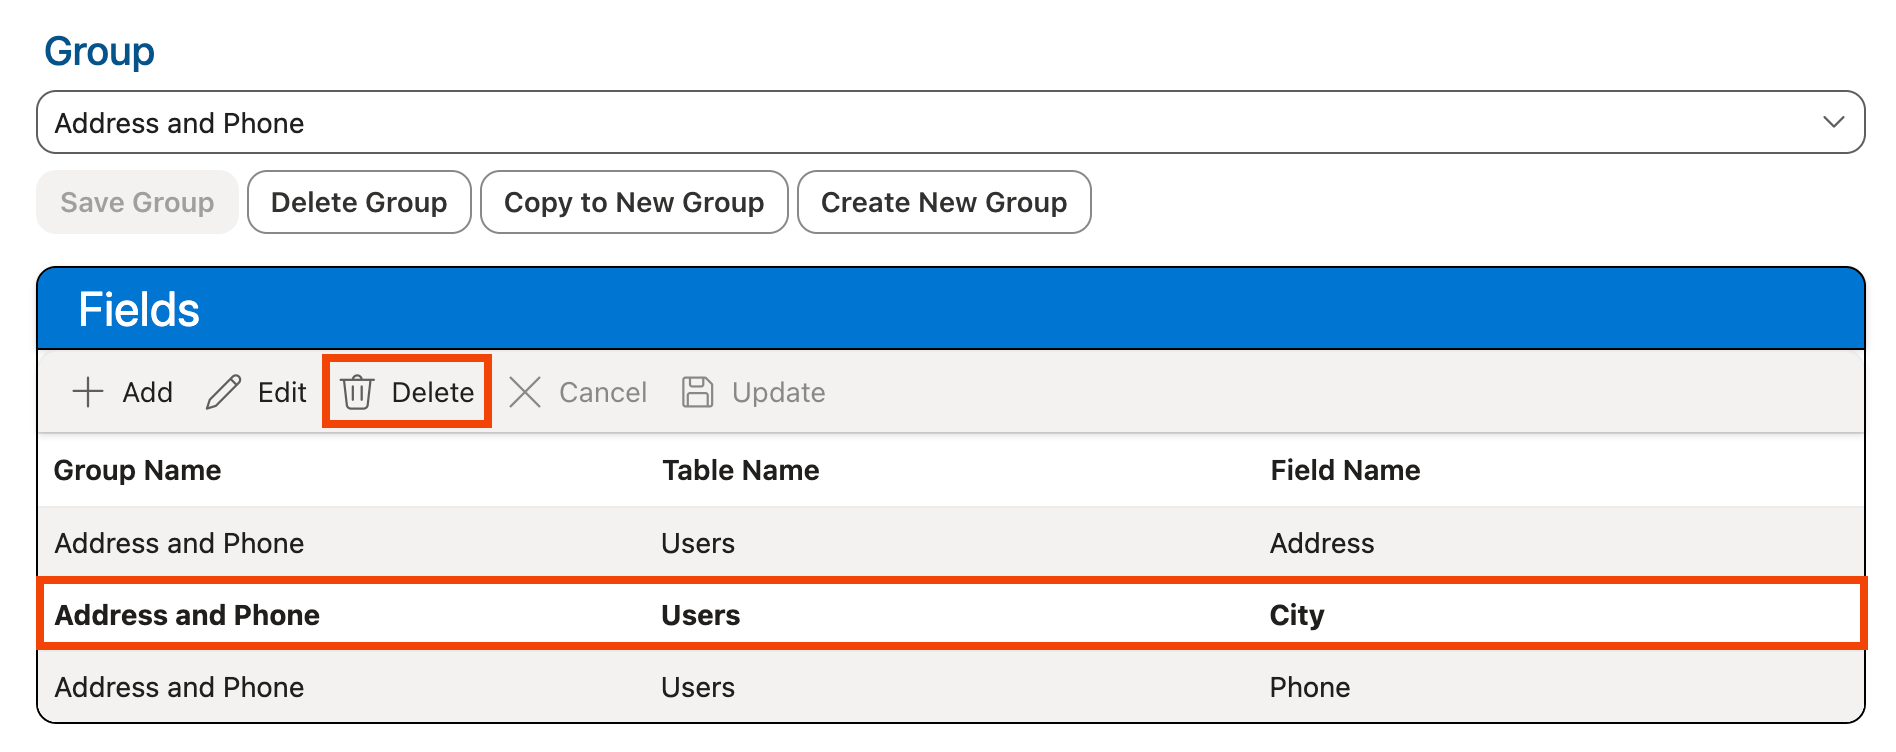
Click on the entry for the field you want to delete in the Fields grid.
-
Click the Delete button in the Fields grid:
-
The field is removed from the Fields grid.
-
Use the keyboard shortcut CTRL-S (Windows)/Command-S (Mac) or click the Save Group button under the Groups dropdown to save your changes: