Customizing Page Field Groupings
The Pages section is for editing the groups of fields that appear on a page for the selected layout. Currently, only the User Information page supports page layout customizations.
Pages Section Overview
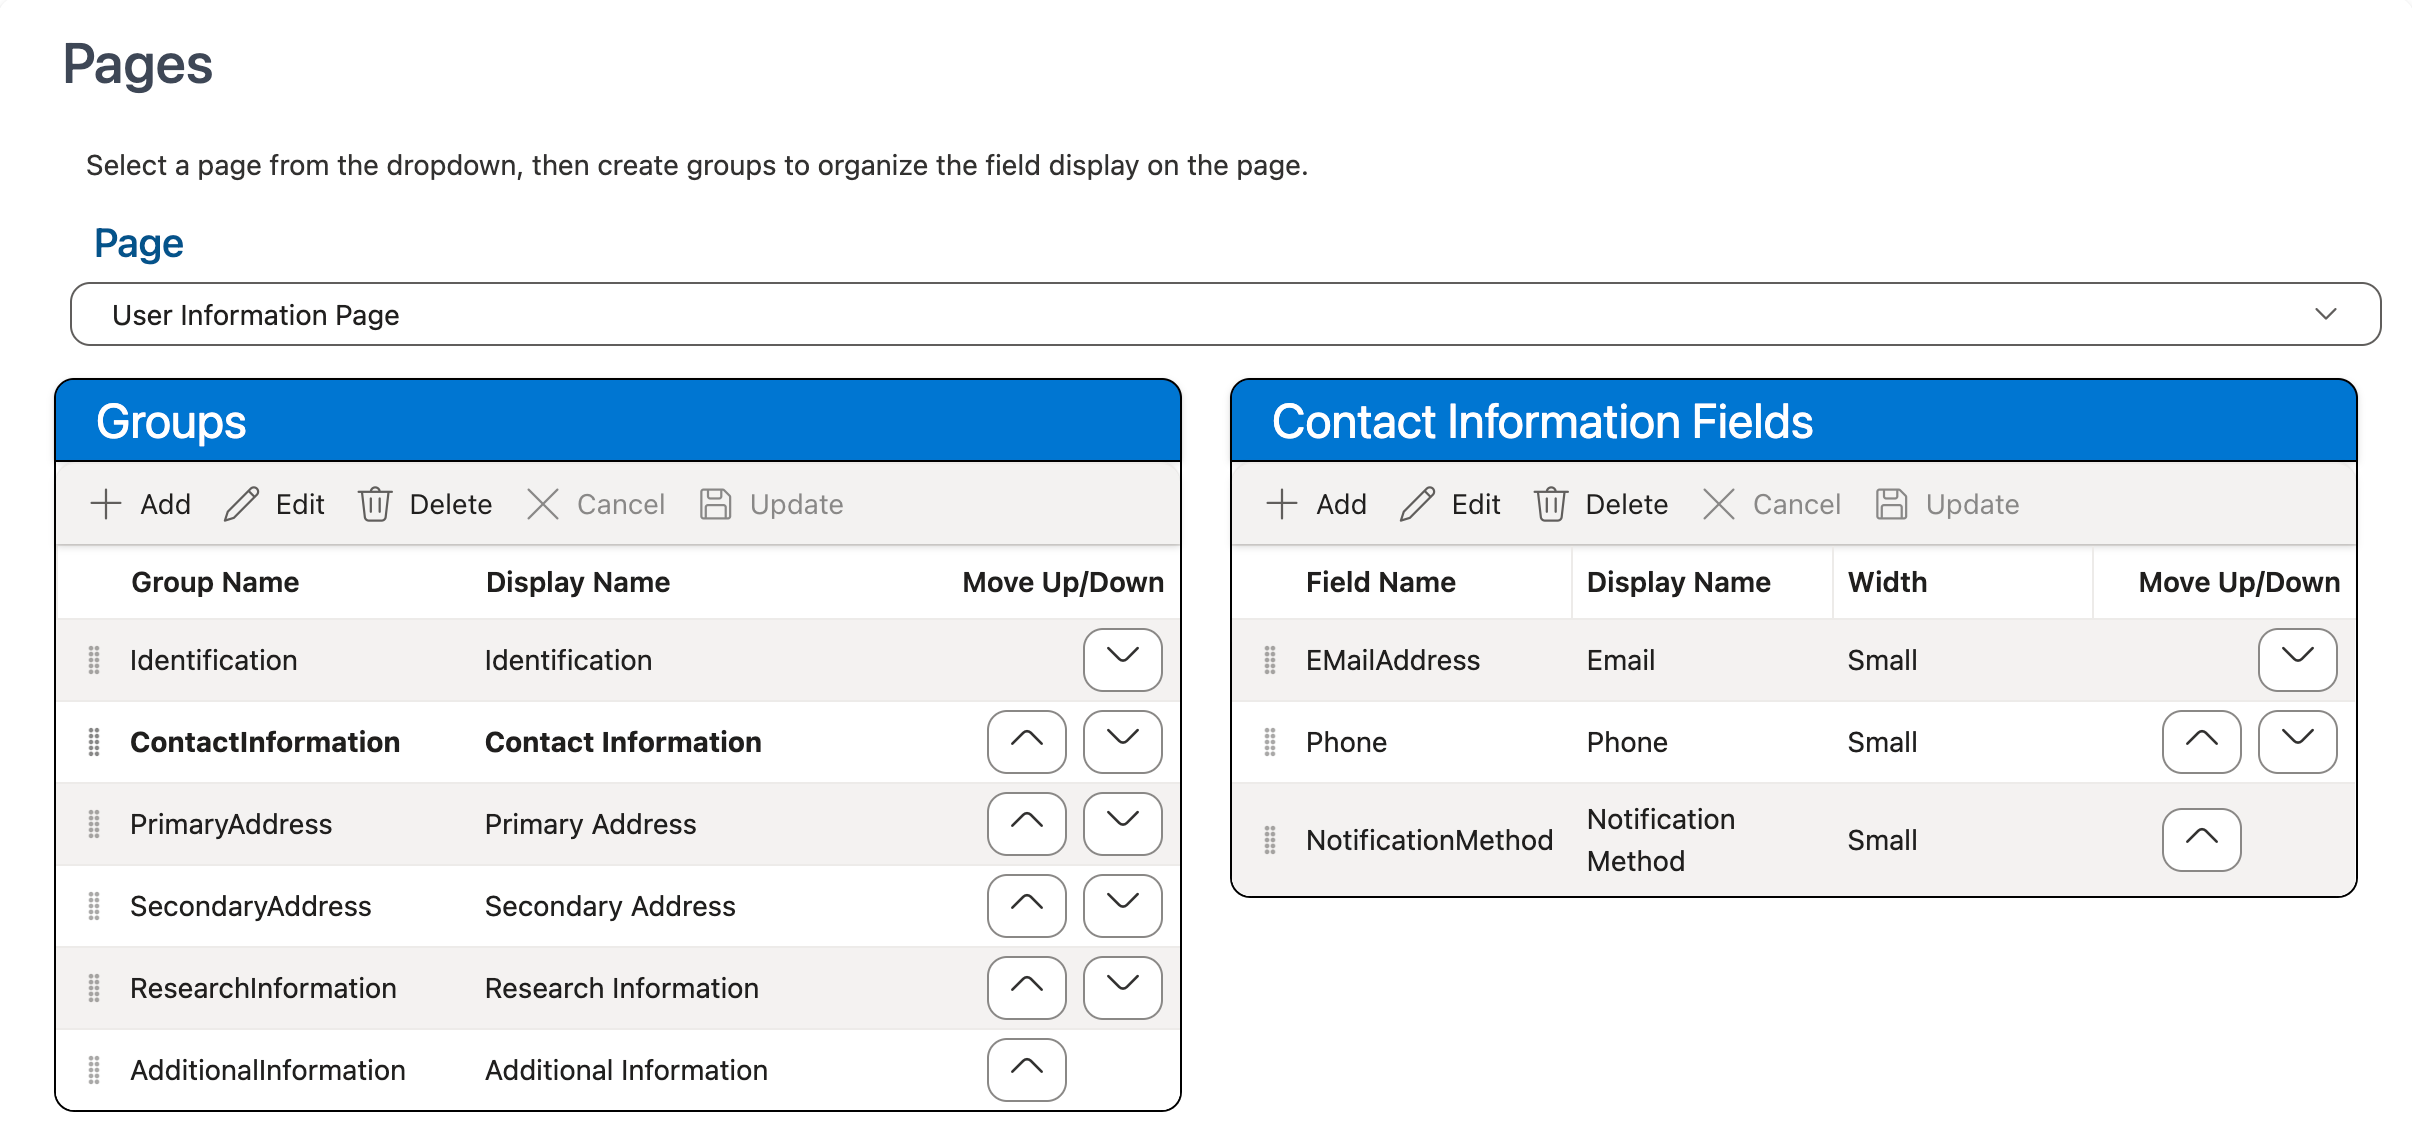
When a page is selected from the Page dropdown, the Groups grid will display the field groupings on the selected page. When a group is selected from this grid, the individual fields within that group will be displayed to the right in the Fields grid. Both the field groupings and the individual fields within each group can be edited to rename, delete, or reorder the fields/groups for the selected page and layout.
Keyboard users can use Control [Ctrl] + Right/Left Arrow to shift focus between the Groups grid and Fields grid.
Field Width Options
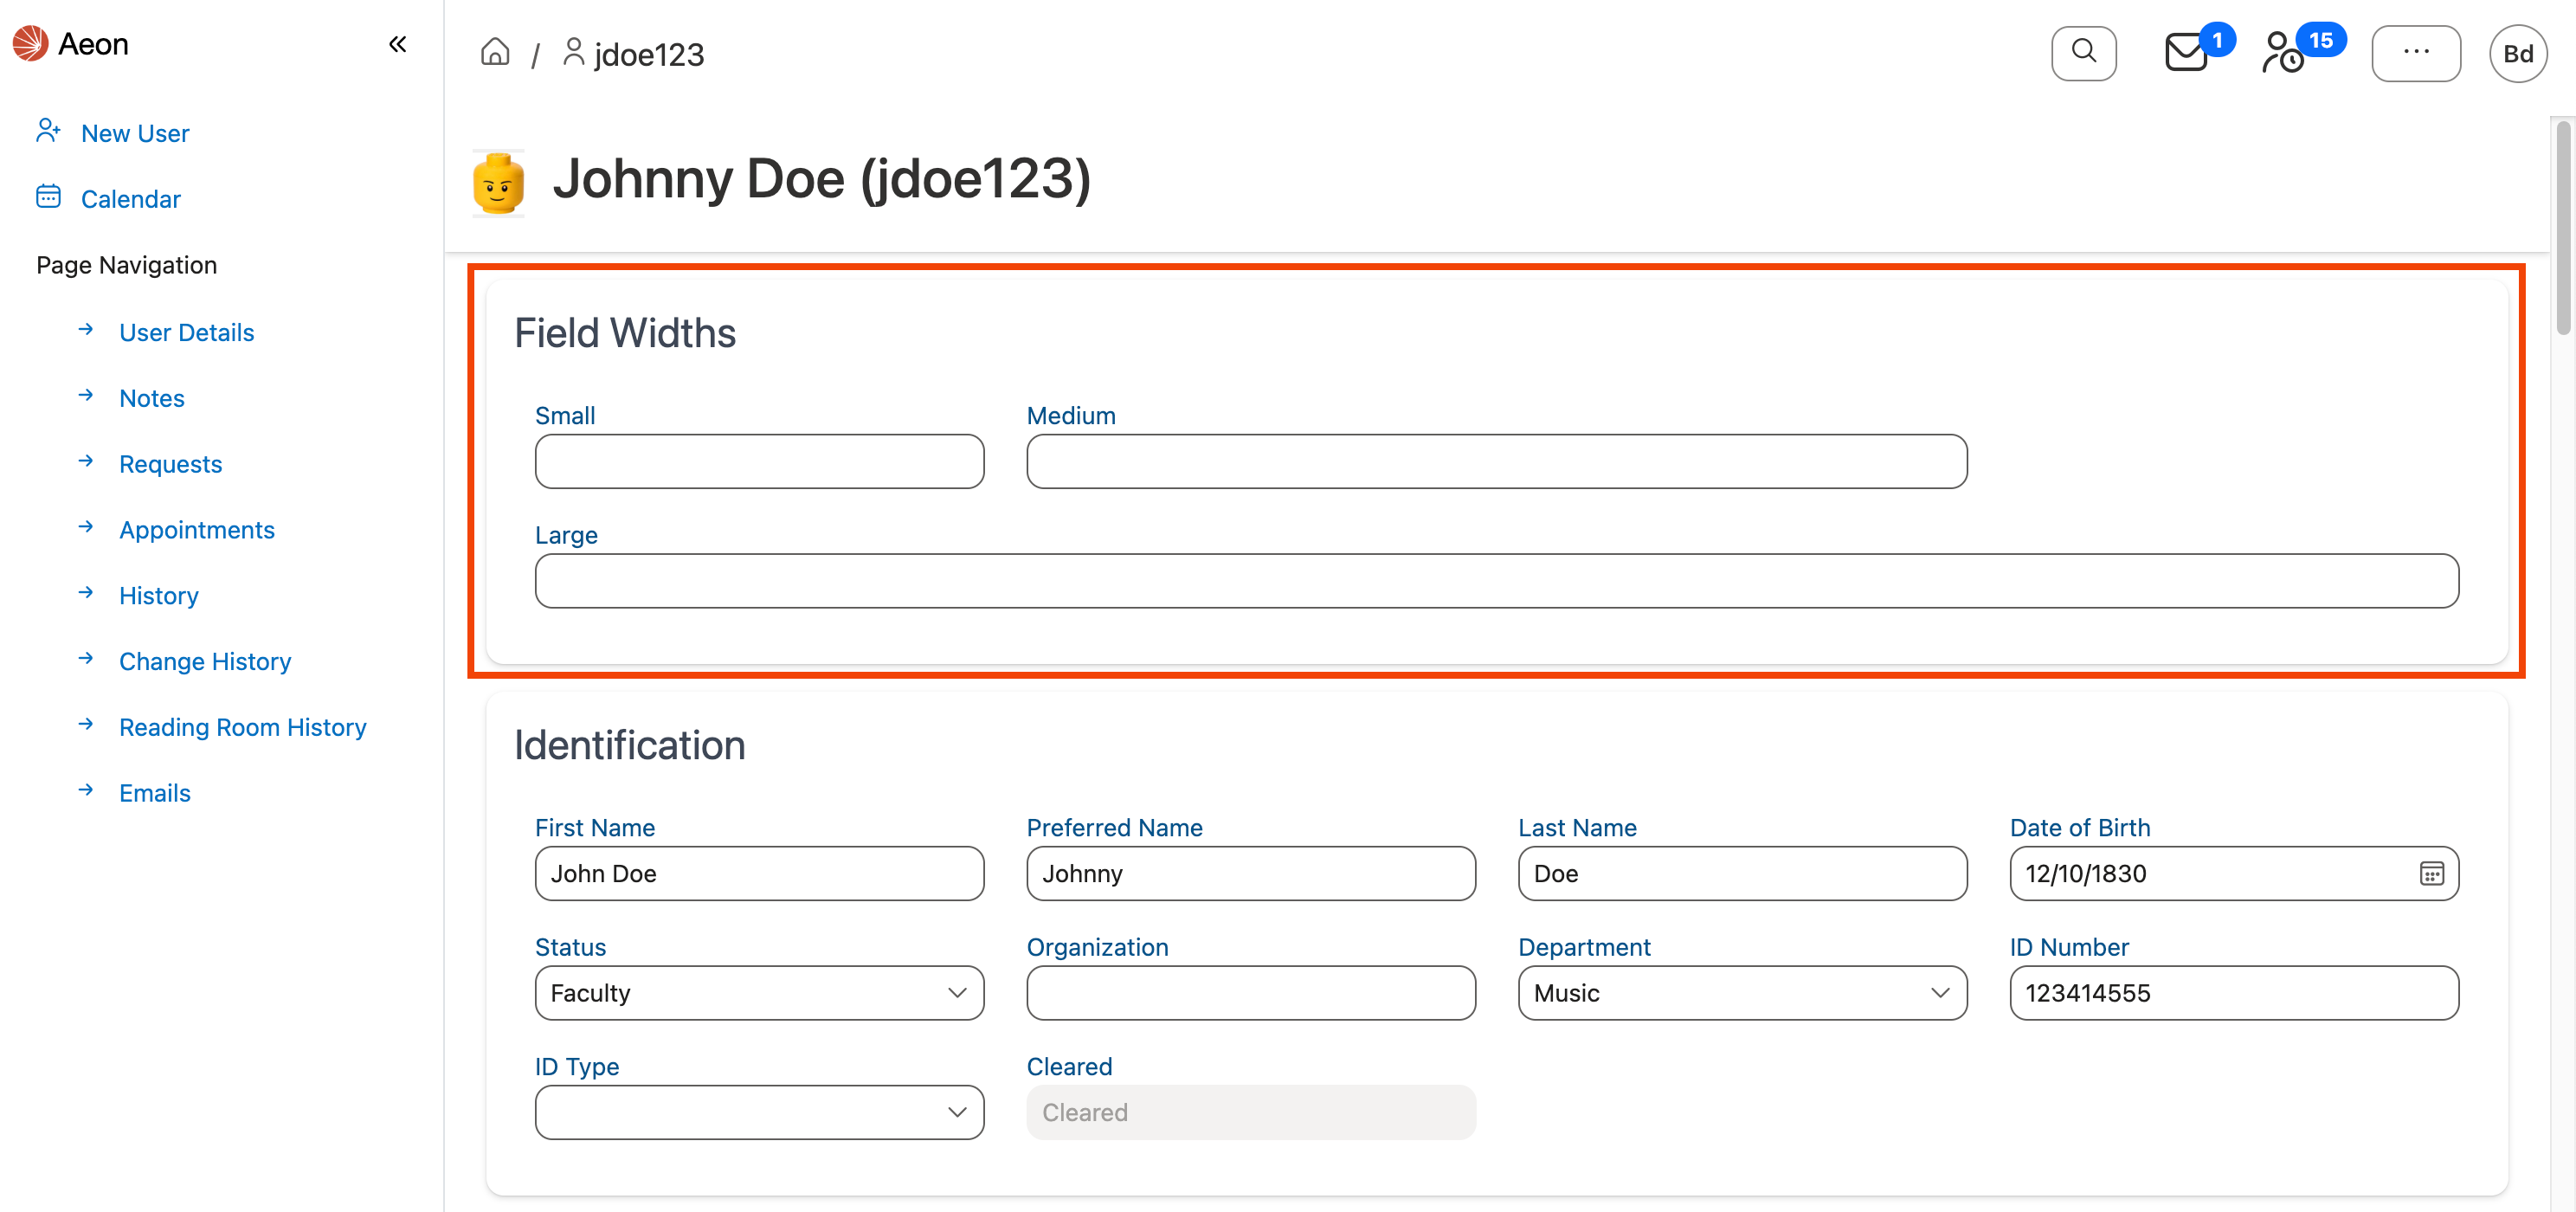
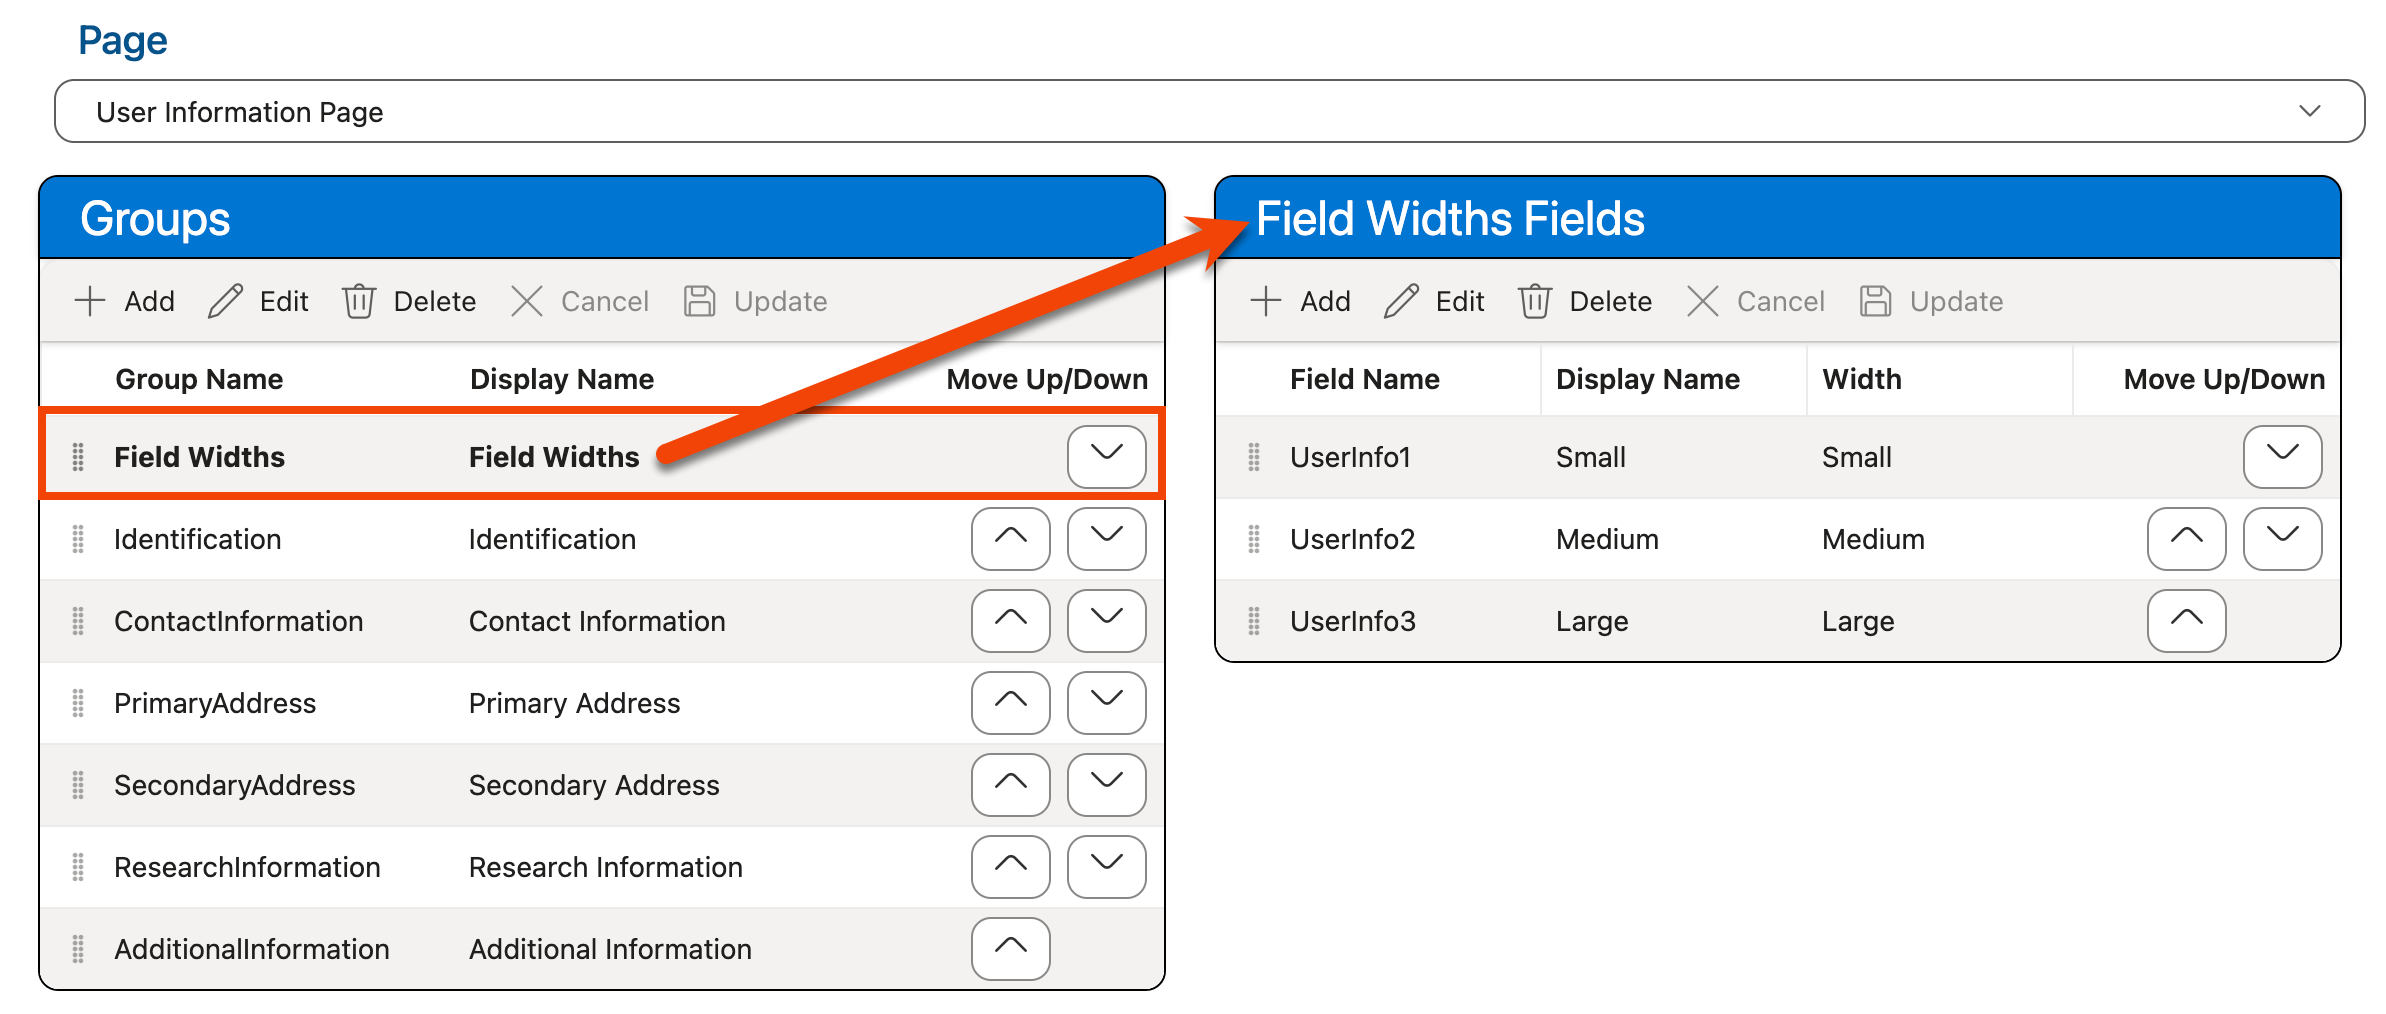
Individual fields on a page can be configured to use one of three width options: small, medium, or large. Below is an example of how each field width will display on the page when configured:
Customizing Field Groupings on a Page
The following sections explain how to reorder, add, remove, or change the display name for the field groupings on the selected page:
Reordering Field Groupings on a Page
To reorder the fields or field groupings that appear on a specific web page for the selected layout:
-
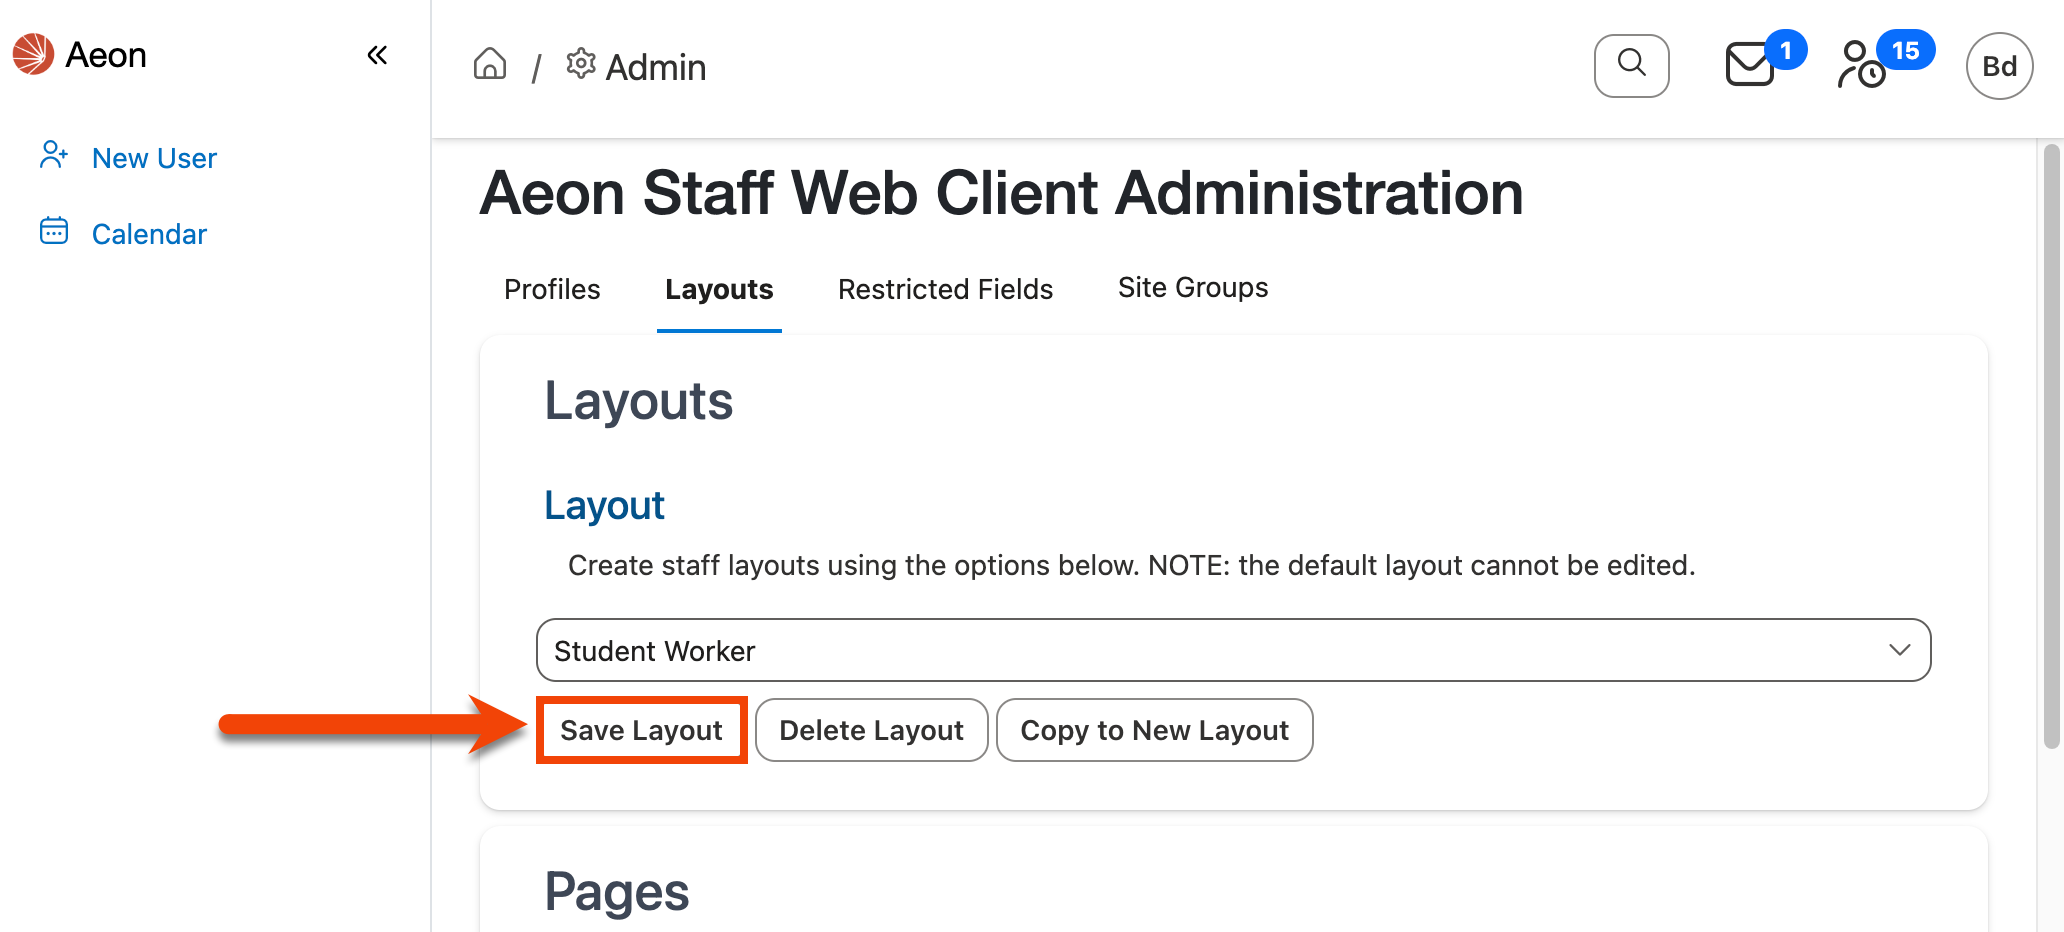
Ensure that the layout for which you want to apply the changes is selected in the Layout dropdown at the top of the page:
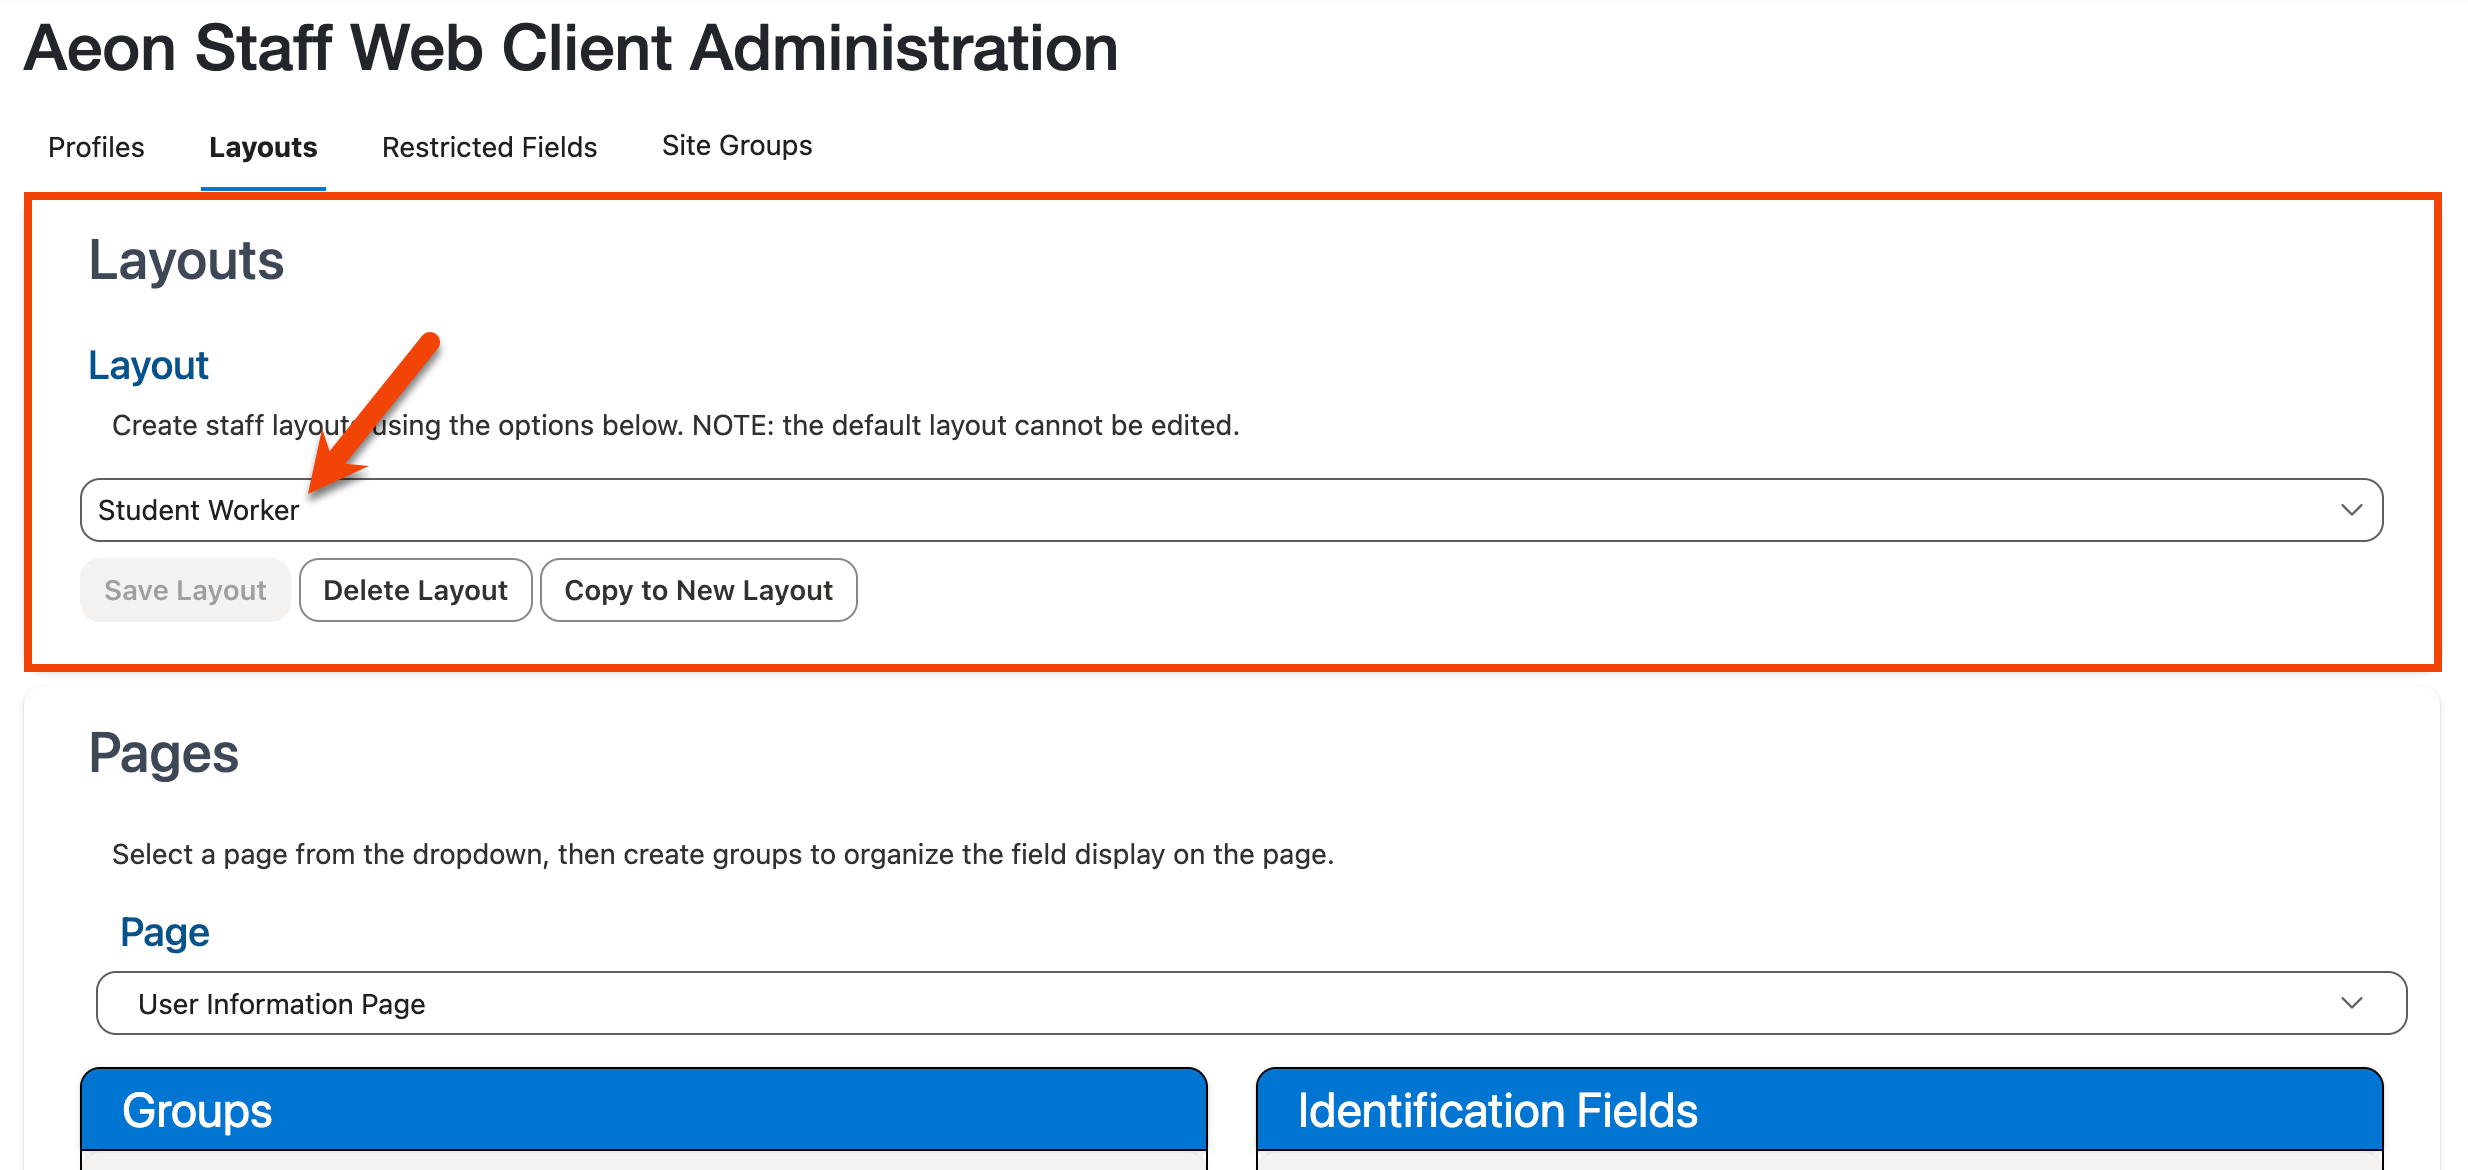
Note: The Default layout cannot be edited.
-
Select the page on which you want to reorder the field groupings from the Page dropdown located in the Pages section:

Note: Currently only the field order on the User Information page can be modified.
-
Use the drag-and-drop controls (
 ) within the Groups grid to move the groupings within the list in the desired order, or use the Move Up/Down arrow buttons (
 ) next to each grouping:
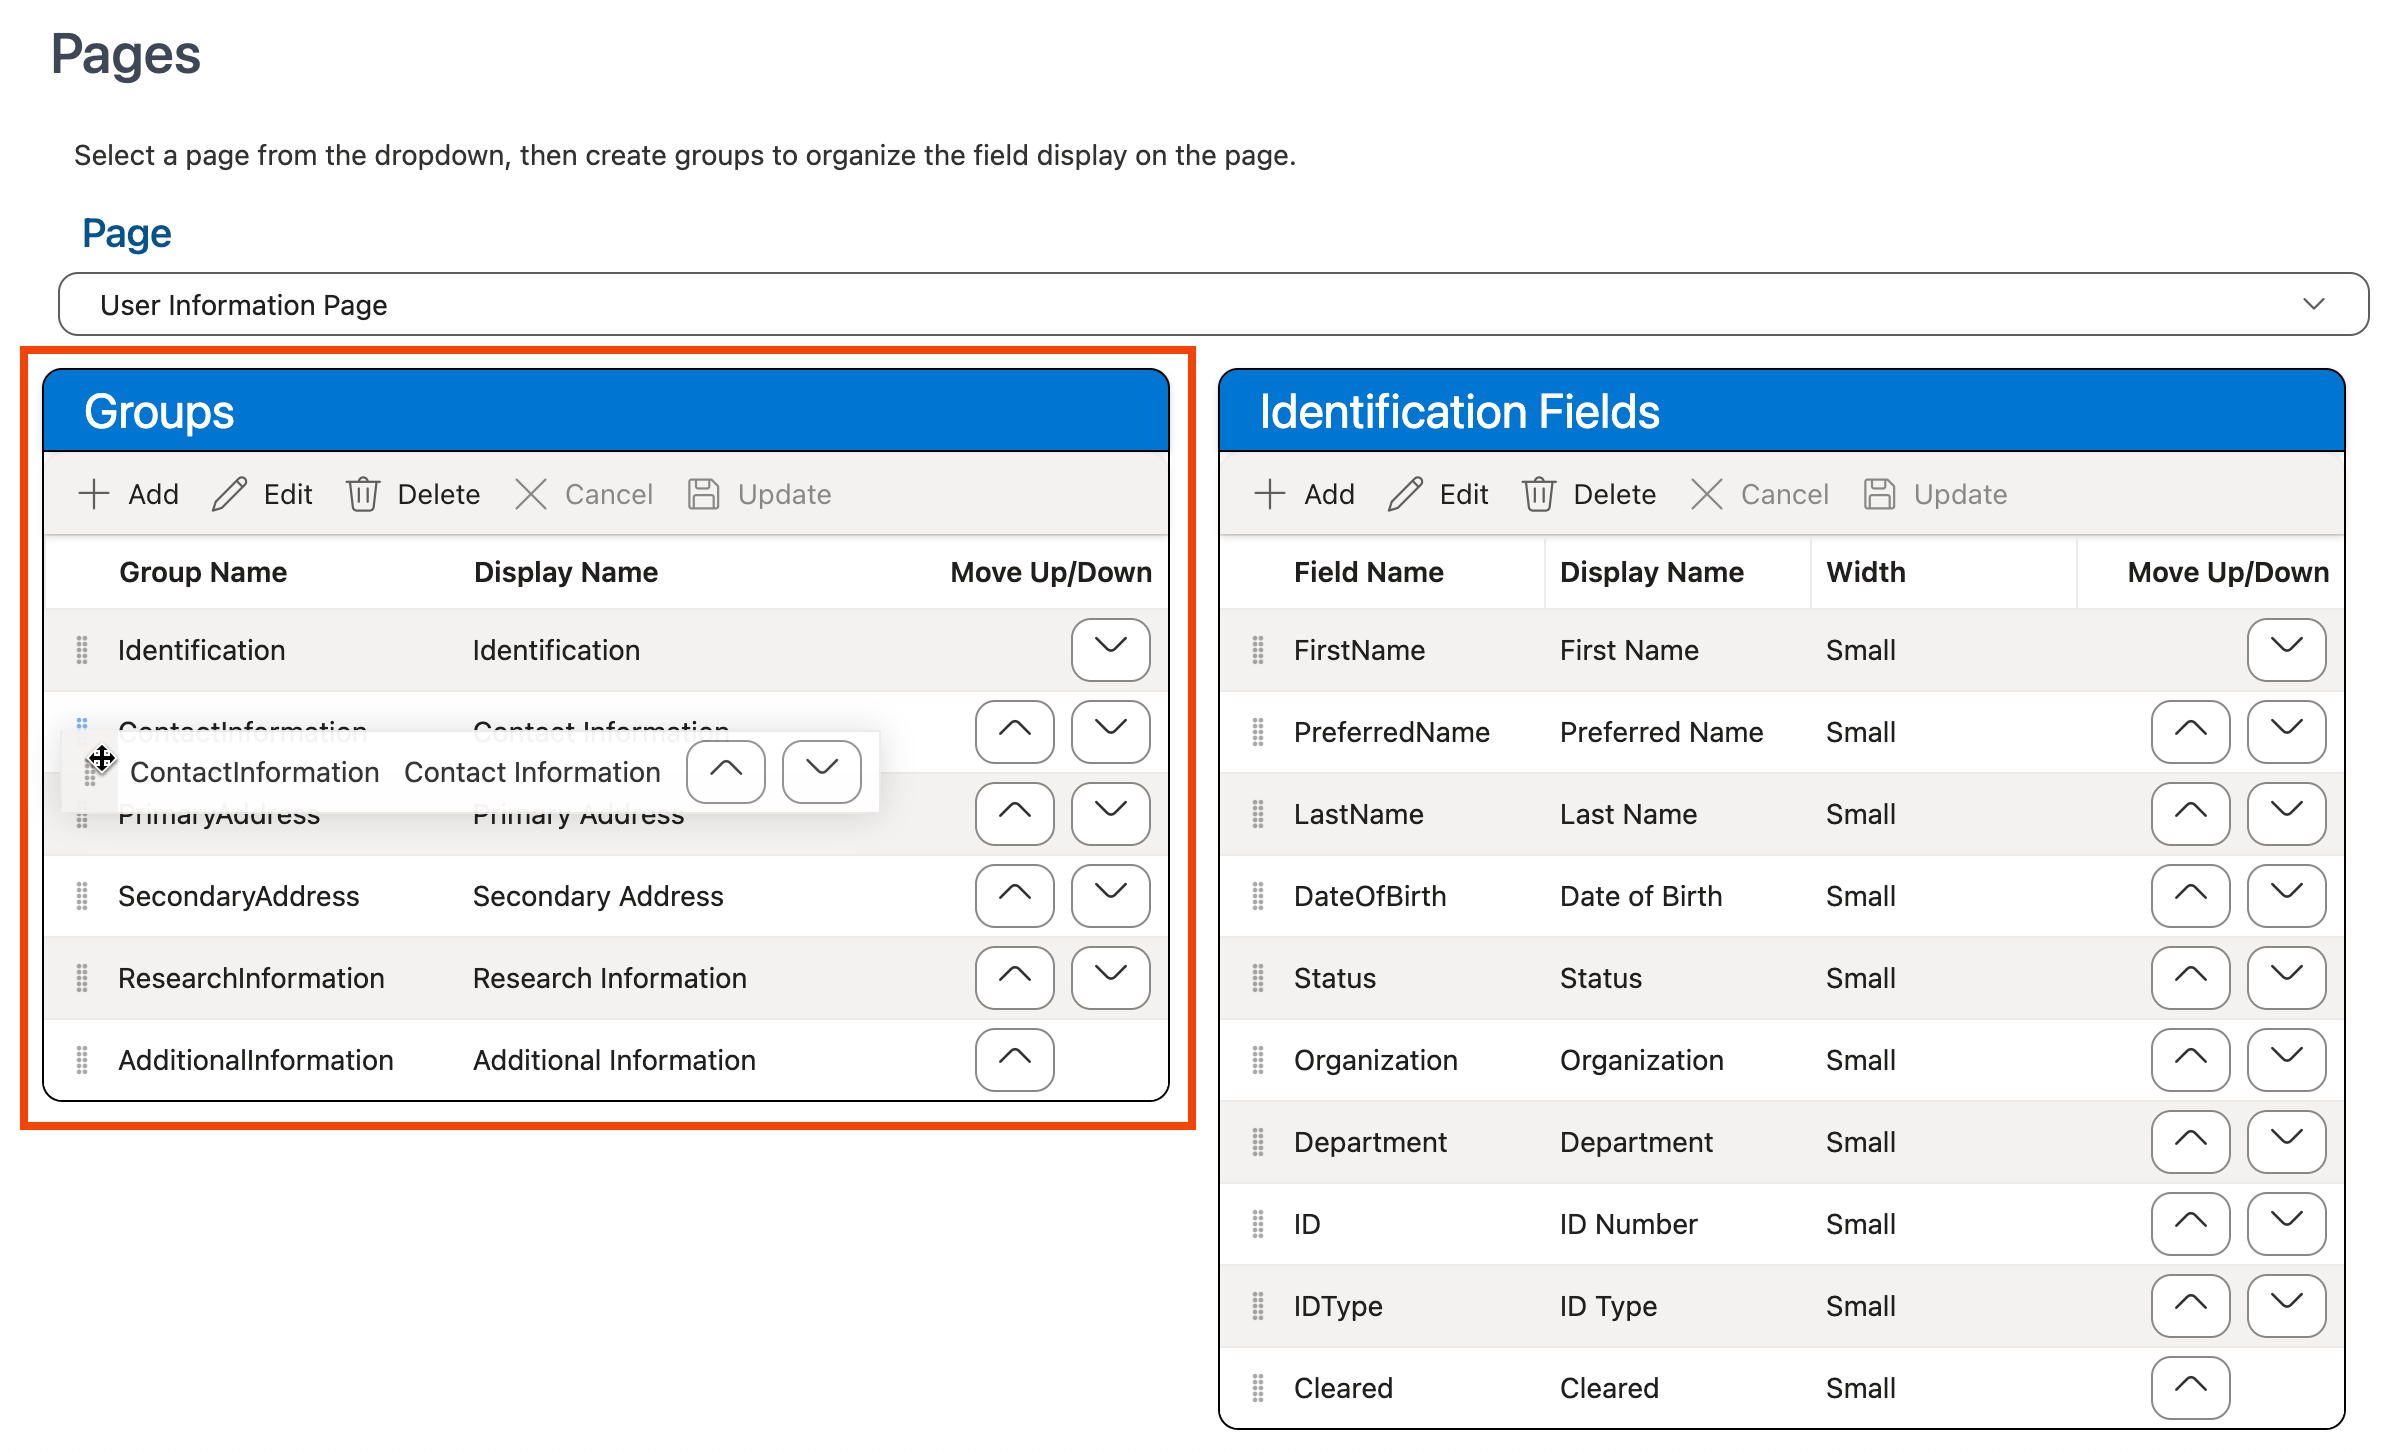
-
Use the keyboard shortcut CTRL-S (Windows)/Command-S (Mac) or click the Save Layout option at the top of the screen in the Layouts section to save your changes:
Adding Field Groupings to a Page
To add a new field grouping to a page:
-
Ensure that the layout for which you want to apply the changes is selected in the Layout dropdown at the top of the page:
Note: The Default layout cannot be edited.
-
Select the page on which you want to add a field grouping from the Page dropdown located in the Pages section:
Note: Currently only the field order on the User Information page can be modified.
-
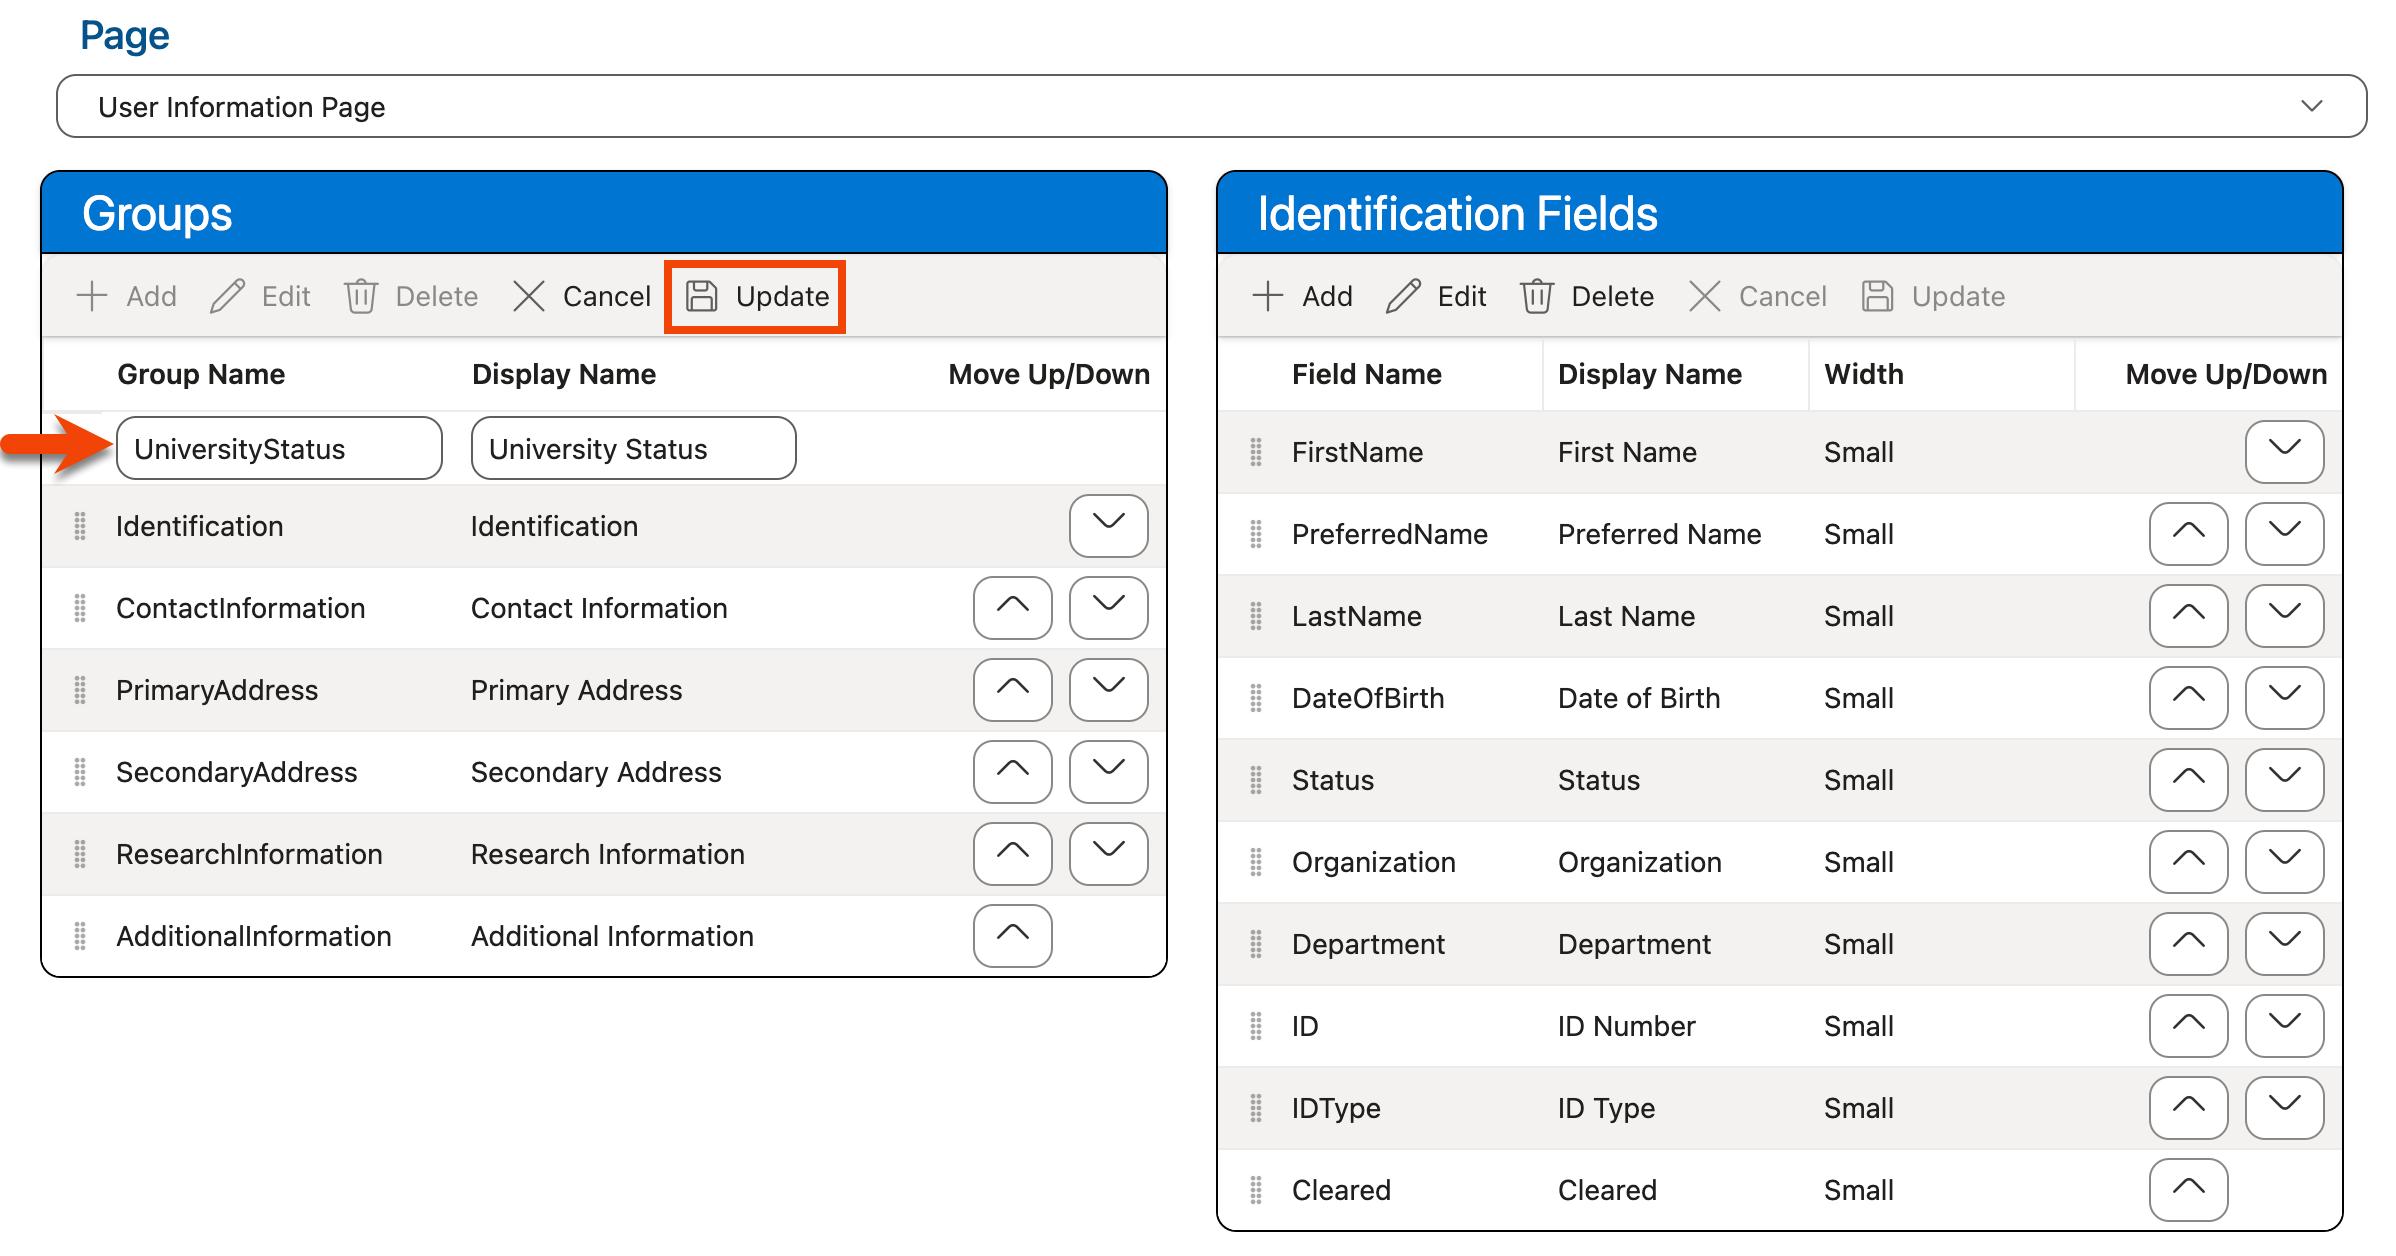
To add a new field grouping to the page, click the + Add button in the Groups grid:

-
Enter the name that will be stored in the Aeon database to identify the grouping in the Group Name column.
Each Group Name must be unique for the selected page but can be reused for different pages (e.g., you cannot have two "Identification" groups on the User Information page, but you can have an "Identification" group on two separate pages). This field is limited to 50 characters in length.
-
Enter the display label that will be used to display the name for the field grouping on the selected page in the Display Name column.
-
Click Update:
-
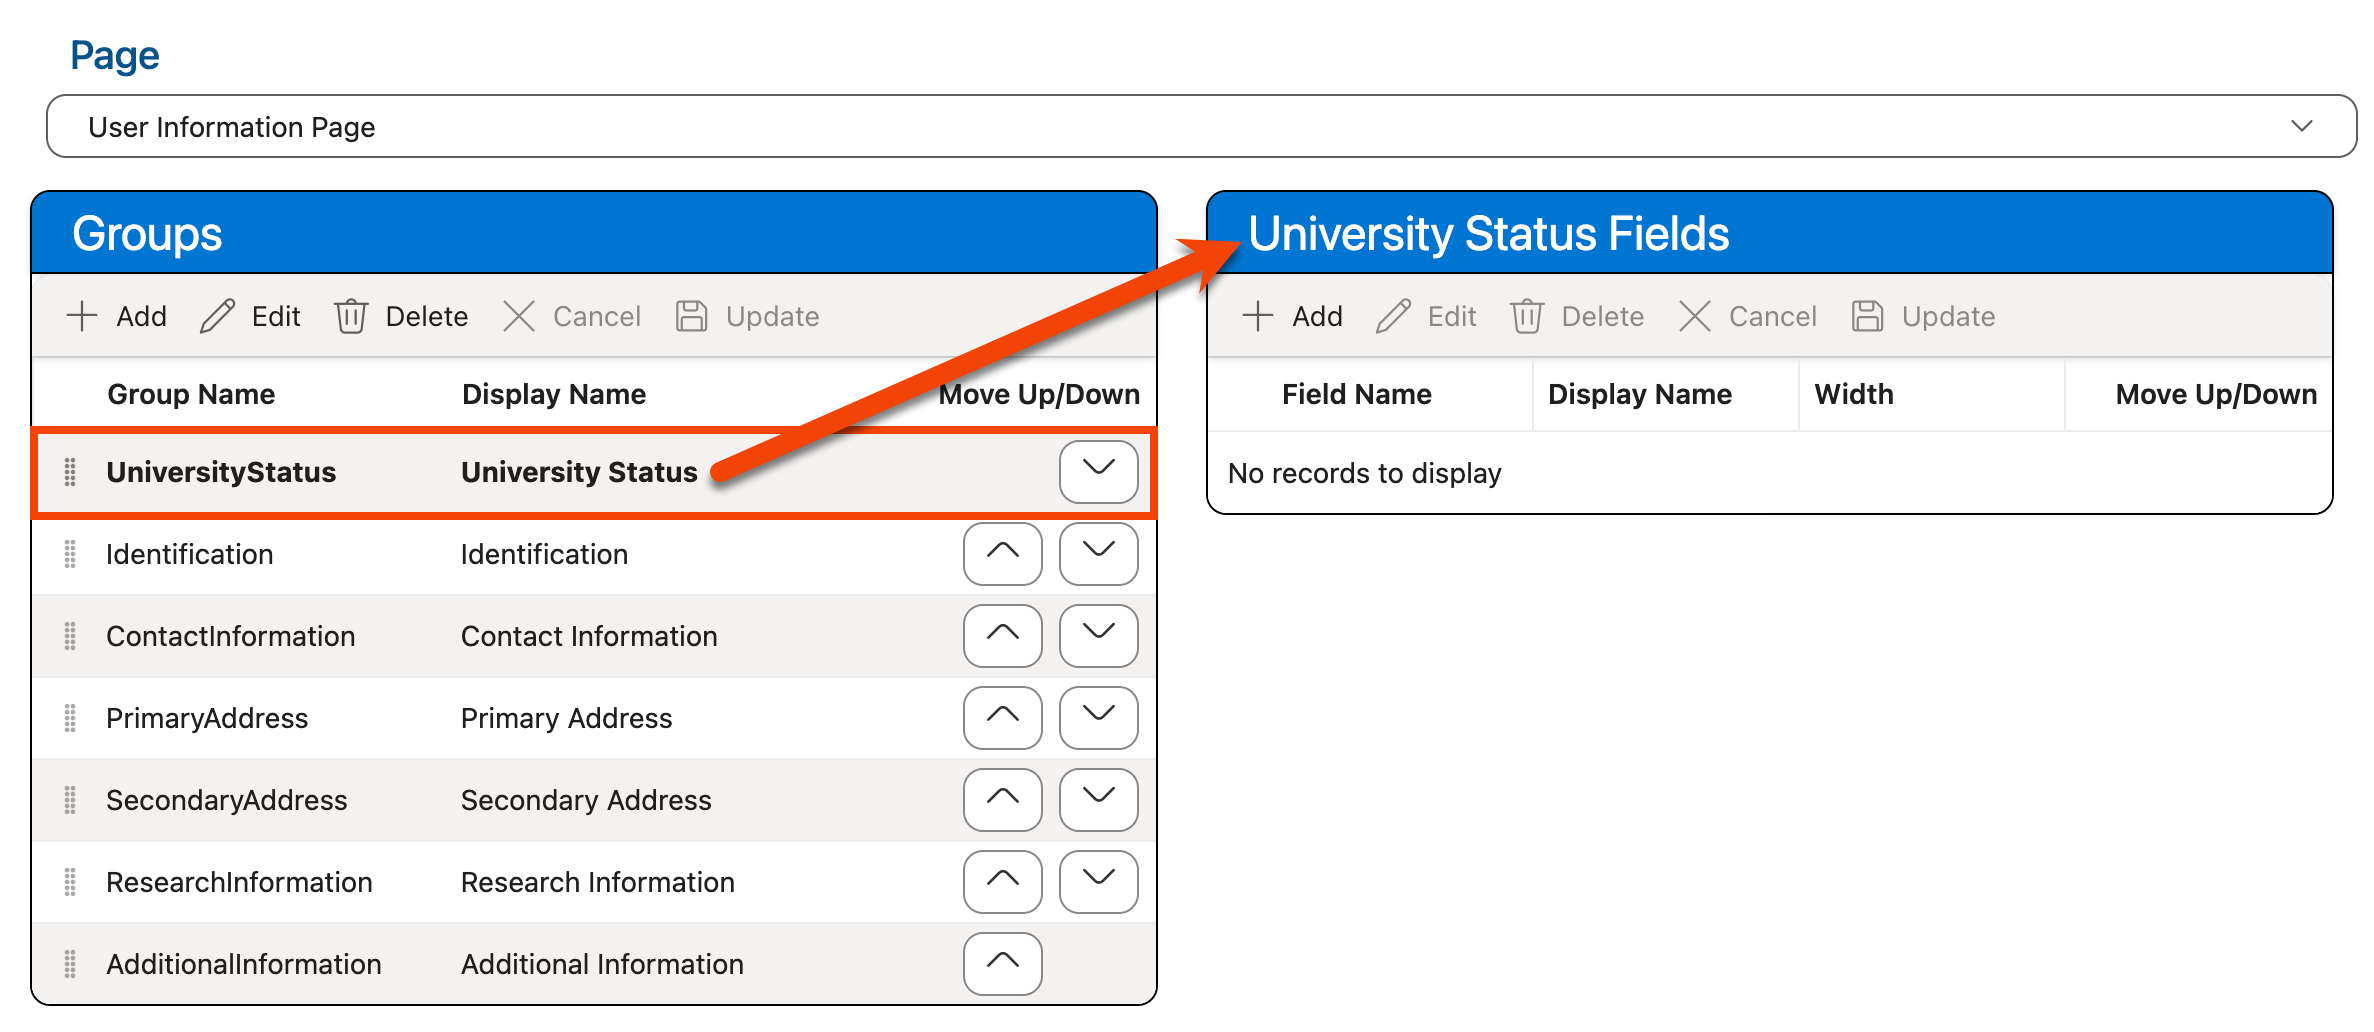
The new grouping will be added to the Groups grid. Use Customizing Fields Within Groupings to add the desired fields to the grouping:
-
Use the drag-and-drop controls (
) or the Move Up/Down arrow buttons () in the Groups grid to move the new grouping into the position where you would like it to display on the page, if necessary. -
Use the keyboard shortcut CTRL-S (Windows)/Command-S (Mac) or click the Save Layout option at the top of the screen in the Layouts section to save your changes:
Removing Field Groupings from a Page
To remove a field grouping from a page:
-
Ensure that the layout for which you want to apply the changes is selected in the Layout dropdown at the top of the page:
Note: The Default layout cannot be edited.
-
Select the page from which you want to delete the field grouping(s) from the Page dropdown located in the Pages section:
Note: Currently only the field order on the User Information page can be modified.
-
Use the Groups grid to select the grouping you want to delete from the page. The fields within that grouping will display in the Fields grid to the right:
-
Click Delete to delete the selected field grouping from the Groups grid:
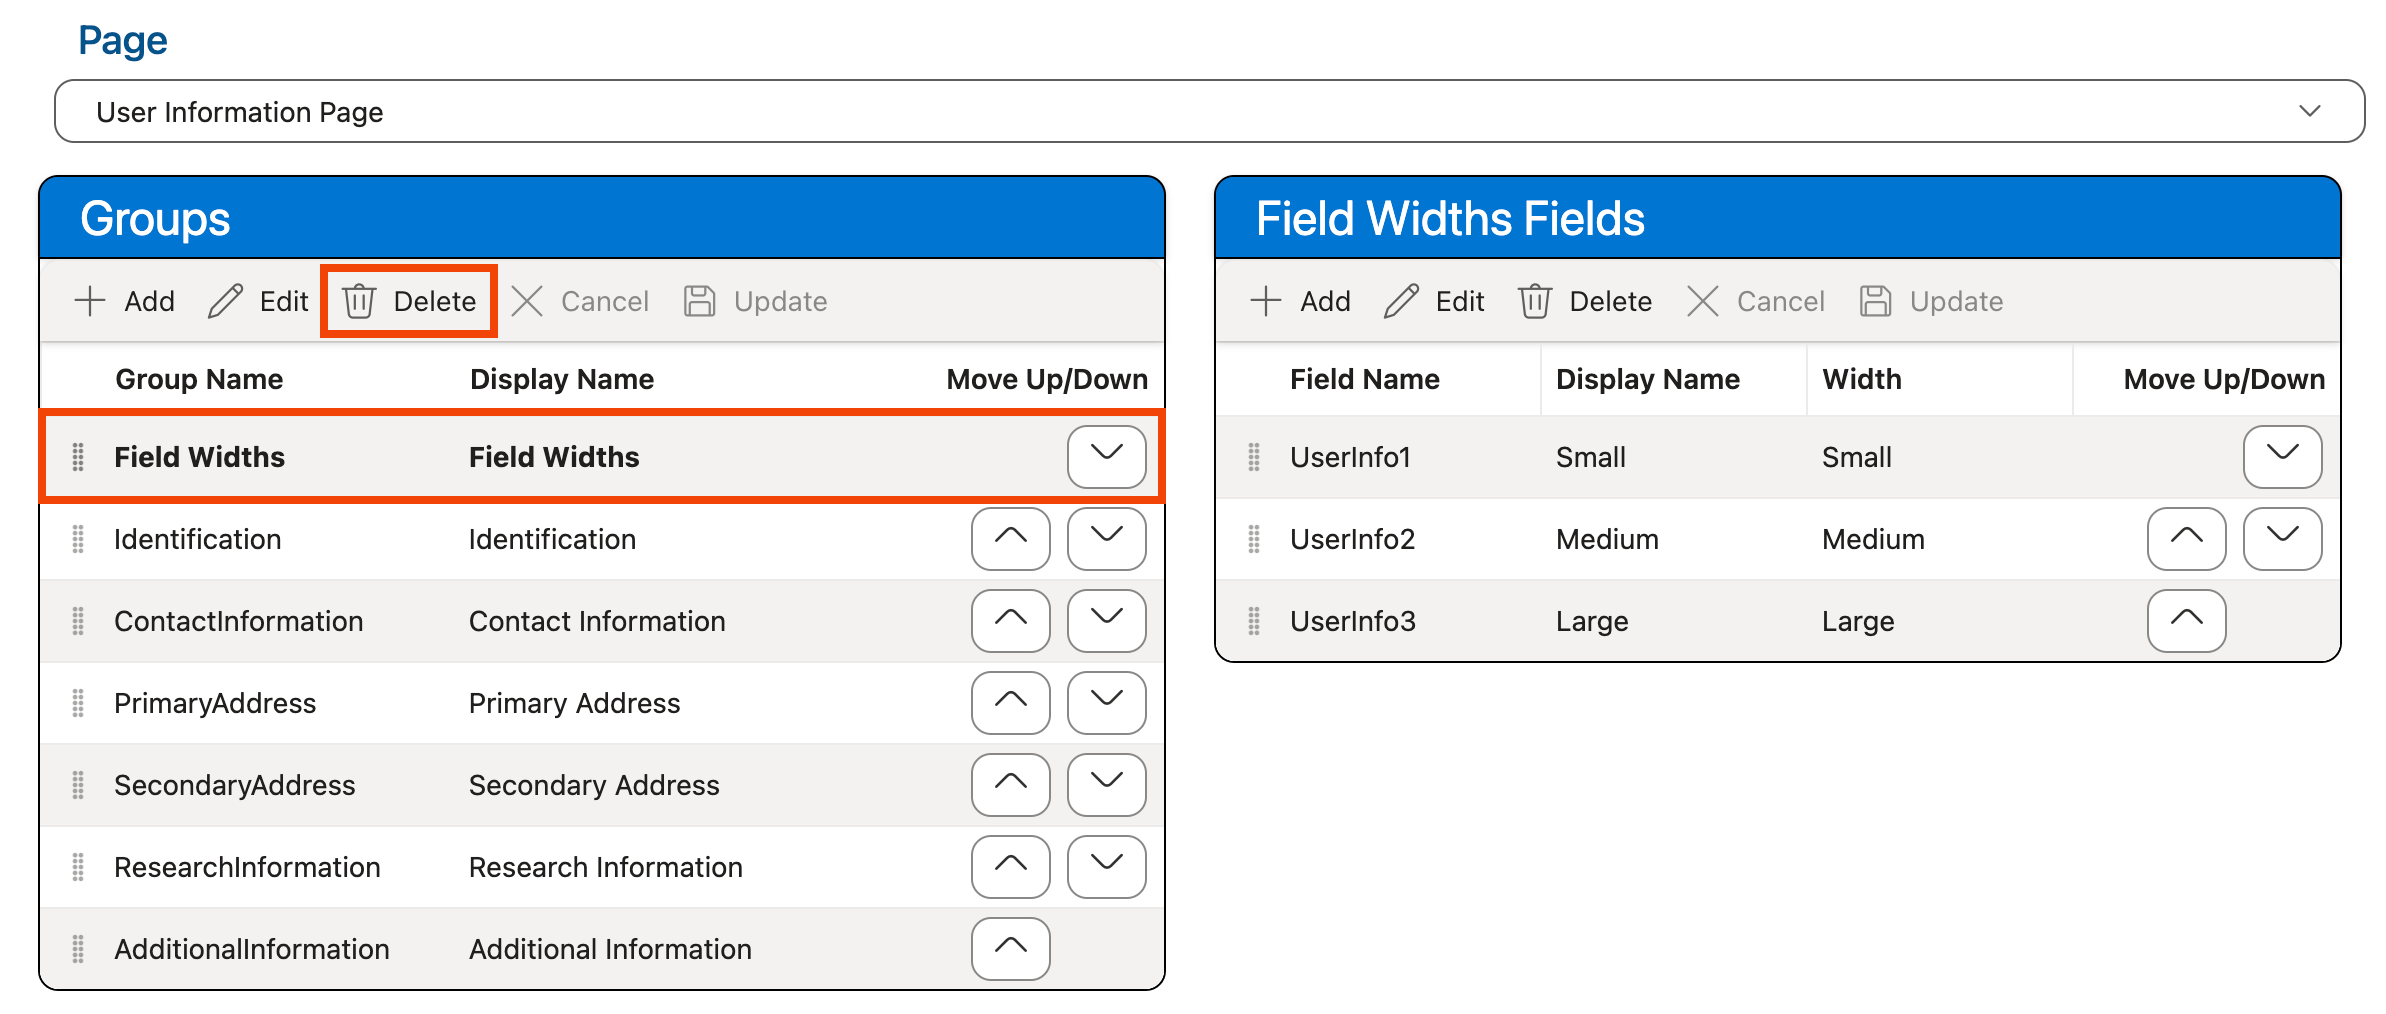
Warning! This will also remove all of the fields within that grouping from the page.
-
Use the keyboard shortcut CTRL-S (Windows)/Command-S (Mac) or click the Save Layout option at the top of the screen in the Layouts section to save your changes:
Changing Field Grouping Display Options
To change the name displayed for a field grouping on a page:
-
Ensure that the layout for which you want to apply the changes is selected in the Layout dropdown at the top of the page:
Note: The Default layout cannot be edited.
-
Select the page on which you want to rename the field grouping from the Page dropdown located in the Pages section:
Note: Currently only the fields on the User Information page can be modified.
-
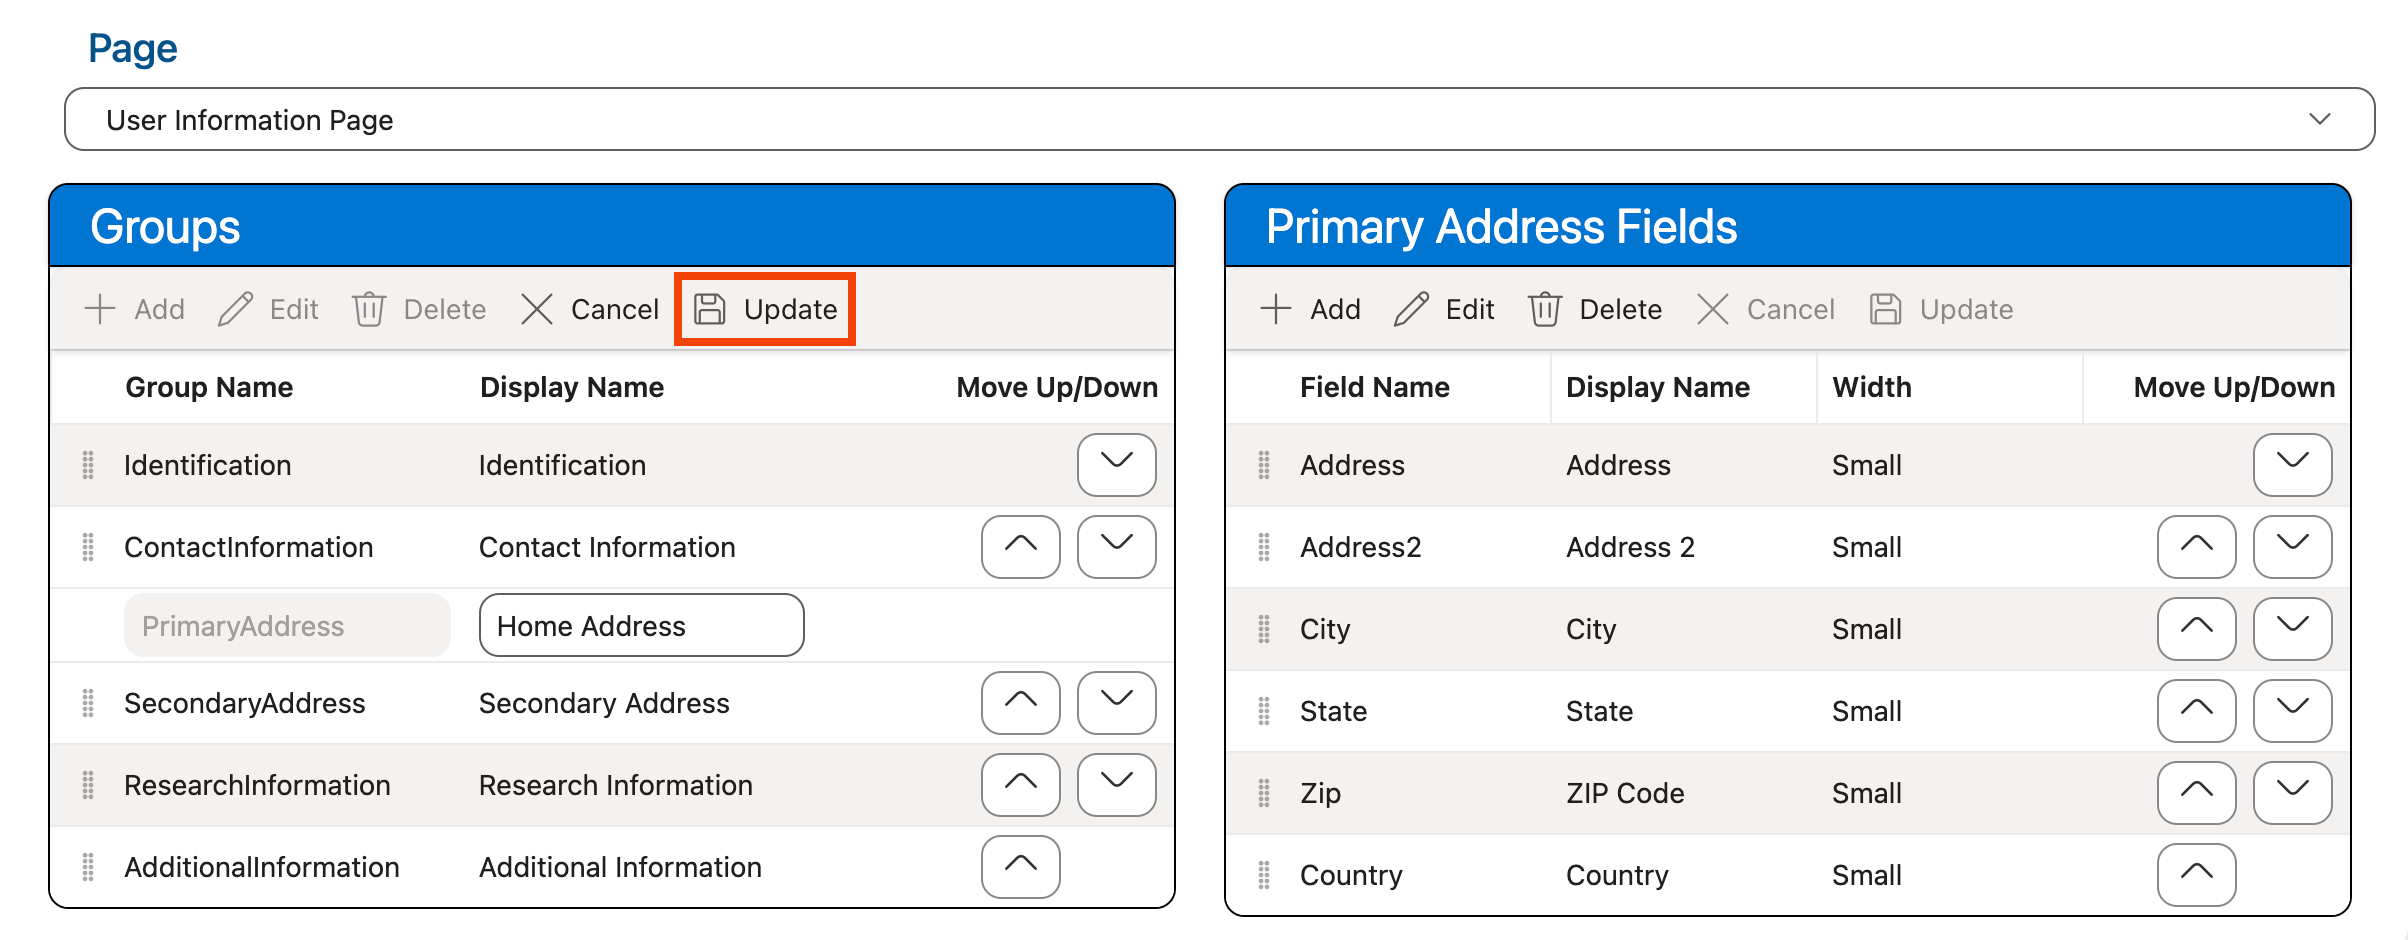
Click on the grouping you want to rename within the Groups grid, then click Edit:

-
Use the Display Name column to edit the display label that will be used to display the name for the field grouping on the selected page.
The value in the Group Name column used to identify the grouping in the database is not editable.
-
Click Update in the Groups grid:
-
Use the keyboard shortcut CTRL-S (Windows)/Command-S (Mac) or click the Save Layout option at the top of the screen in the Layouts section to save your changes: