Customizing Fields Within Groupings
This section covers how to customize individual fields within field groupings on pages in the Aeon Web Client. Before working with individual fields, ensure you have organized your field groupings using Customizing Page Field Groupings.
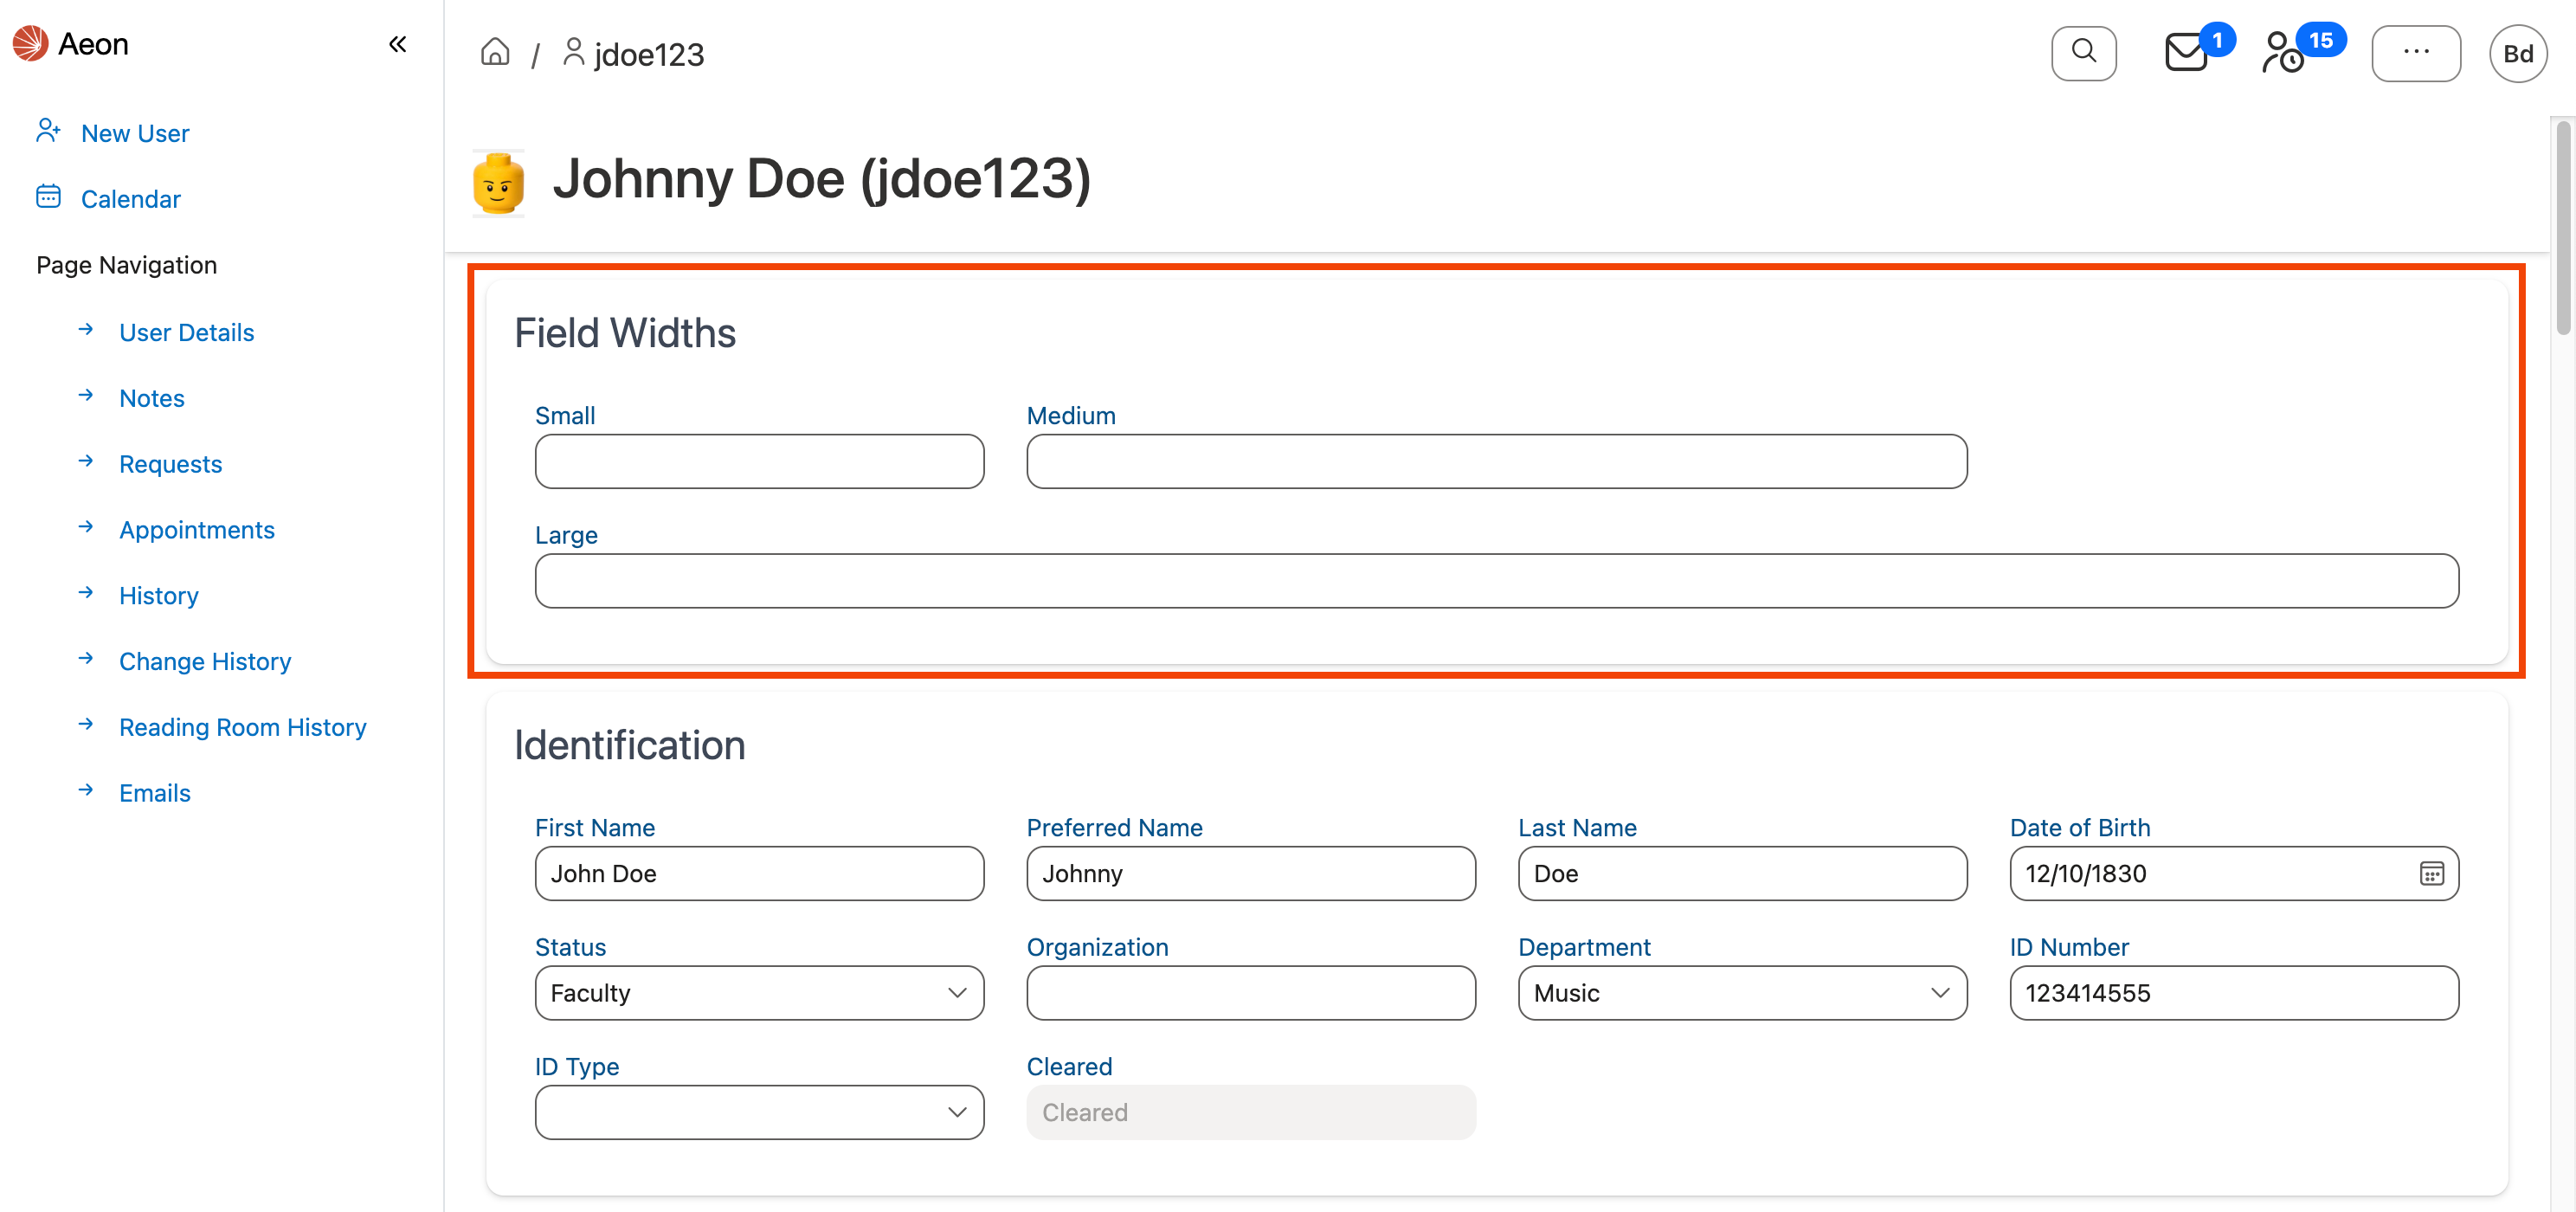
Field Width Options
Individual fields on a page can be configured to use one of three width options: small, medium, or large. Below is an example of how each field width will display on the page when configured:
Customizing Fields Within a Field Grouping
Reordering Fields in a Grouping
To reorder the field groupings that appear on a specific web page for the selected layout:
-
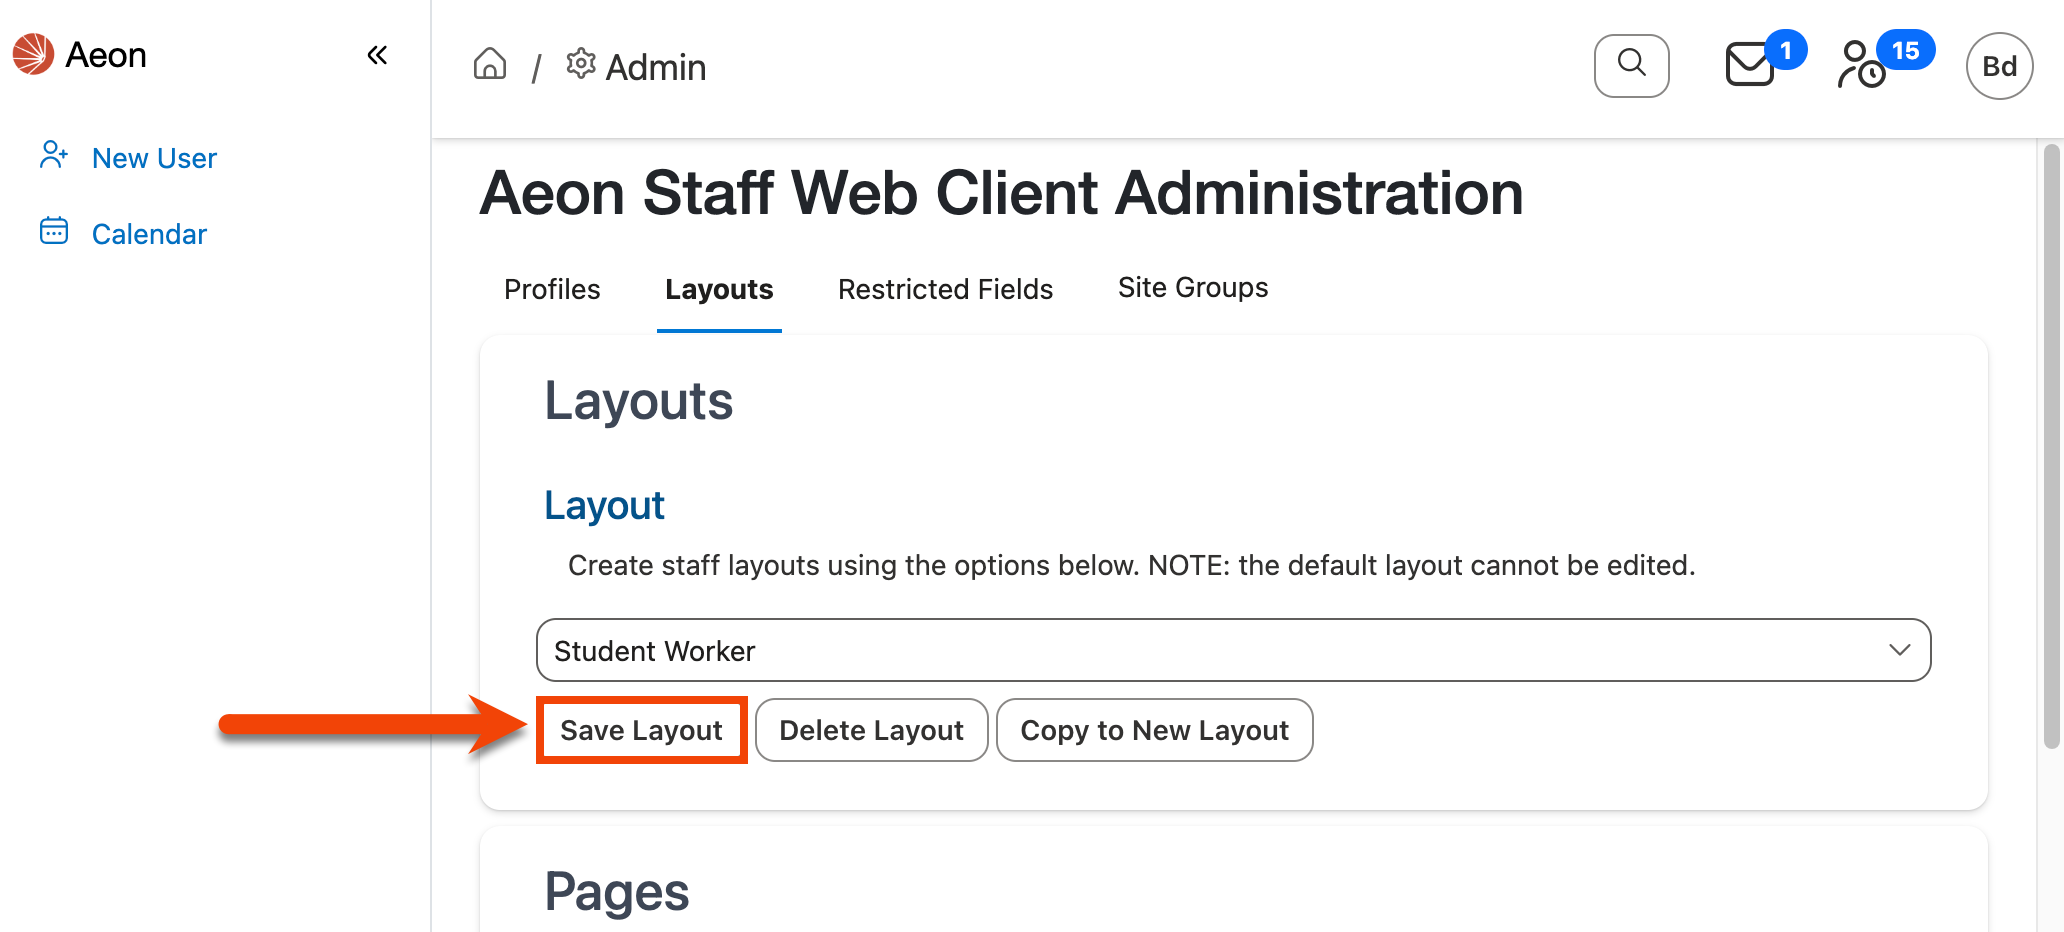
Ensure that the layout for which you want to apply the changes is selected in the Layout dropdown at the top of the page:
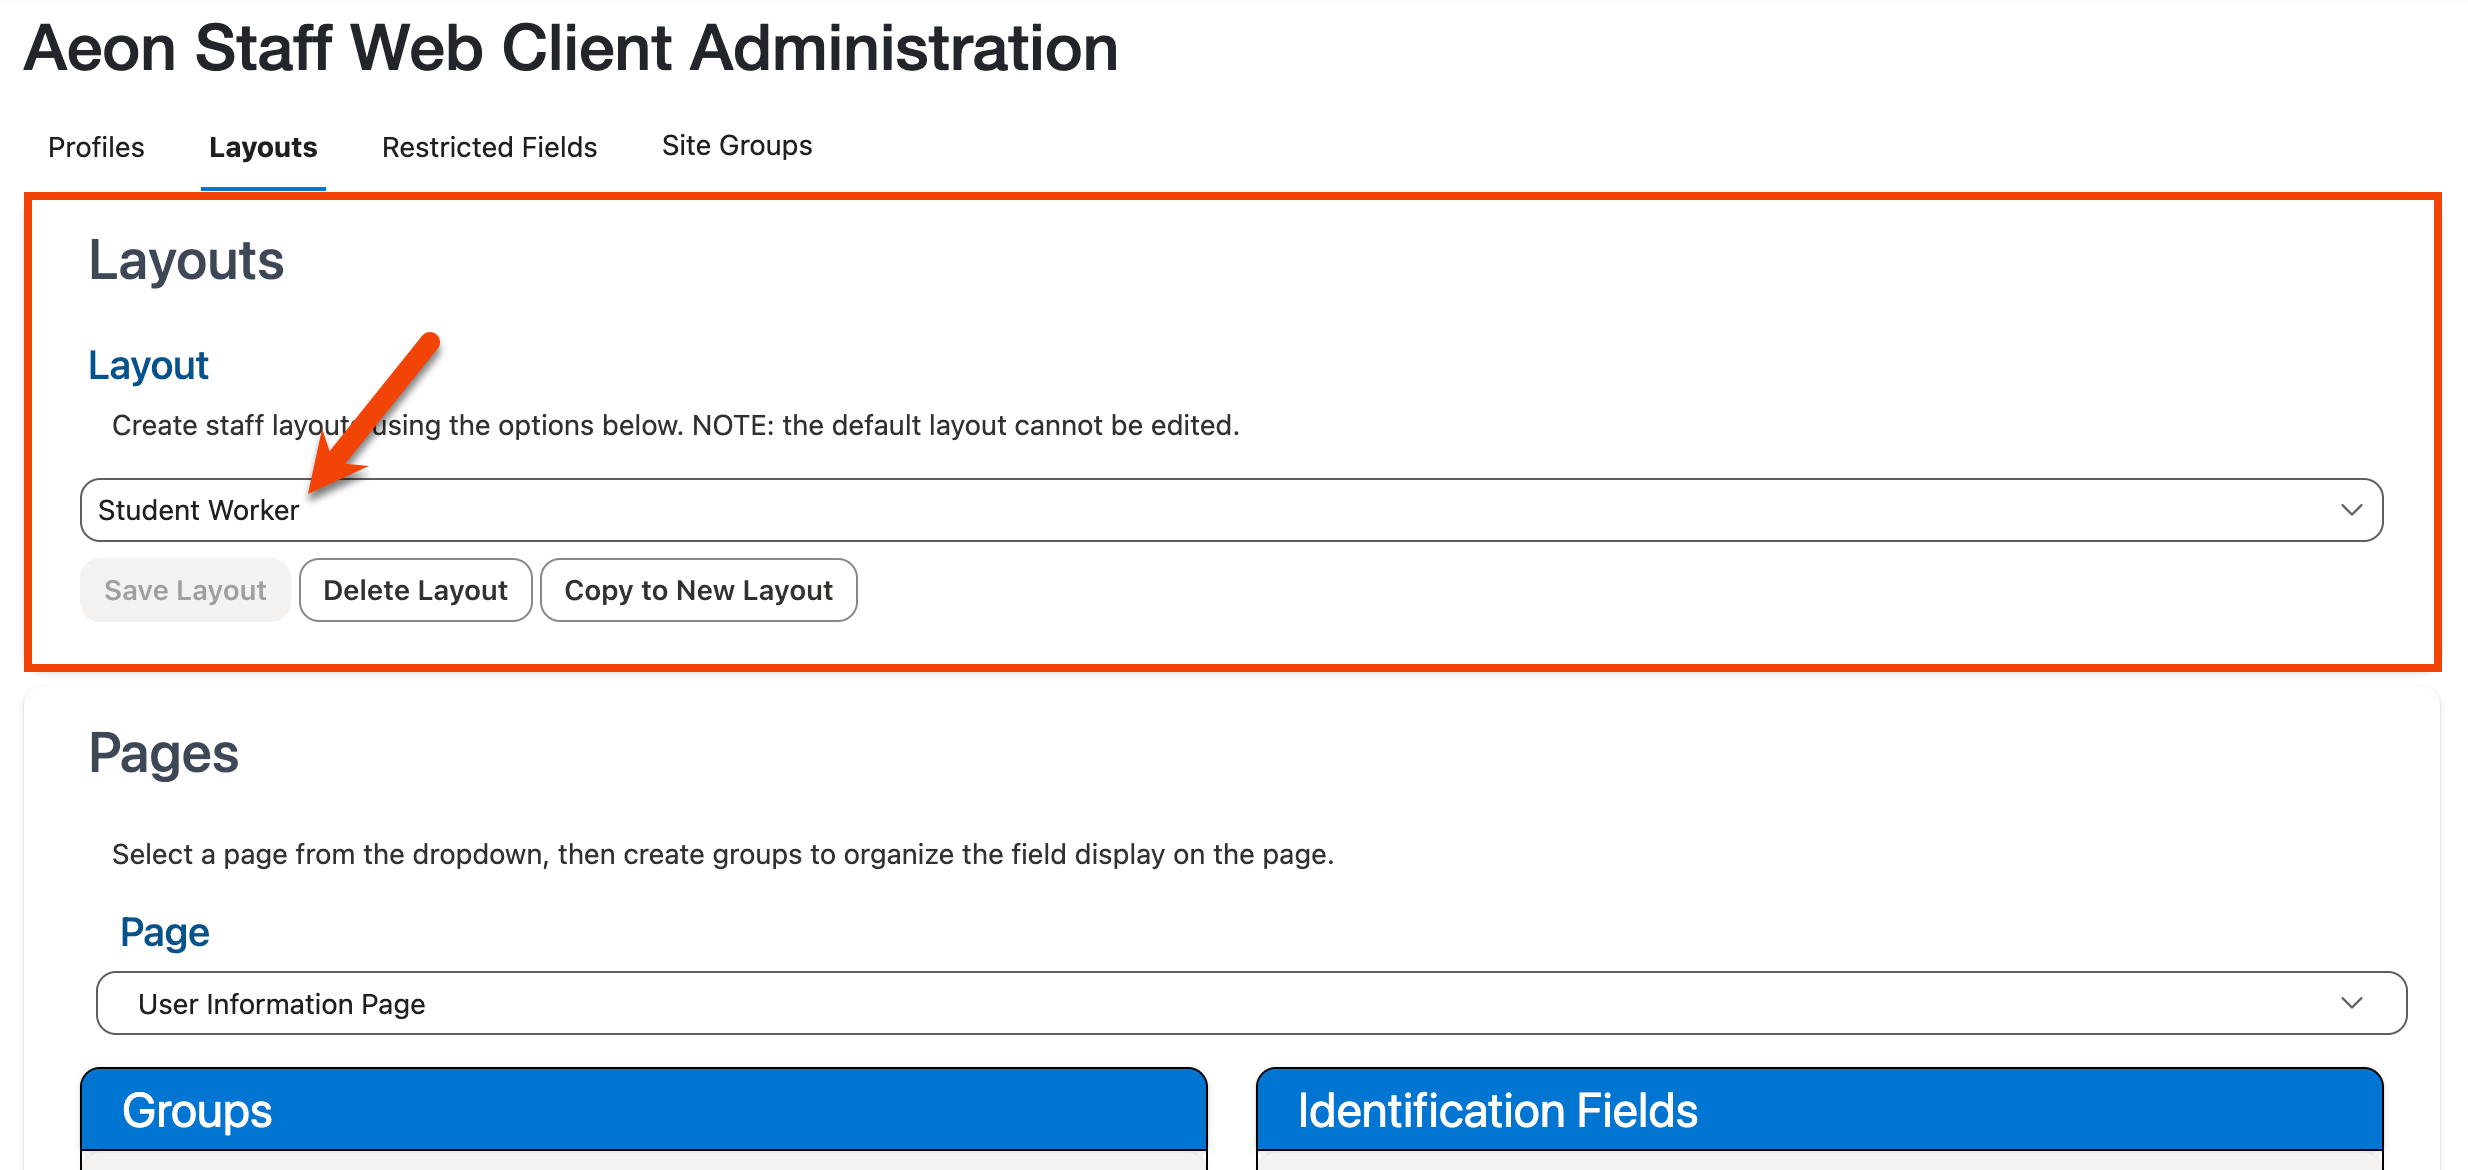
Note: The Default layout cannot be edited.
-
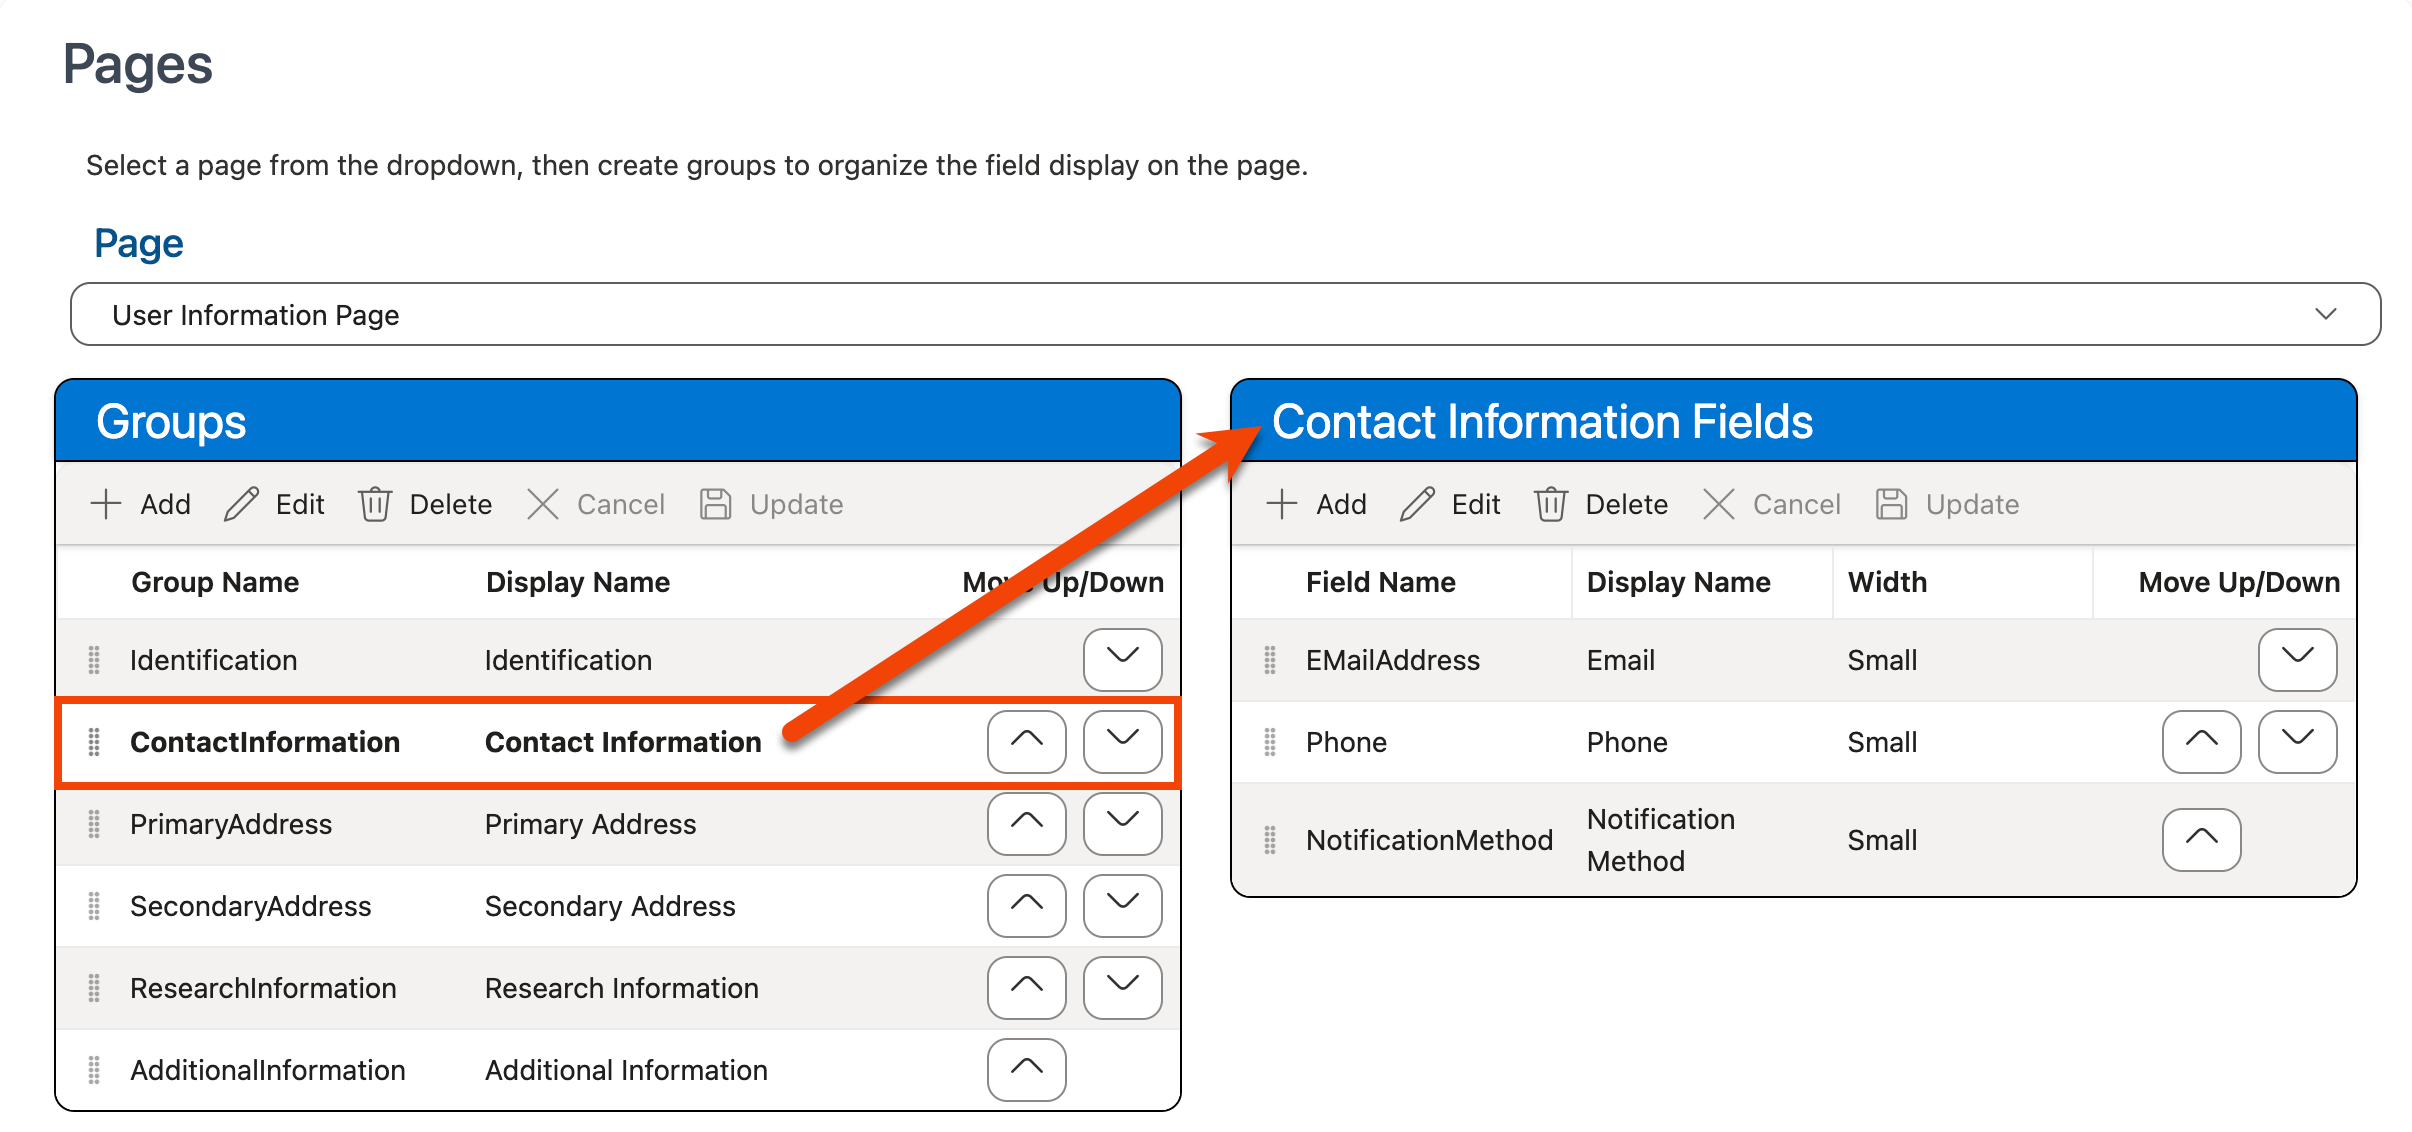
Select the page on which you want to reorder the fields from the Page dropdown located in the Pages section:

Note: Currently only the field order on the User Information page can be modified.
-
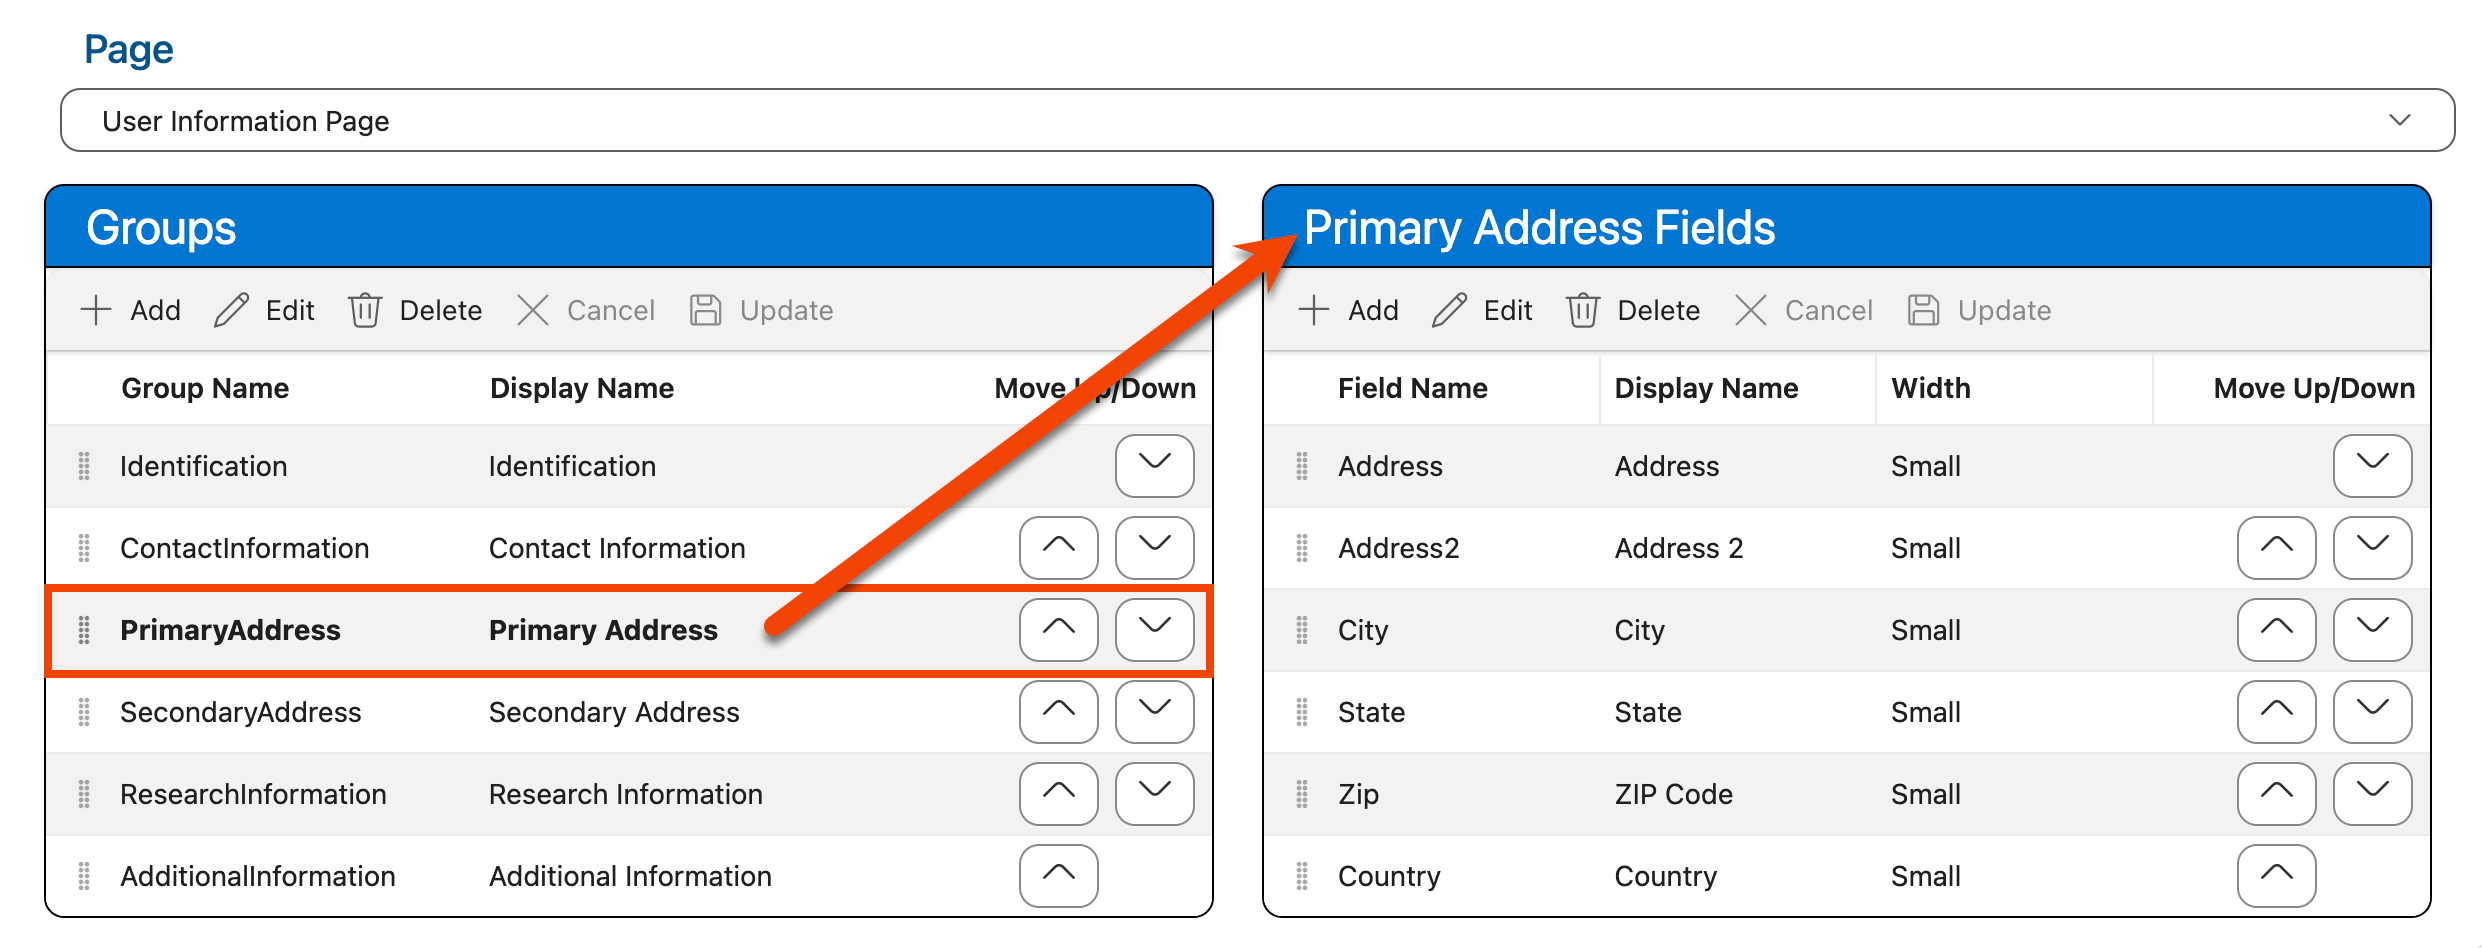
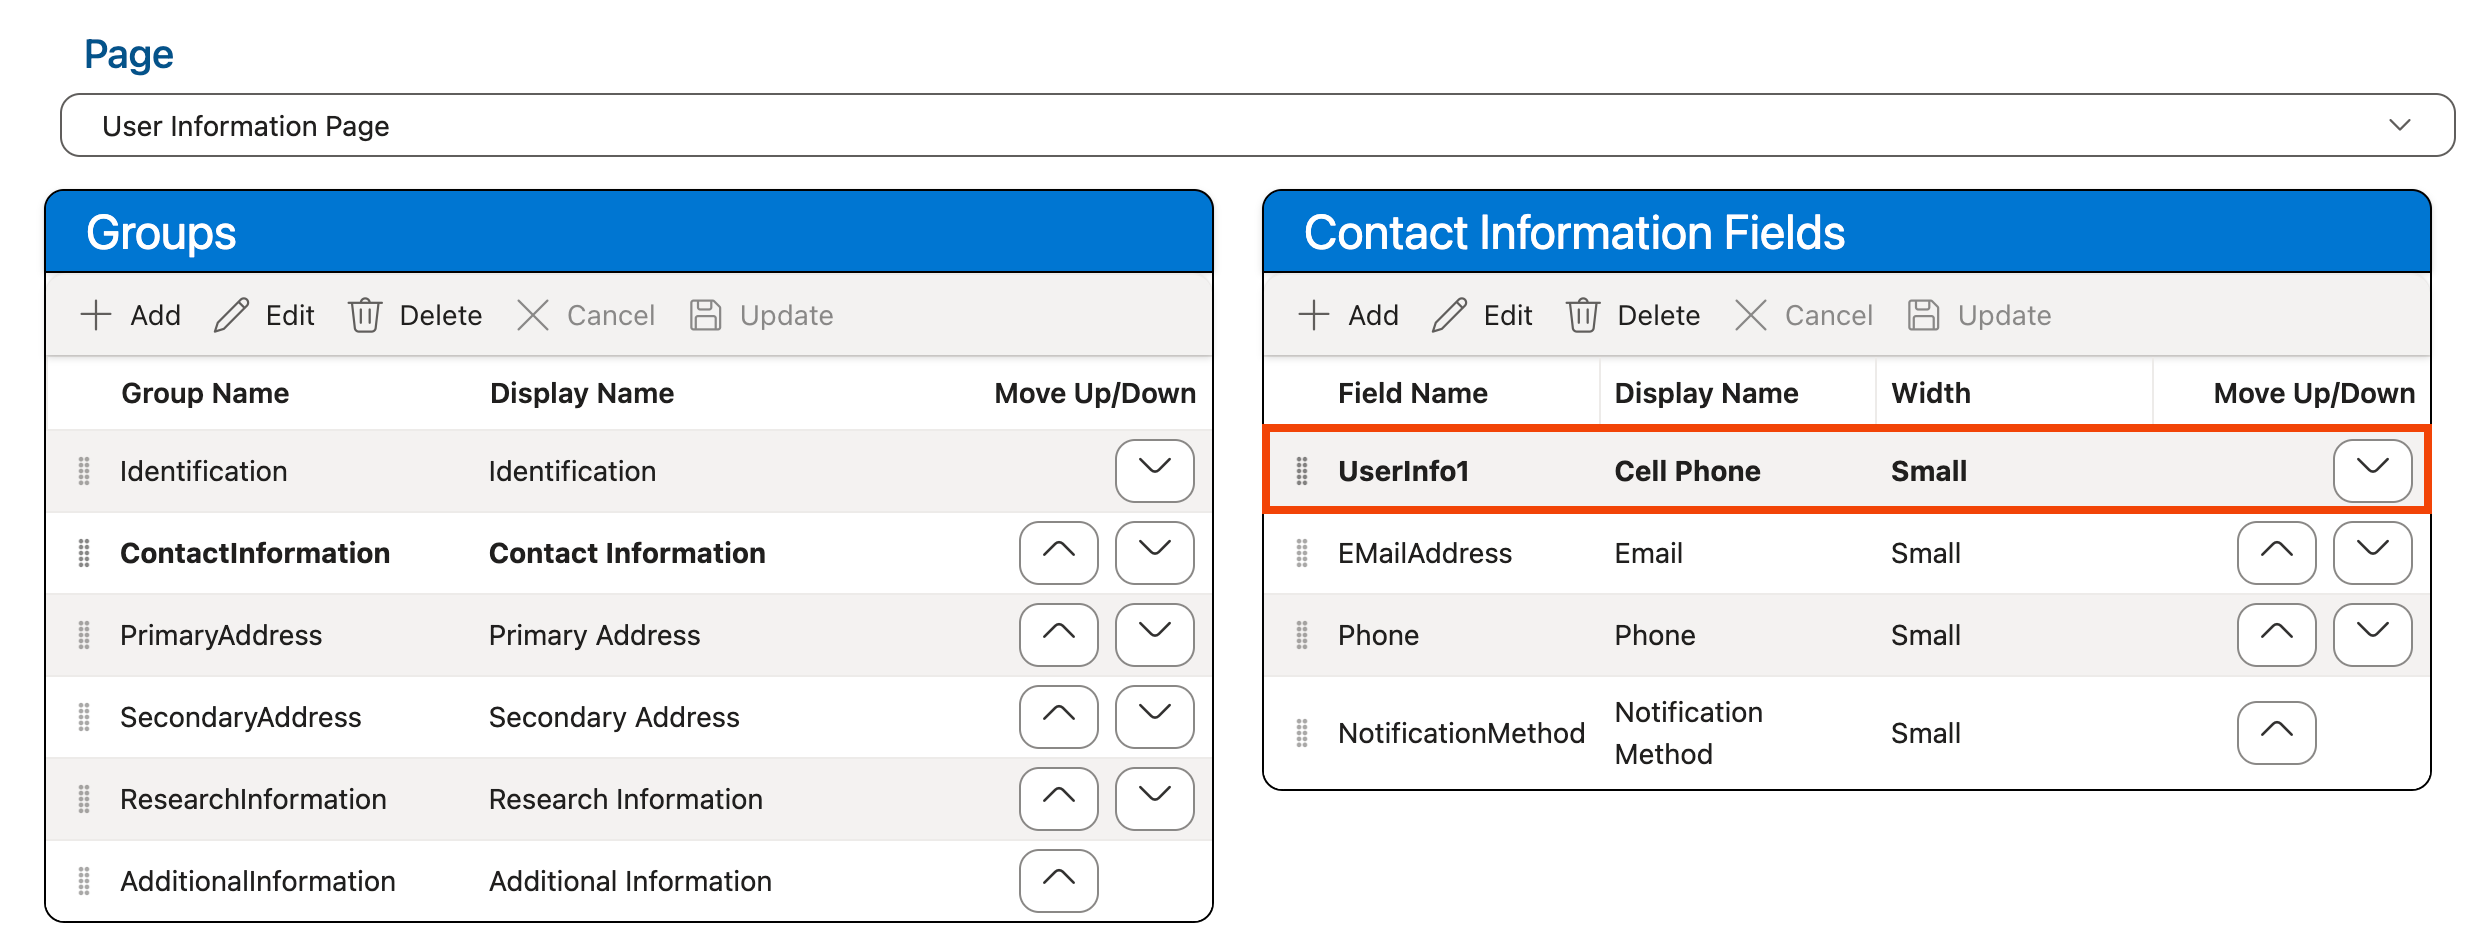
Click on the field grouping for which the fields should be reordered in the Groups grid. The individual fields within that grouping will appear in the Fields grid to the right:
-
Use the drag-and-drop controls (
 ) within the Fields grid to move the fields within the list in the desired order, or use the Move Up/Down arrow buttons (
 ) next to each field:
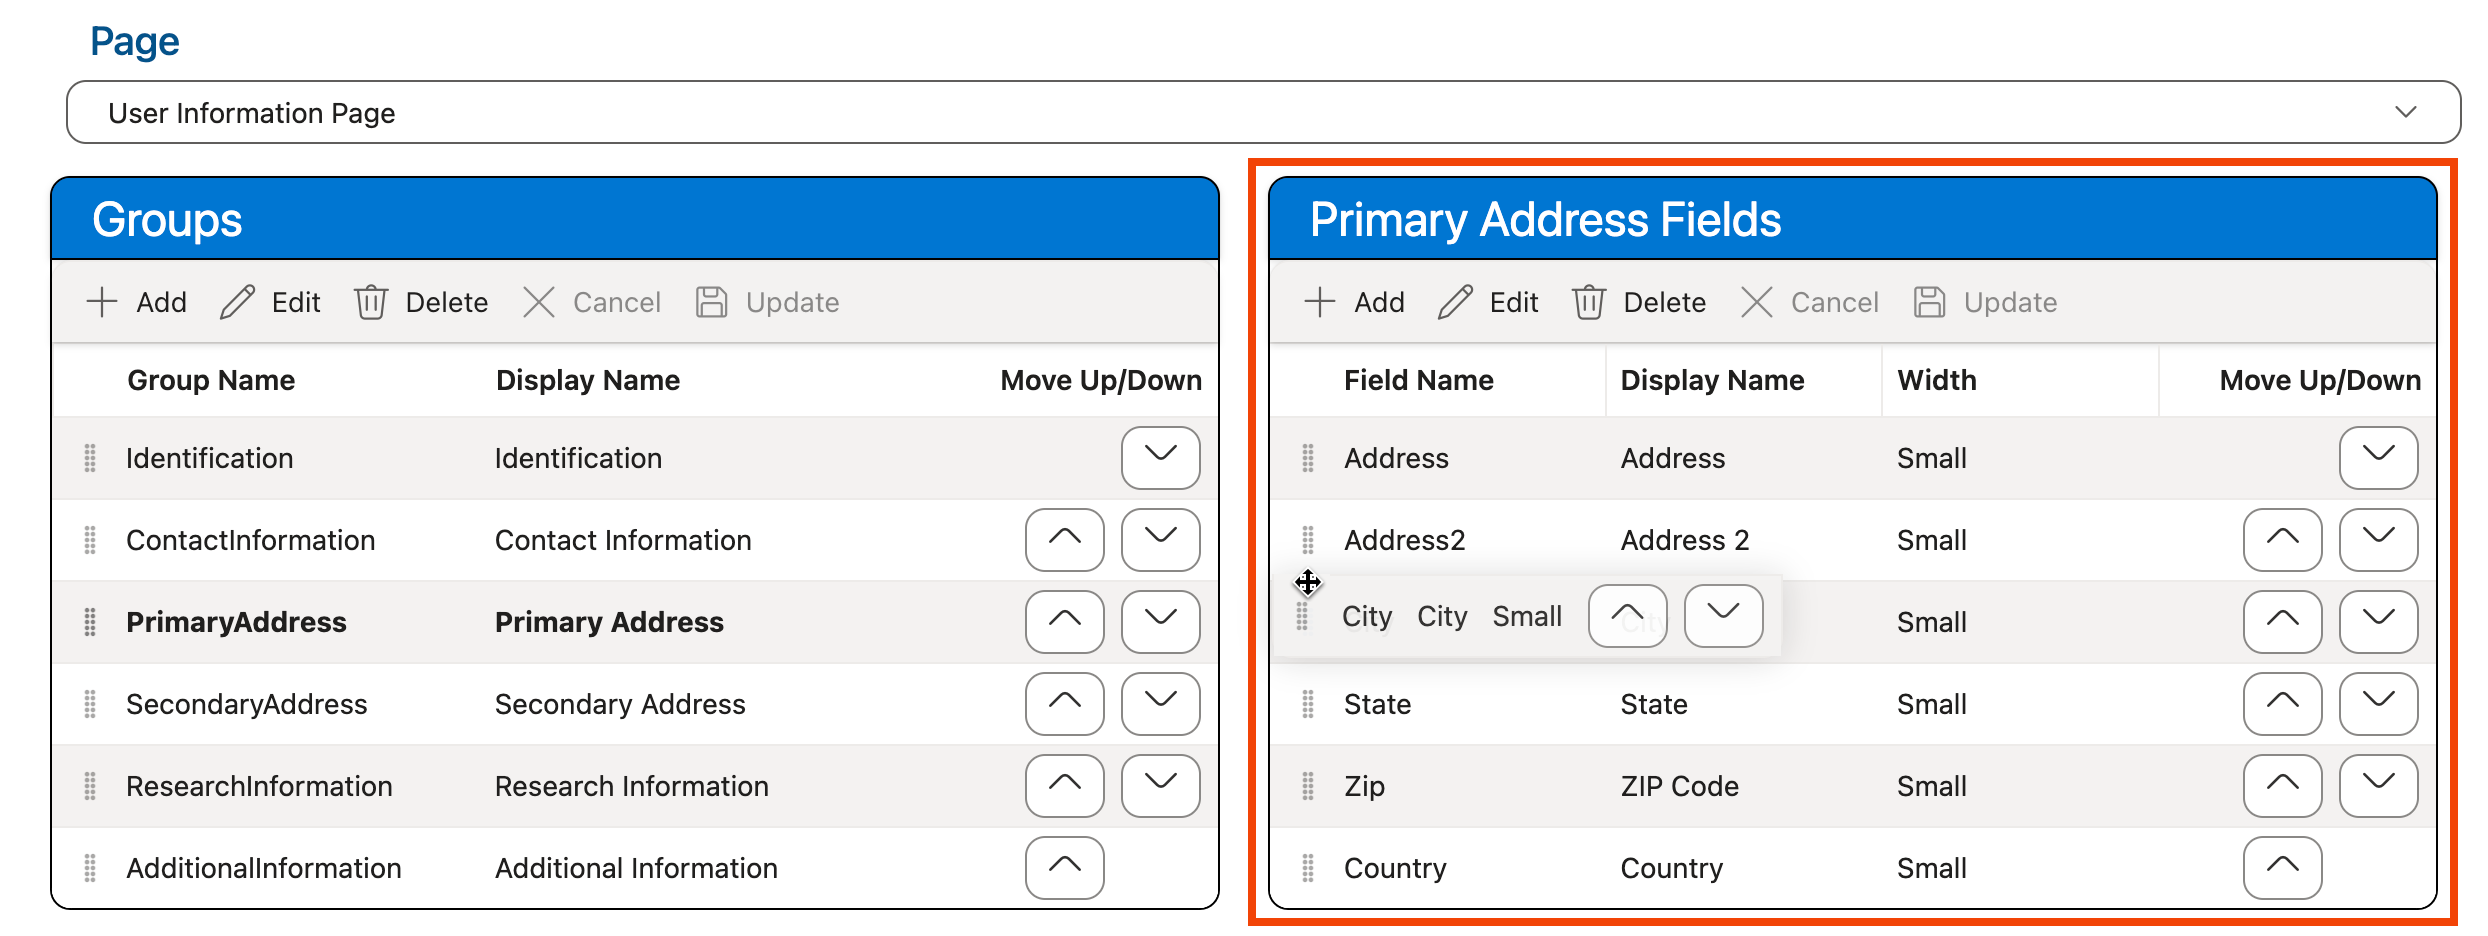
-
Use the keyboard shortcut CTRL-S (Windows)/Command-S (Mac) or click the Save Layout option at the top of the screen in the Layouts section to save your changes:
Adding Fields to a Grouping
To add a new field to an existing field grouping on a page:
-
Ensure that the layout for which you want to apply the changes is selected in the Layout dropdown at the top of the page:
Note: The Default layout cannot be edited.
-
Select the page on which you want to add the field from the Page dropdown located in the Pages section:
Note: Currently only the field order on the User Information page can be modified.
-
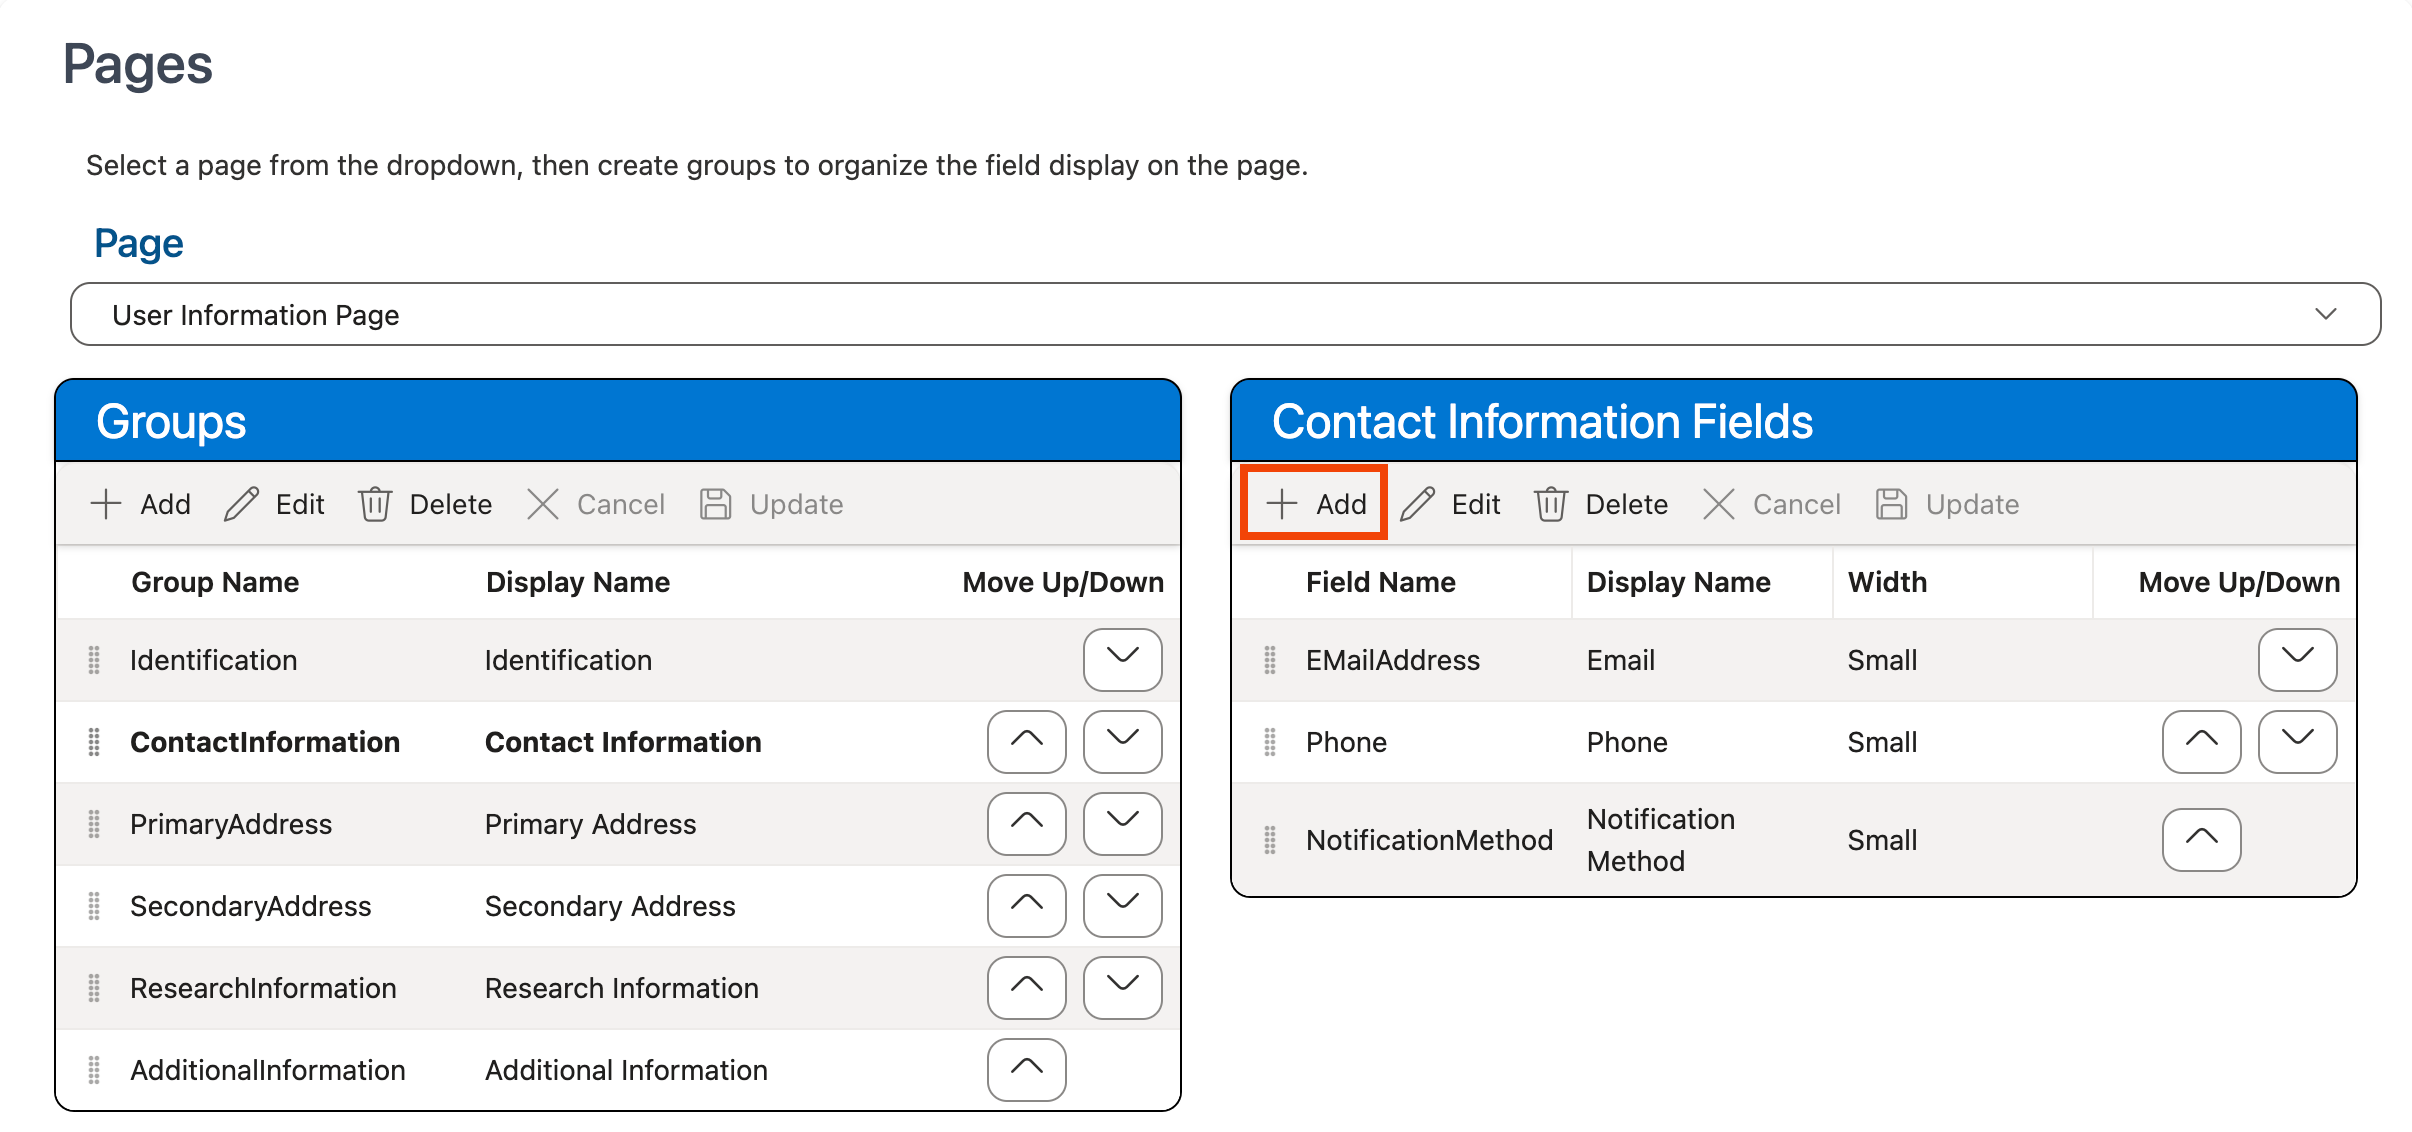
Use the Groups grid to select the grouping to which the field should be added. The fields within that grouping will display in the Fields grid to the right:
-
Click the + Add button at the top of the Fields grid:
-
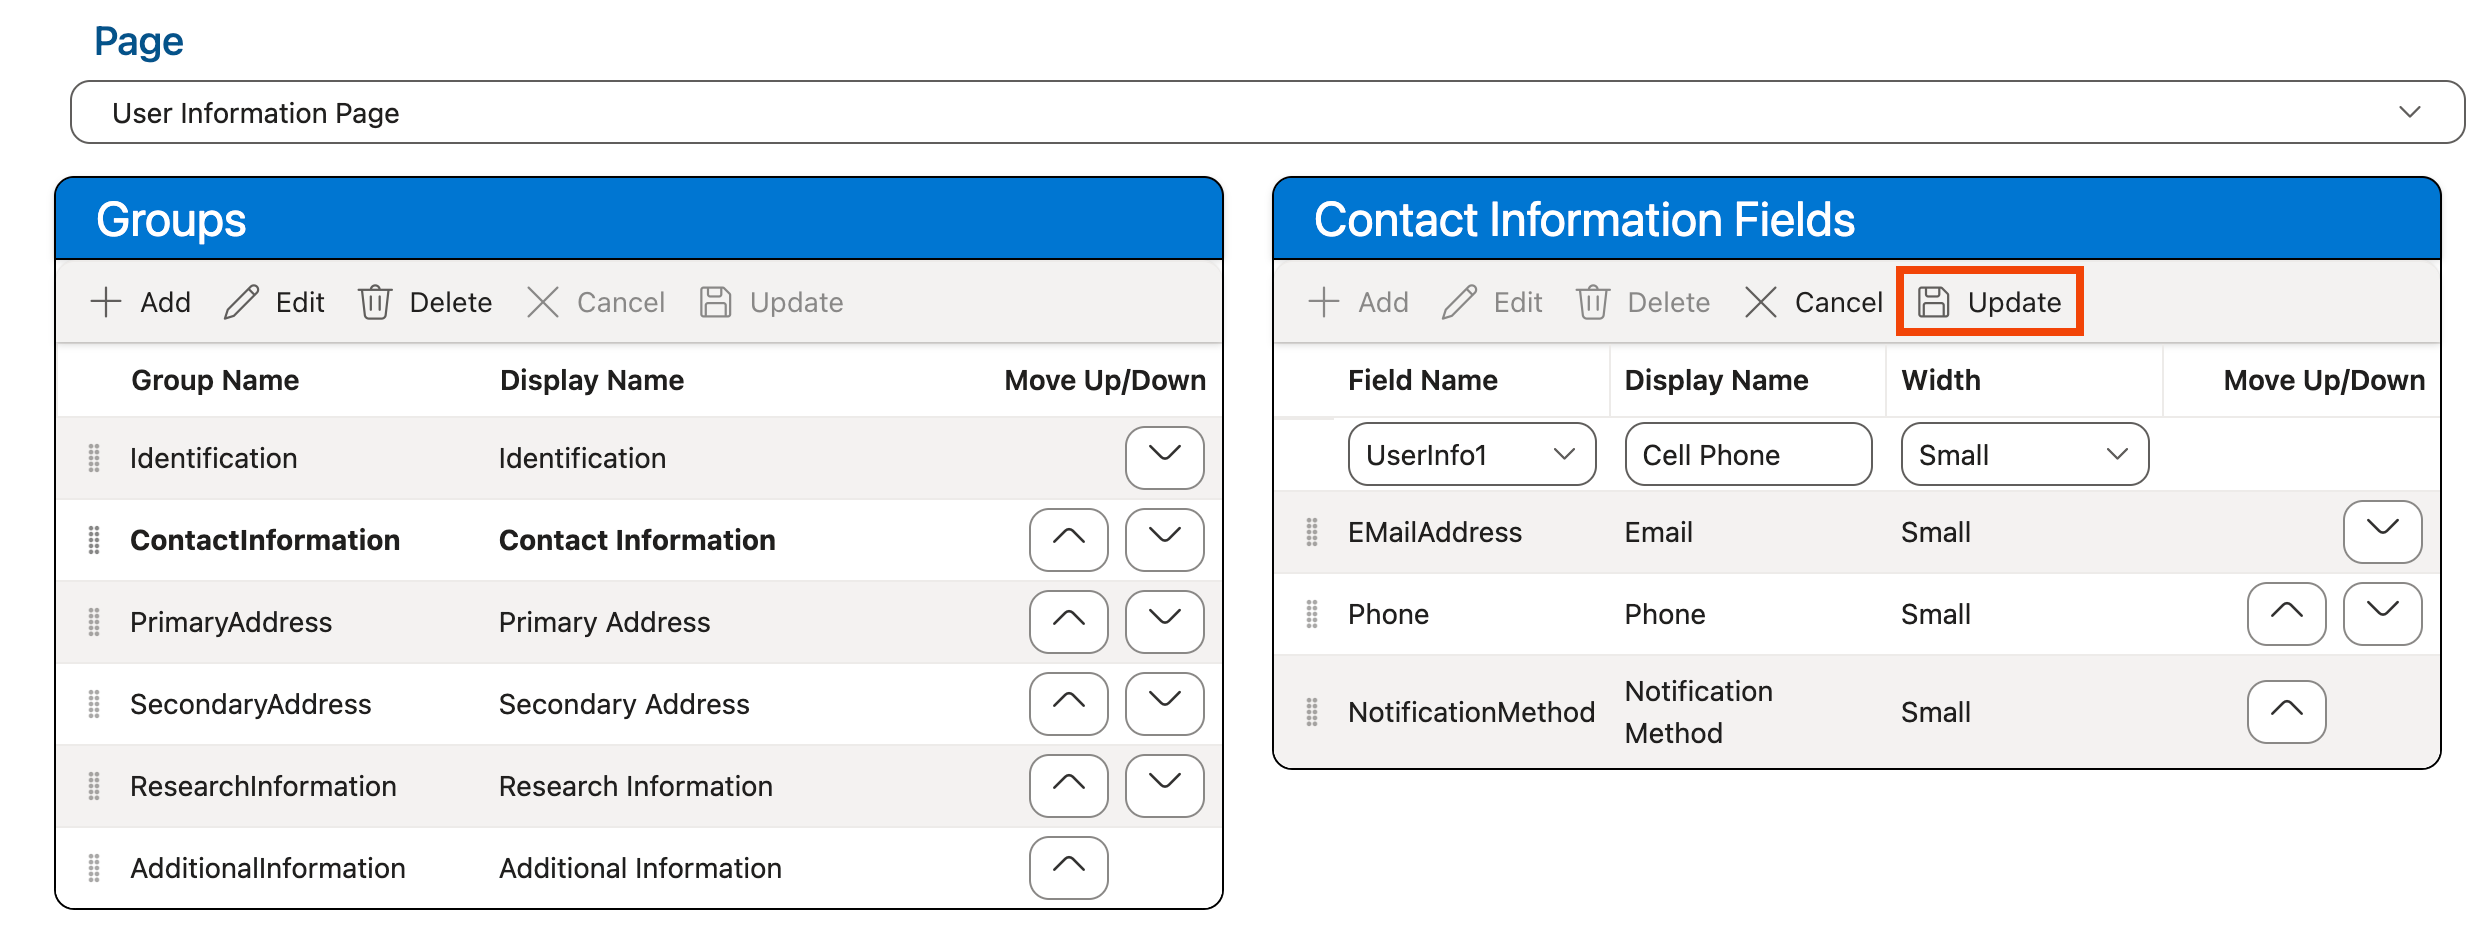
Choose the field you want to add from the Field Name dropdown.
Fields in the Users database table and any User-type custom fields defined in the Aeon Customization Manager will be selectable in the dropdown.
Handling for Duplicate Fields on a Page
You cannot have multiple copies of the same field in the same field grouping on a page, however, you can have multiple copies of the same field on a page if each copy of the field is in a different field grouping. For example, you cannot have two copies of the FirstName field in the Contact Information group on the User Information page, but you can have one copy of the FirstName field in the Contact Information group and another copy in the Identification group on the User Information page.
-
Enter the name that should be displayed for that field on the page in the Display Name column.
-
Choose the width you would like displayed for the field in the Width dropdown.
See Field Width Options above for examples of how each size will be displayed.
-
Click Update:
-
The field is added to the Fields grid:
-
Use the drag-and-drop controls (
) or the Move Up/Down arrow buttons () in the Fields grid to move the new field into the position where you would like it to display on the page, if necessary. -
Use the keyboard shortcut CTRL-S (Windows)/Command-S (Mac) or click the Save Layout option at the top of the screen in the Layouts section to save your changes:
Removing Fields from a Grouping
To remove a field from a grouping on a page:
-
Ensure that the layout for which you want to apply the changes is selected in the Layout dropdown at the top of the page:
Note: The Default layout cannot be edited.
-
Select the page on which you want to remove the field(s) from the Page dropdown located in the Pages section:
Note: Currently only the field order on the User Information page can be modified.
-
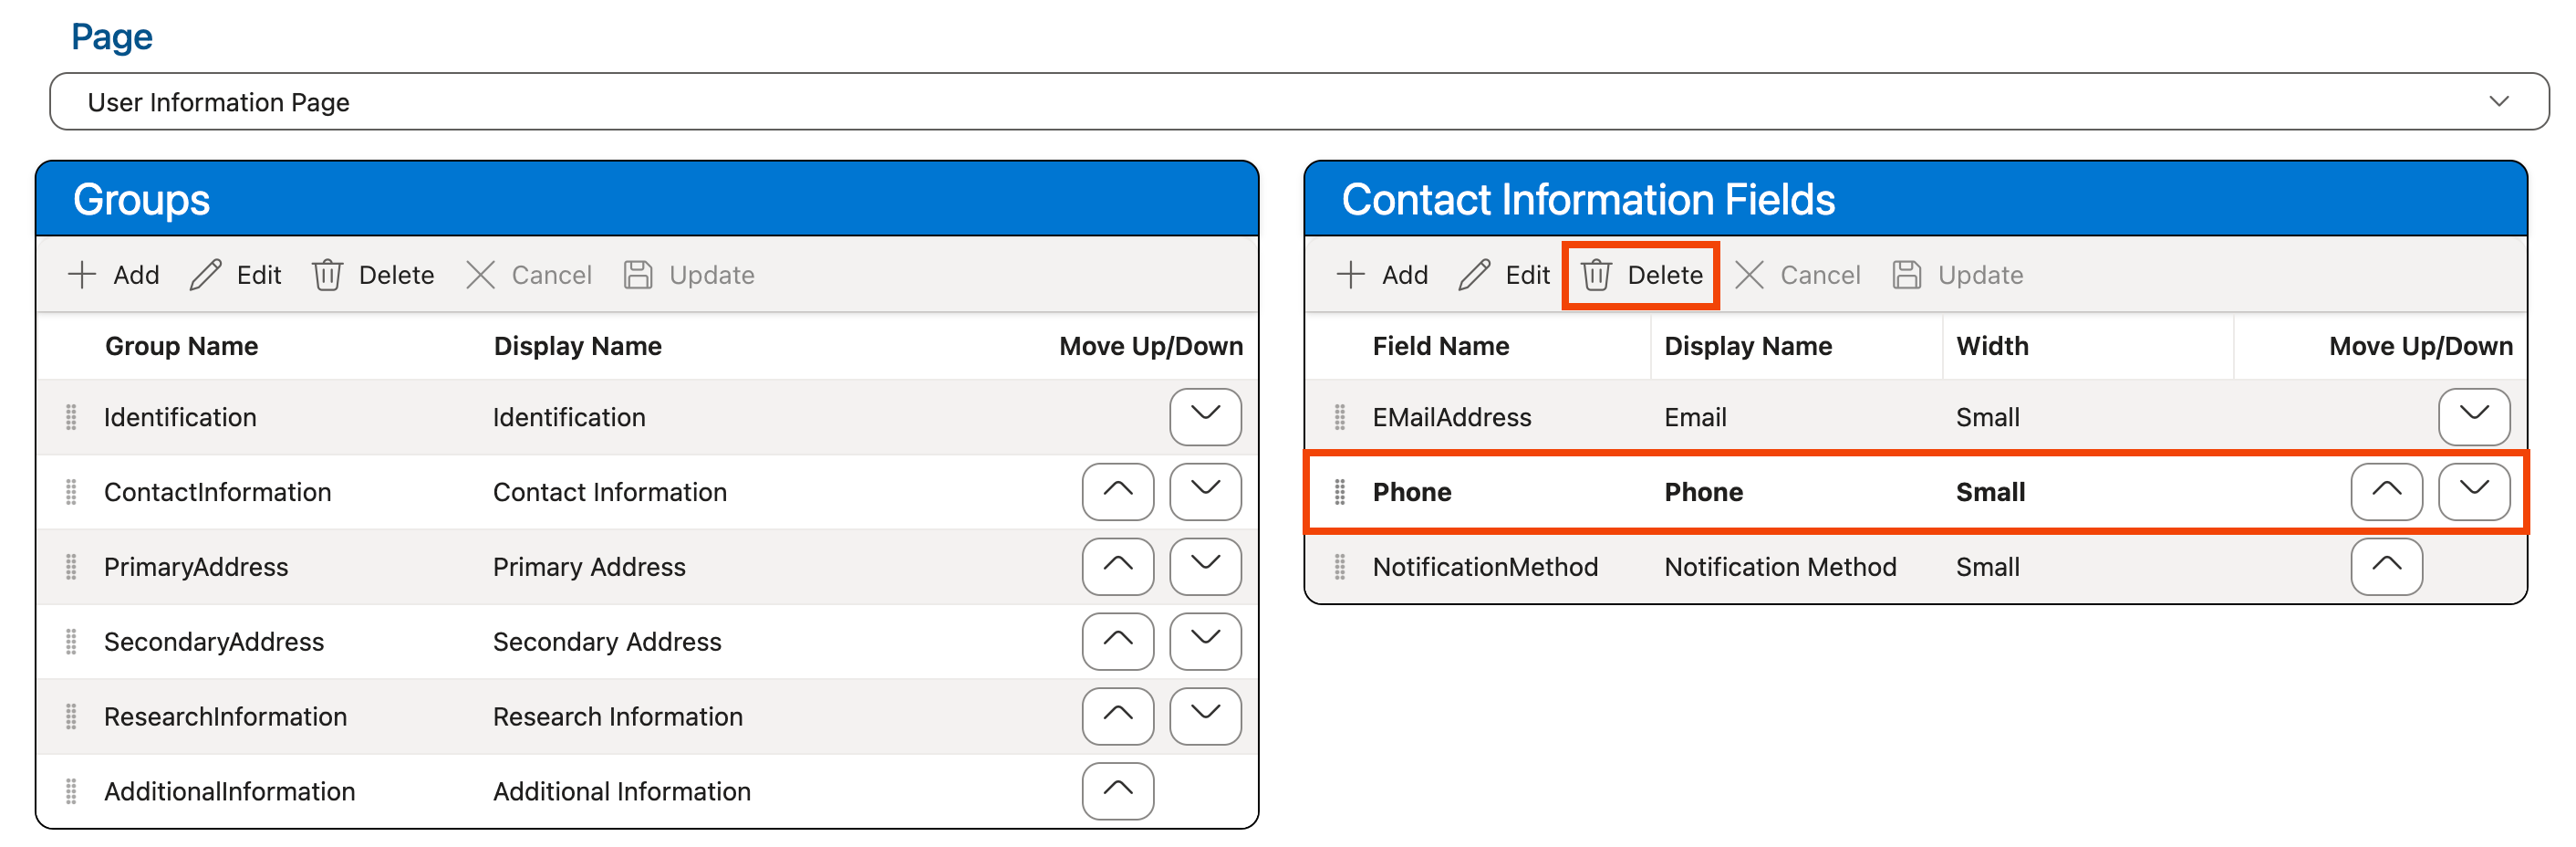
Use the Groups grid to select the grouping from which the field should be removed. The fields within that grouping will display in the Fields grid to the right:
-
Click on the field that you want to remove in the Fields grid to select it.
-
Click Delete:
-
The field is removed from the Fields grid.
-
Use the keyboard shortcut CTRL-S (Windows)/Command-S (Mac) or click the Save Layout option at the top of the screen in the Layouts section to save your changes:
Changing Field Display Options
To change how a field is displayed on a page:
-
Ensure that the layout for which you want to apply the changes is selected in the Layout dropdown at the top of the page:
Note: The Default layout cannot be edited.
-
Select the page on which you want to change the display options for the field from the Page dropdown located in the Pages section:
Note: Currently only the field order on the User Information page can be modified.
-
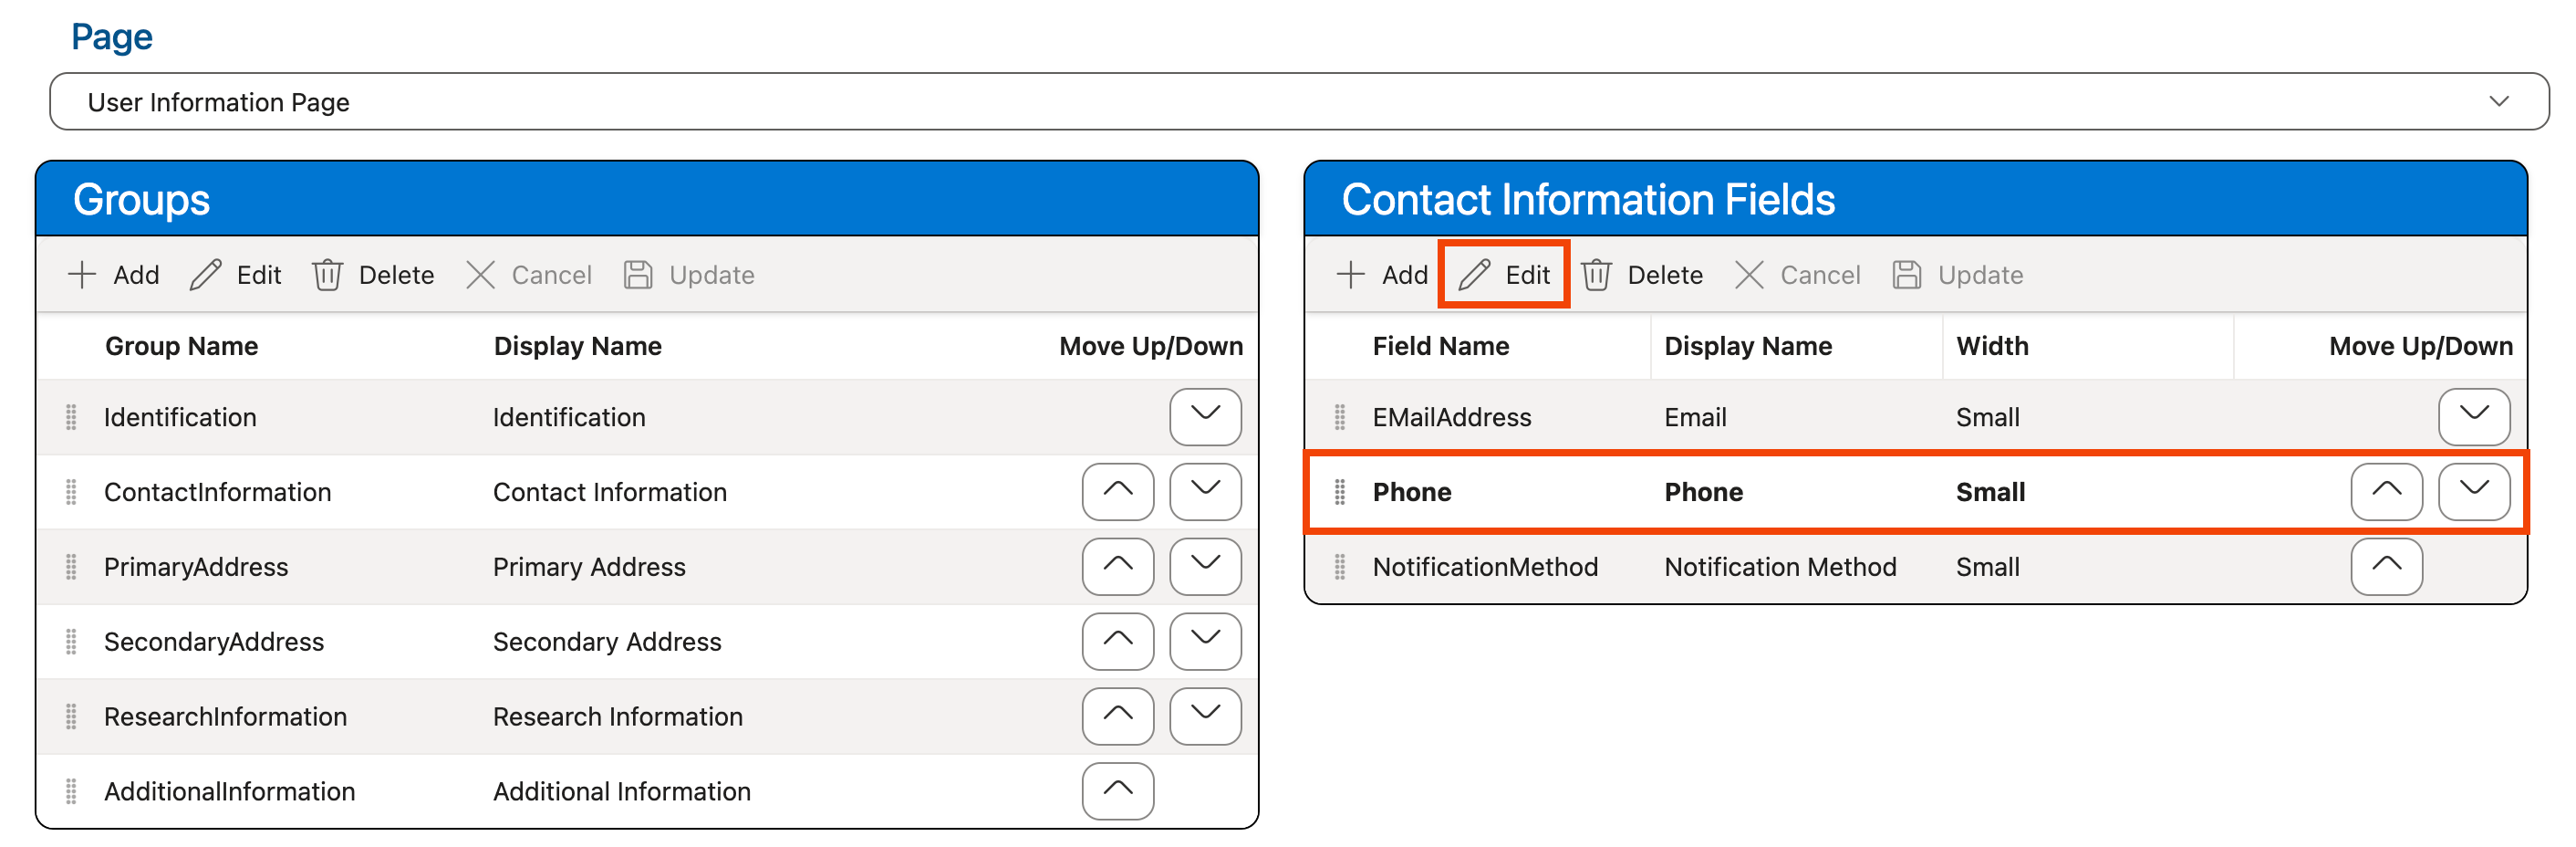
Use the Groups grid to select the grouping that contains the field that should be modified. The fields within that grouping will display in the Fields grid to the right:
-
Click on the field that you want to rename in the Fields grid to select it.
-
Click Edit:
-
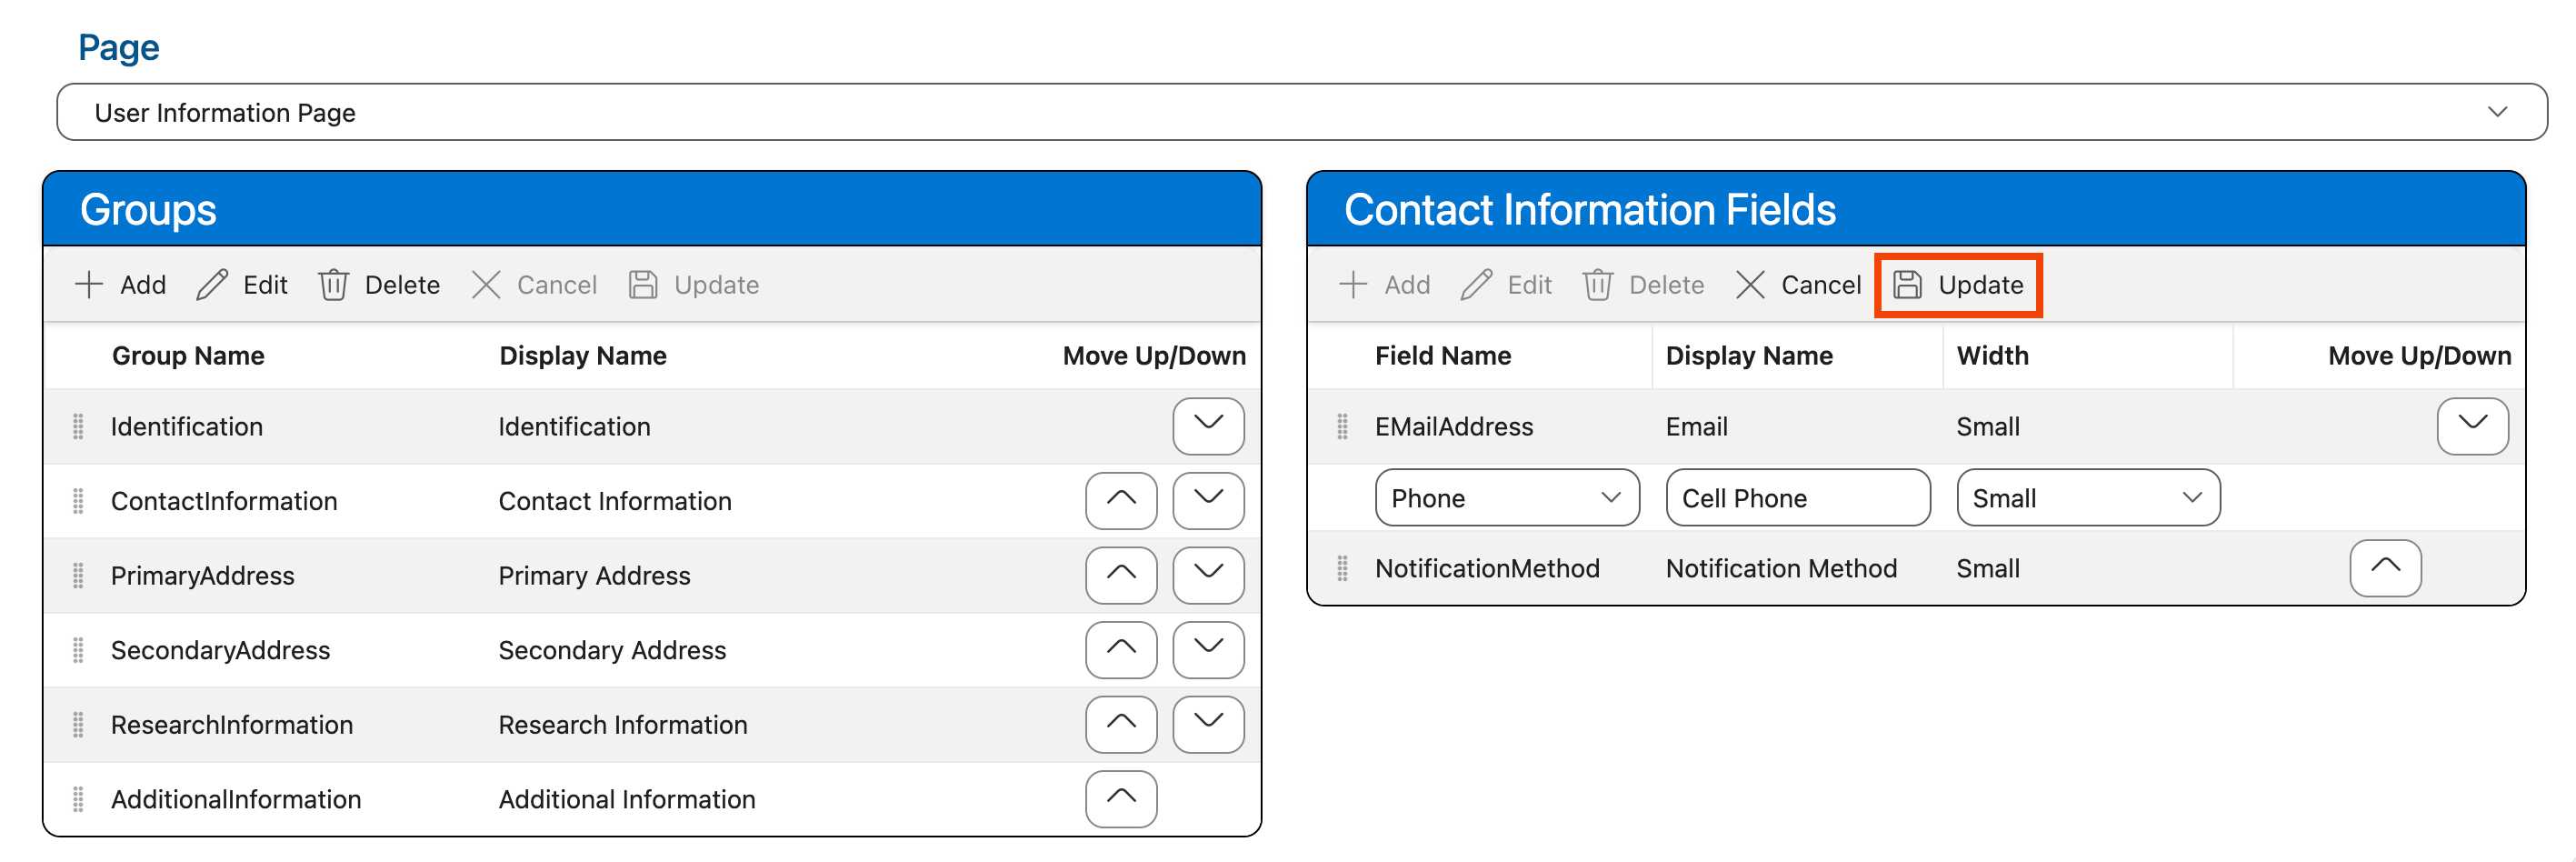
To modify the name that should be displayed for the field on the selected page, change the value in the Display Name column.
-
To modify the width you would like displayed for the field on the selected page, change the value in the Width dropdown.
See Field Width Options above for examples of how each size will be displayed.
-
Click Update:
-
Use the keyboard shortcut CTRL-S (Windows)/Command-S (Mac) or click the Save Layout option at the top of the screen in the Layouts section to save your changes: