Customizing Web Client Grids
From the Grid Columns section, you can edit the columns that will appear in different customizable grids in the web client. First, use the Grid Type dropdown to choose which type of grid to edit (Transactions, Users, or Activities). Then, use the Grid Context dropdown to choose the context, or location in the web client, where the grid should be edited. This allows you to customize that grid differently depending on where the grid is used in the web client. For example, you can customize the Transactions grid on the User Information page to display a different set of columns from those displayed in the Transactions grid on the Search Results page.
Grid Customization Options|Customizing Grid Columns
Grid Customization Options
The following sections list the grid contexts available for customization for each selectable grid type (Transactions, Users, and Activities) as well as the fields that can be added to each type of grid:
See Aeon Database Tables for the complete list of fields in each table noted below.
Transactions Grids
Available Contexts:
- UserPage: Controls the information displayed in the Transactions grid on the User Information page
- SearchResult: Controls the information displayed in the Transactions grid on the Search Results page
- QueueList: Controls the information displayed in the Transactions grid accessed from double-clicking a queue from the Request List section of the Dashboard
- Appointment: Controls the information displayed in the Transactions grid on the Appointment form
Available Fields: Fields from the following database tables are available to be added to Transactions grids:
- Appointments
- Transactions
- Users
- Transaction and User-type custom fields defined in the Aeon Customization Manager's CustomFieldDefinitions table
Users Grids
Available Contexts:
- SearchResult: Controls the information displayed in the Users grid on the Search Results page
Available Fields: Fields from the following database tables are available to be added to Users grids:
- Users
- User-type custom fields defined in the Aeon Customization Manager's CustomFieldDefinitions table
Activities Grids
Available Contexts:
- SearchResult: Controls the information displayed in the Activities grid on the Search Results page
Available Fields: Fields from the following database tables are available to be added to Activities grids:
- Activities
- Activity-type custom fields defined in the Aeon Customization Manager's CustomFieldDefinitions table
Customizing Grid Columns
Reordering Fields in a Grid
To reorder the fields displayed in a grid:
-
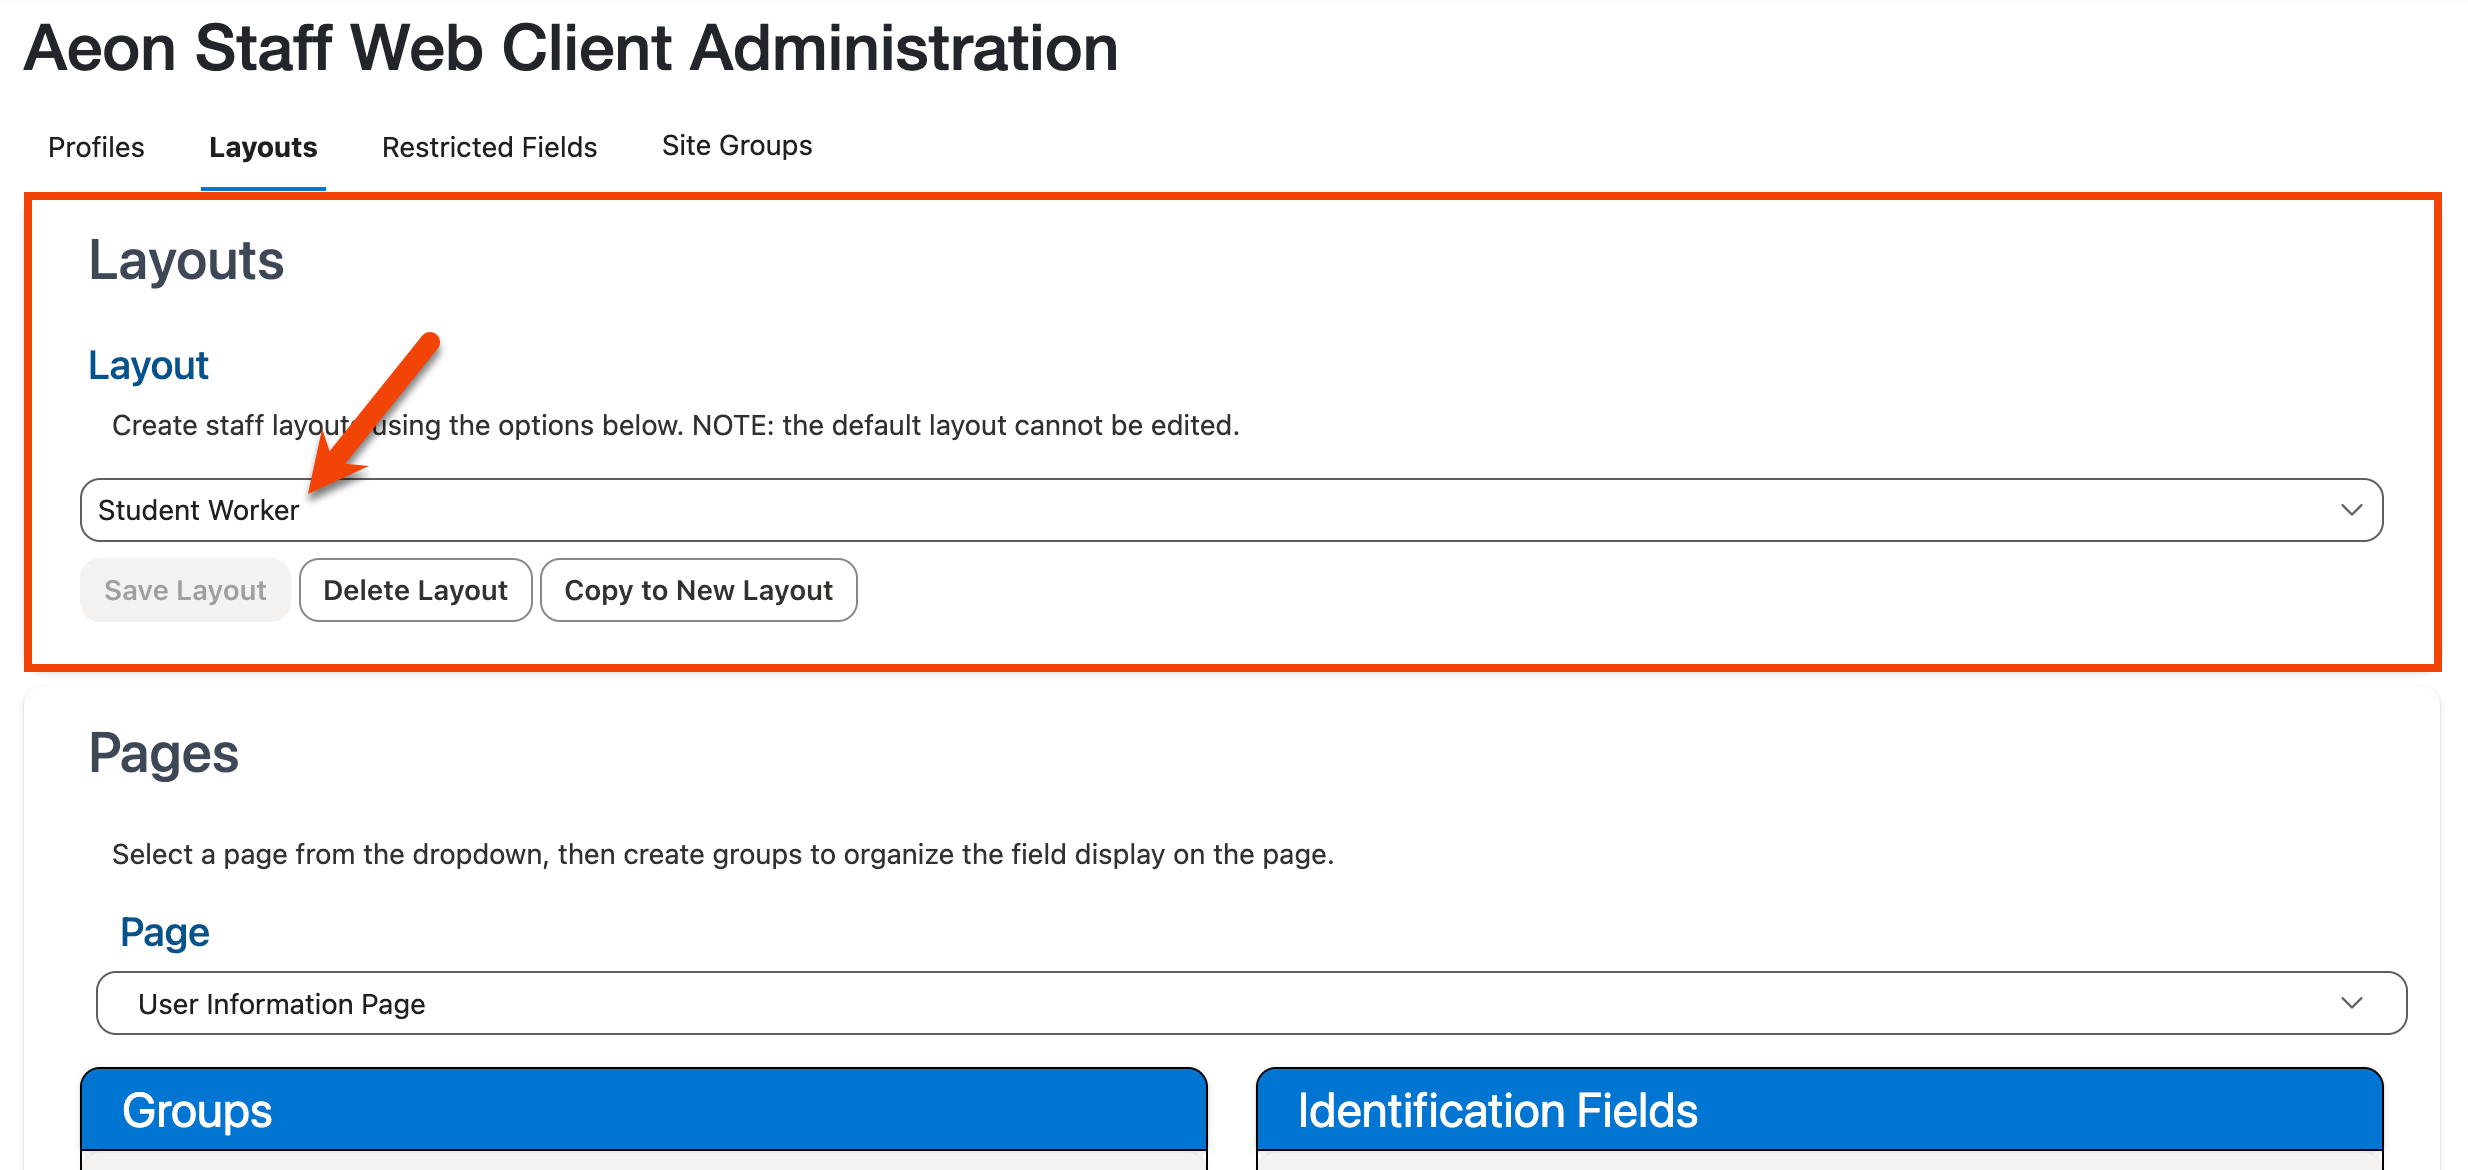
Ensure that the layout for which you want to apply the changes is selected in the Layout dropdown at the top of the page:
-
In the Grid Columns section at the bottom of the page, use the Grid Type and Grid Context dropdowns to choose the grid for which you want to reorder the fields. The Columns grid below will display the fields in the selected grid:
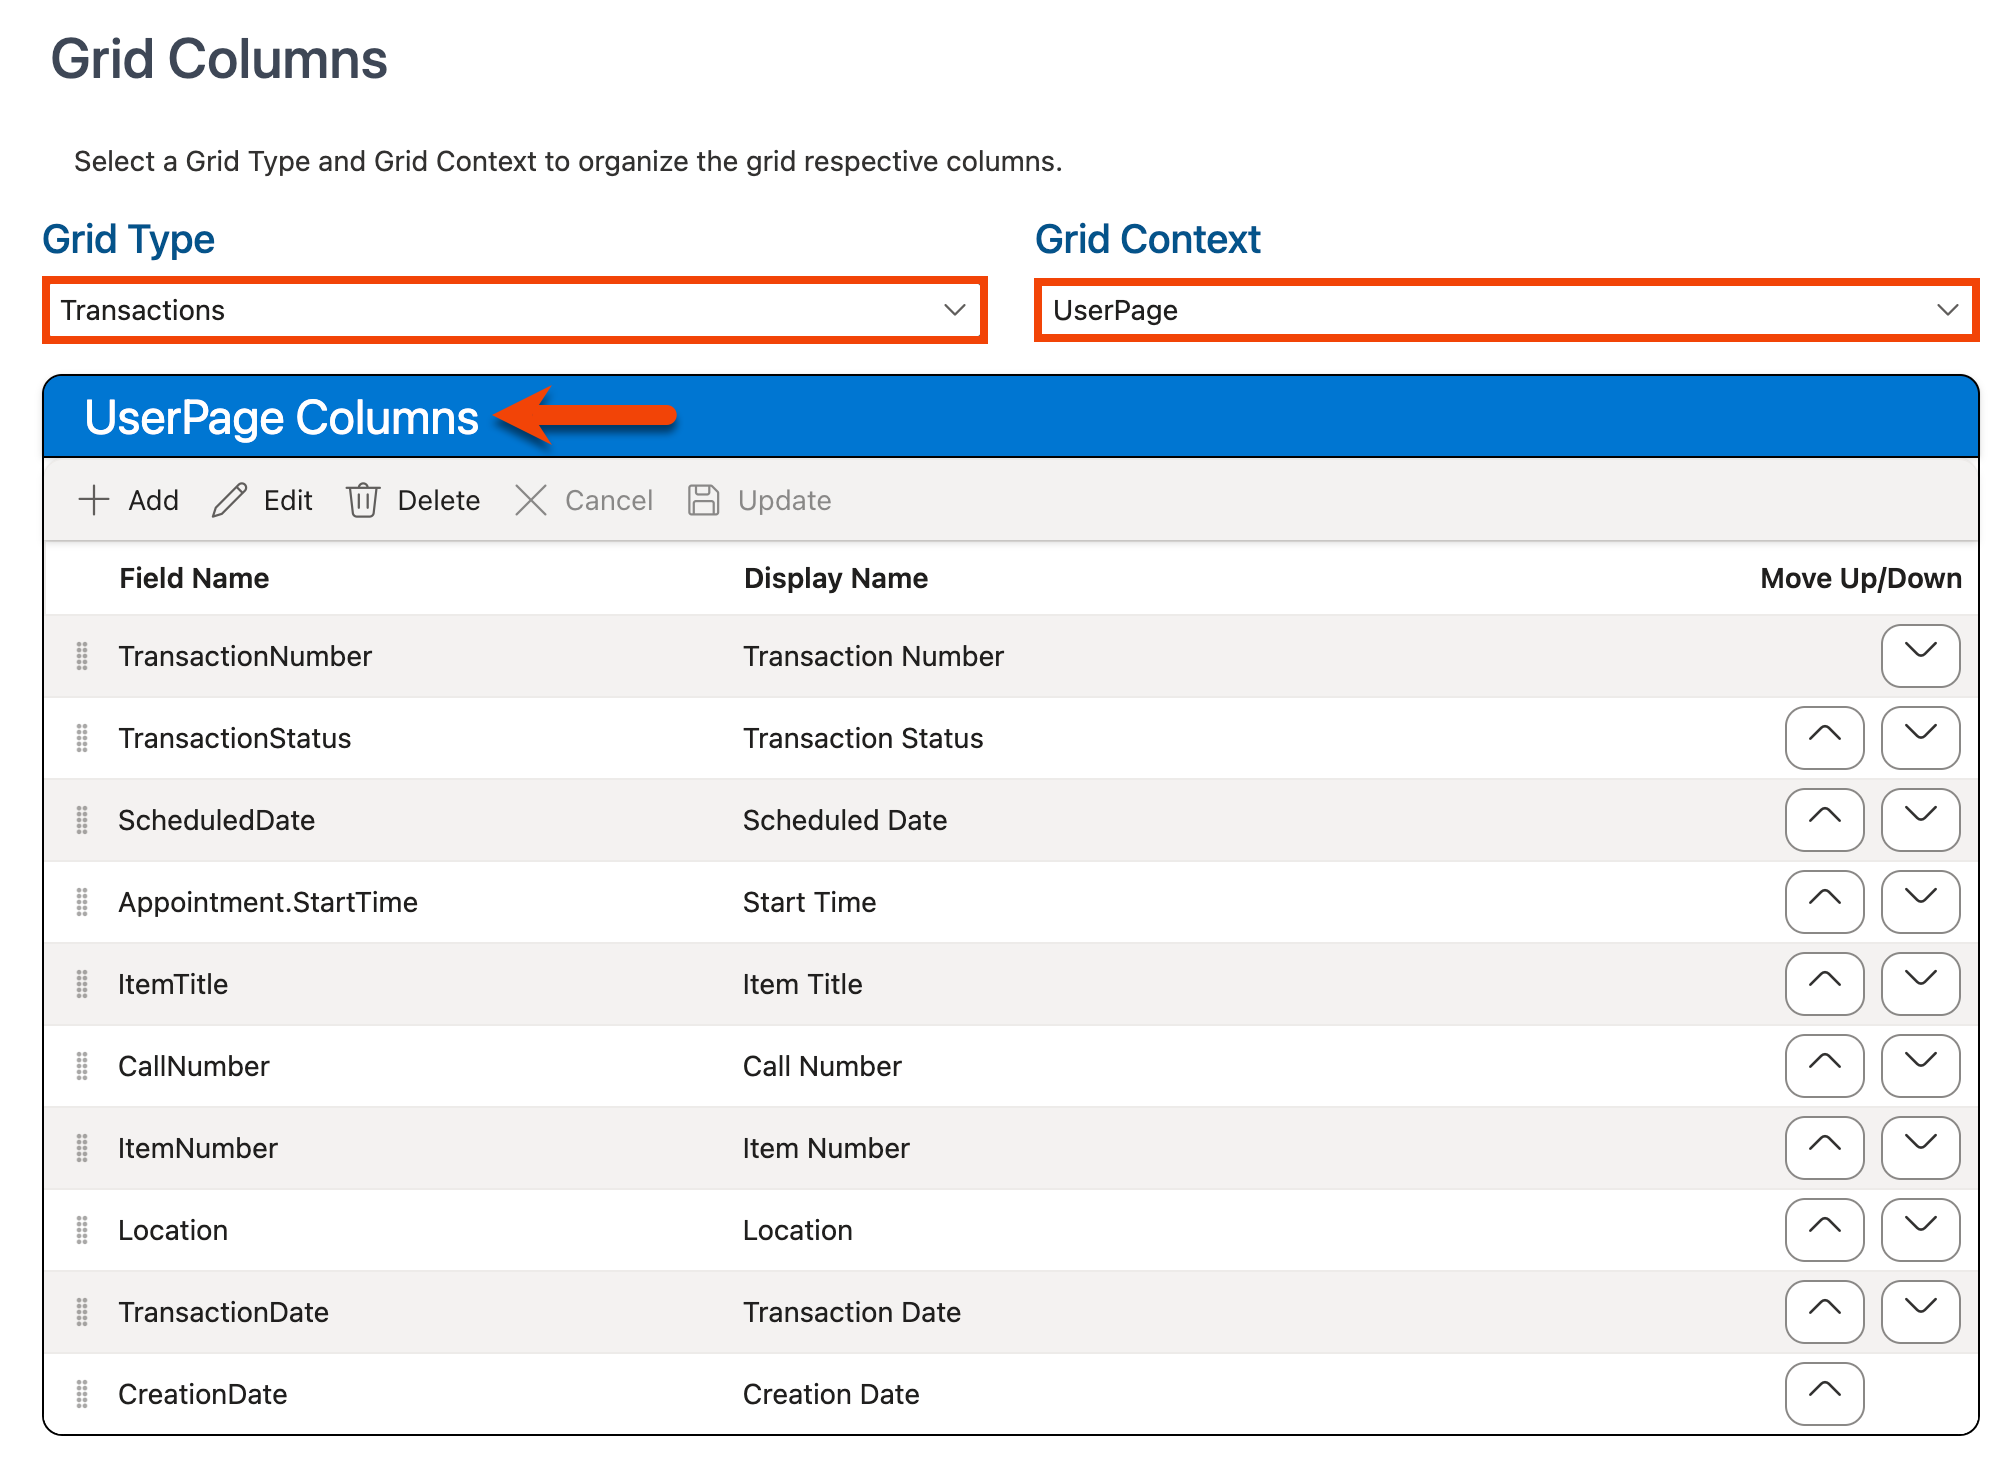
See Grid Customization Options above for detailed information on these options.
-
Use the drag-and-drop controls (
 ) within the Columns grid to move the fields within the list in the desired order, or use the Move Up/Down arrow buttons (
 ) next to each field:
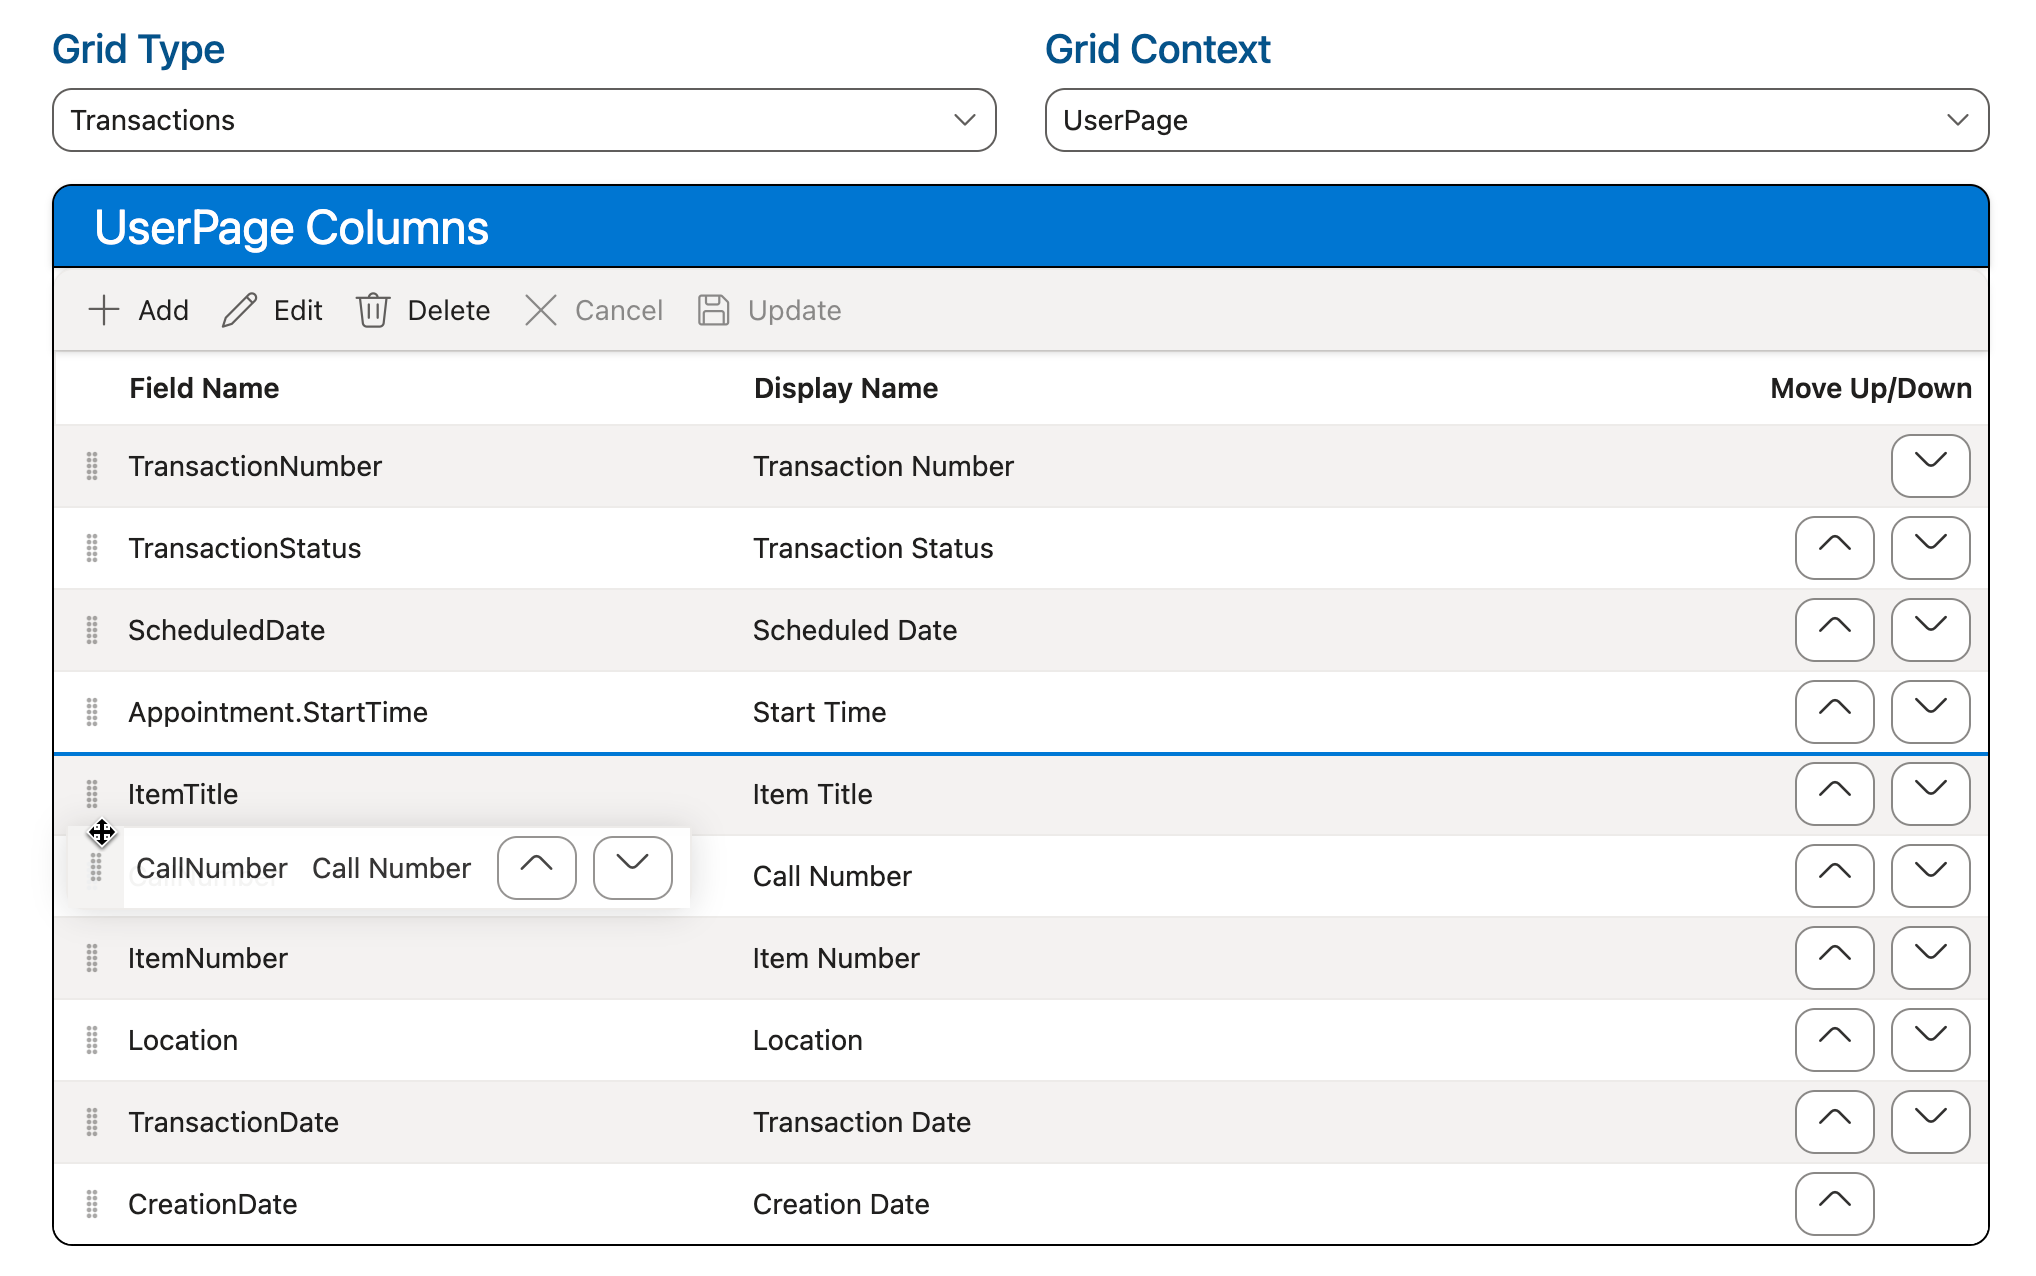
-
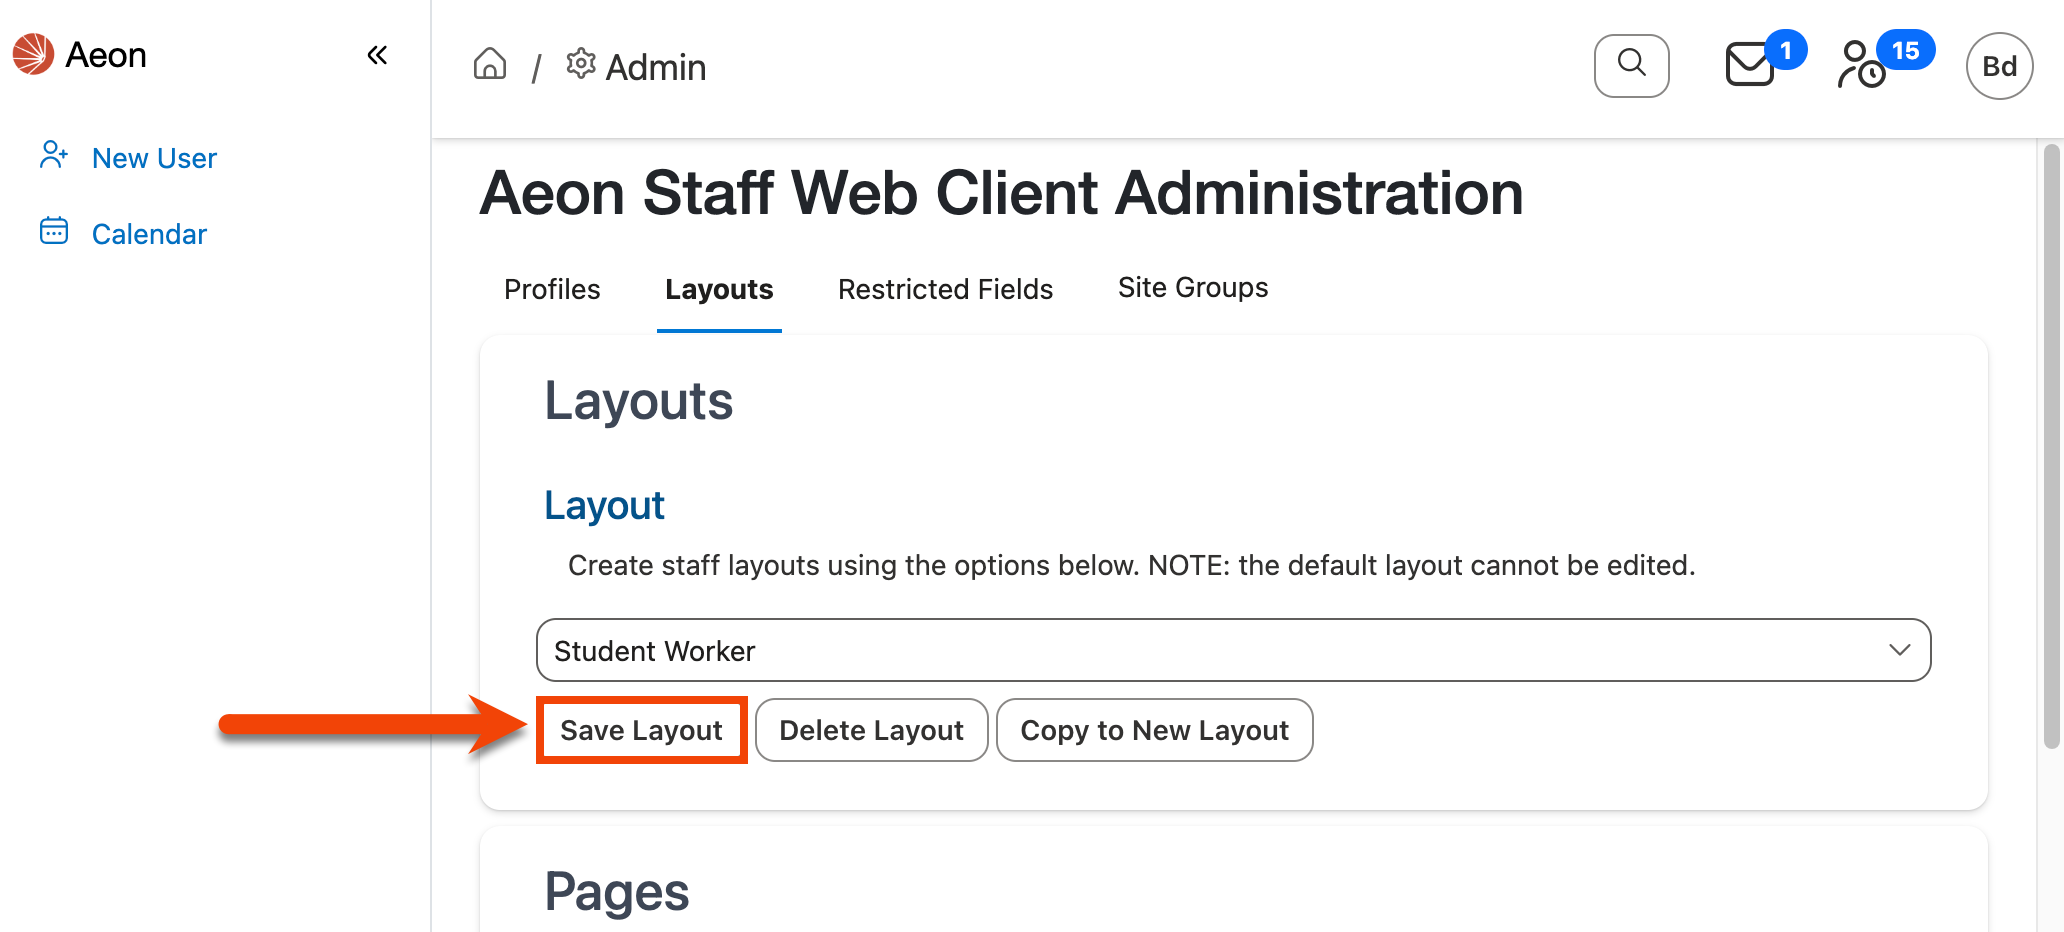
Use the keyboard shortcut CTRL-S (Windows)/Command-S (Mac) or click the Save Layout option at the top of the screen in the Layouts section to save your changes:
Adding Fields to a Grid
To add a field to a grid:
-
Ensure that the layout for which you want to apply the changes is selected in the Layout dropdown at the top of the page:
-
In the Grid Columns section at the bottom of the page, use the Grid Type and Grid Context dropdowns to choose the grid for which you want to add the field. The Columns grid below will display the existing fields in the selected grid:
See Grid Customization Options above for detailed information on these options.
-
Click the + Add button at the top of the Columns grid:
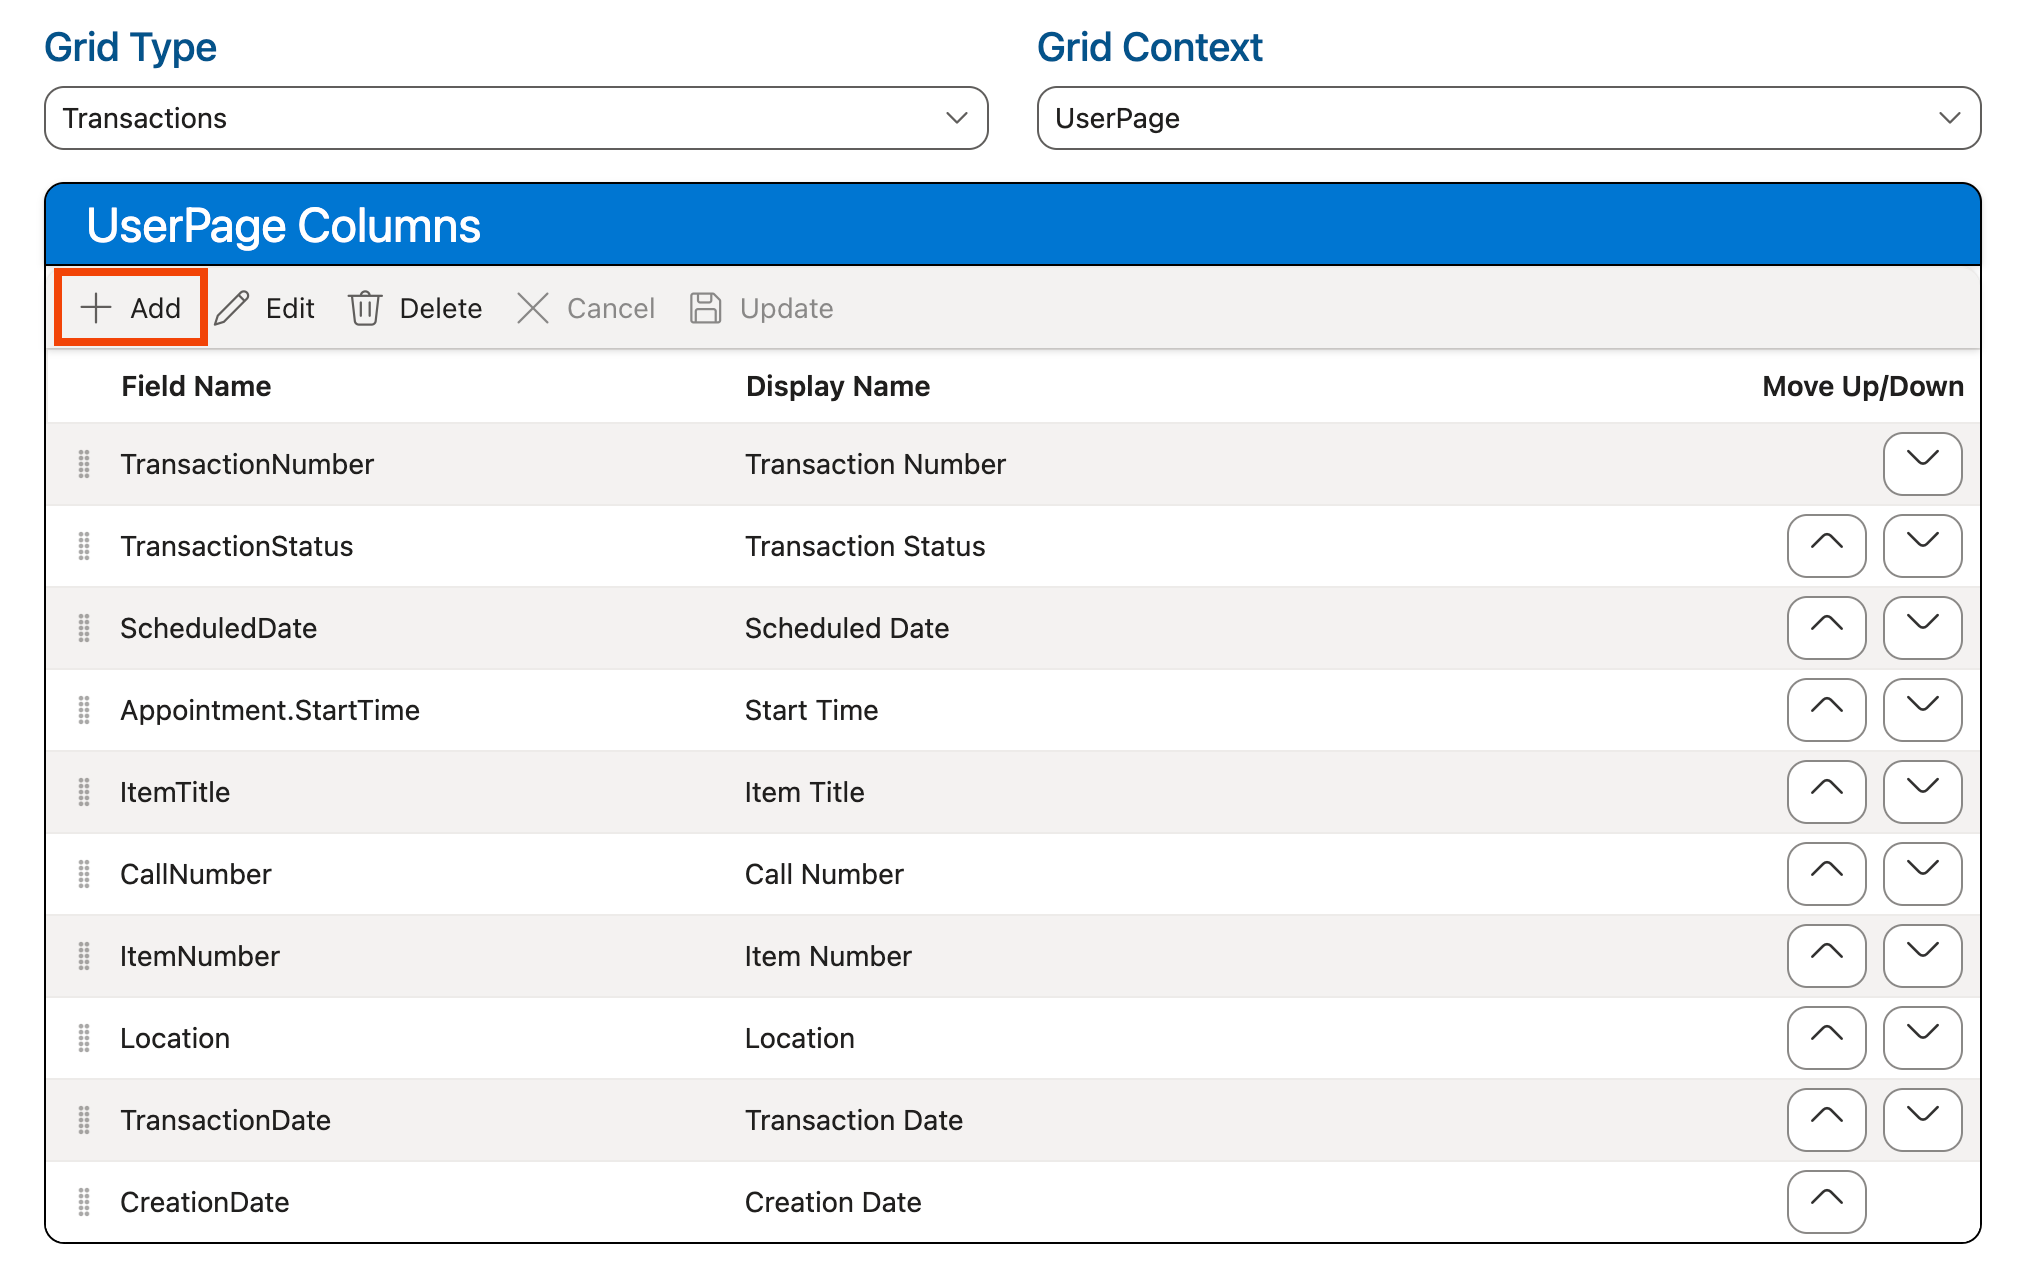
-
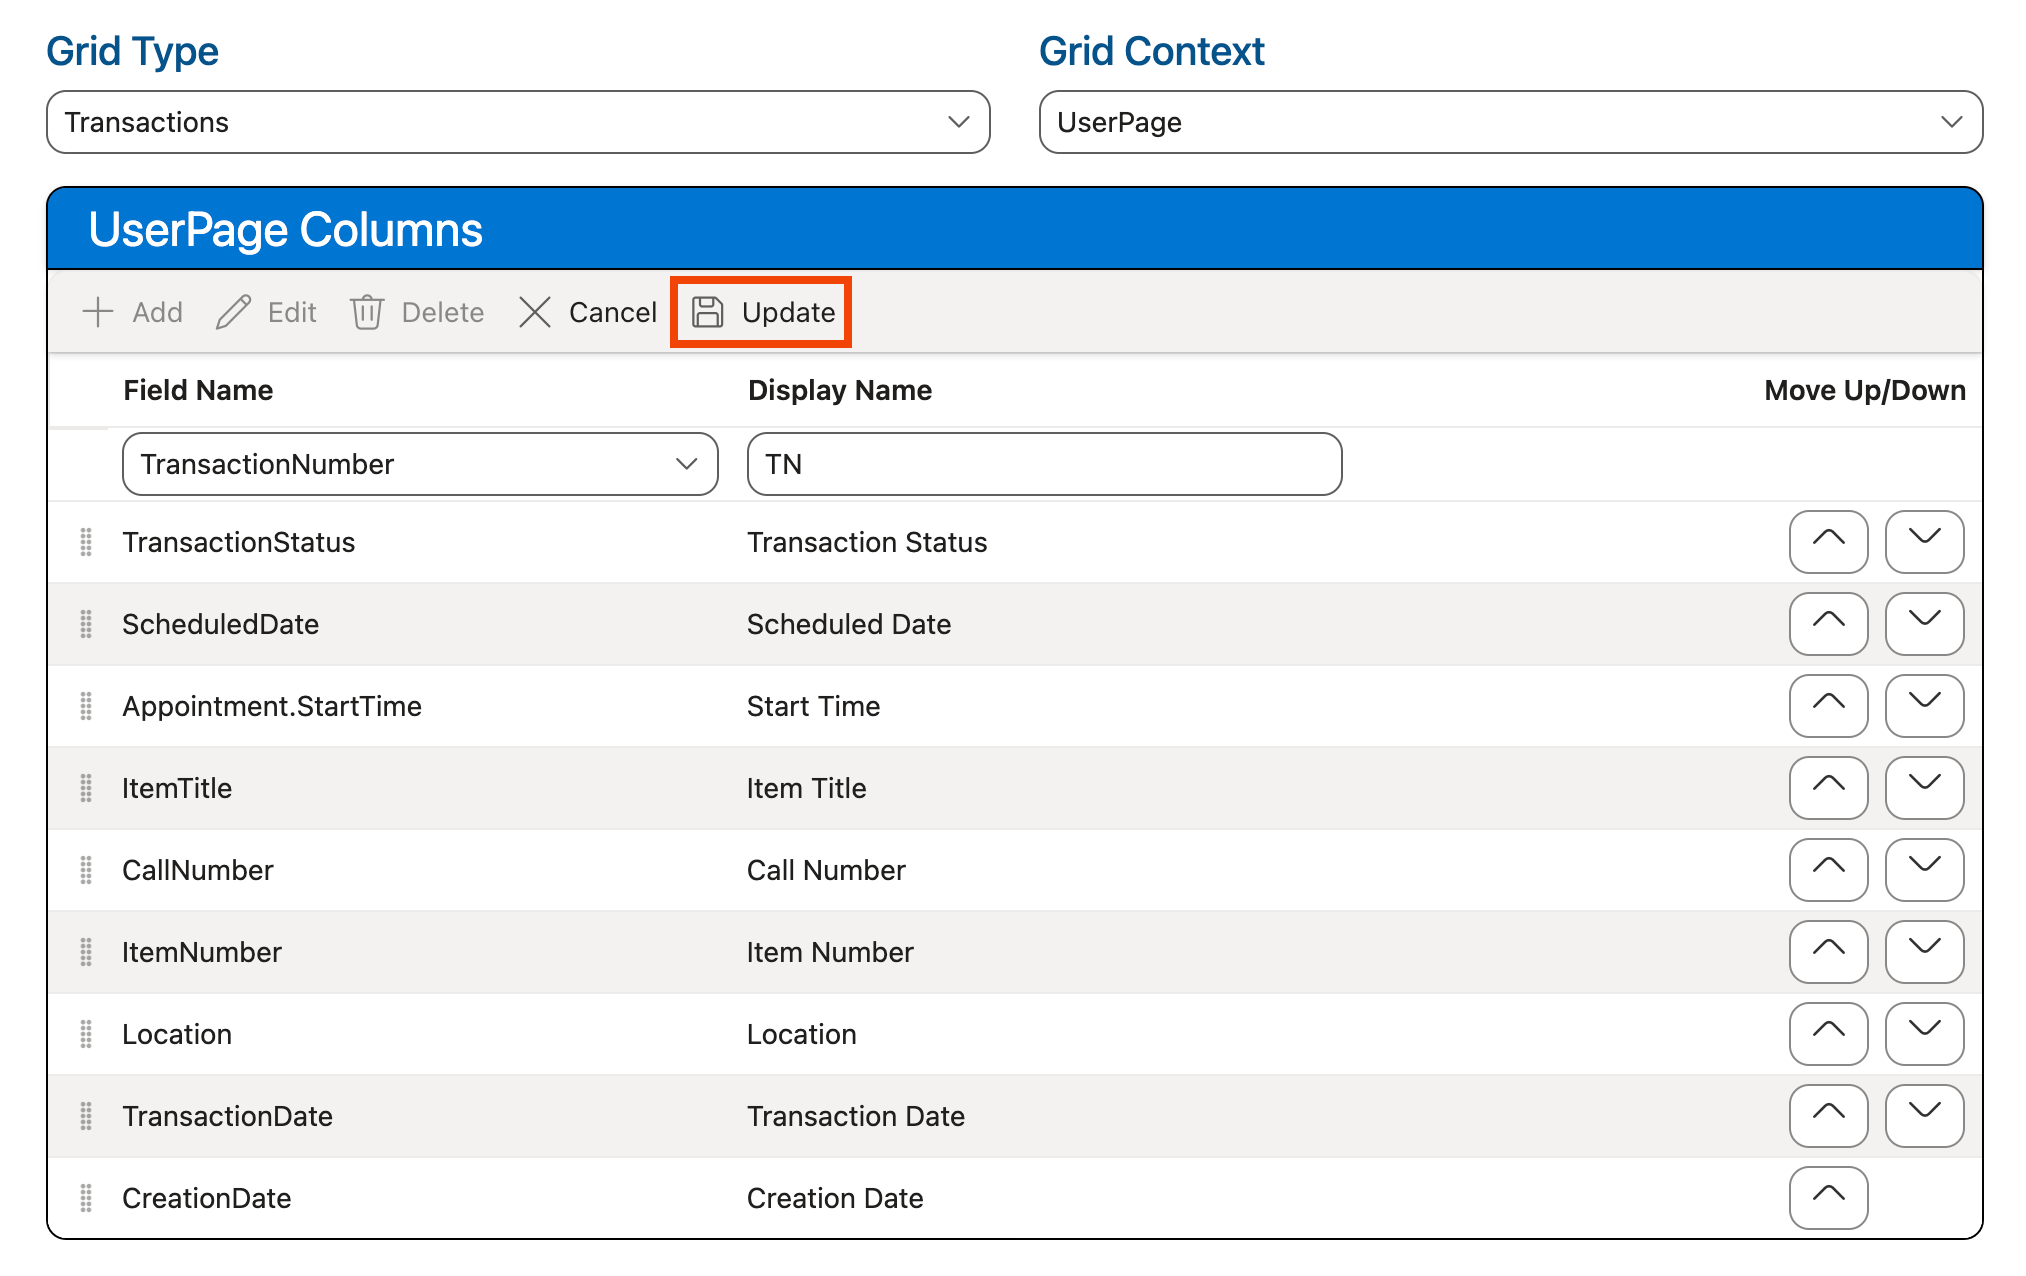
Choose the field you want to add to the grid from the Field Name dropdown.
See Grid Customization Options above for information on which fields are available to be added to each type of grid.
-
Enter the name that should be displayed for that field in the grid in the Display Name column.
-
Click Update:
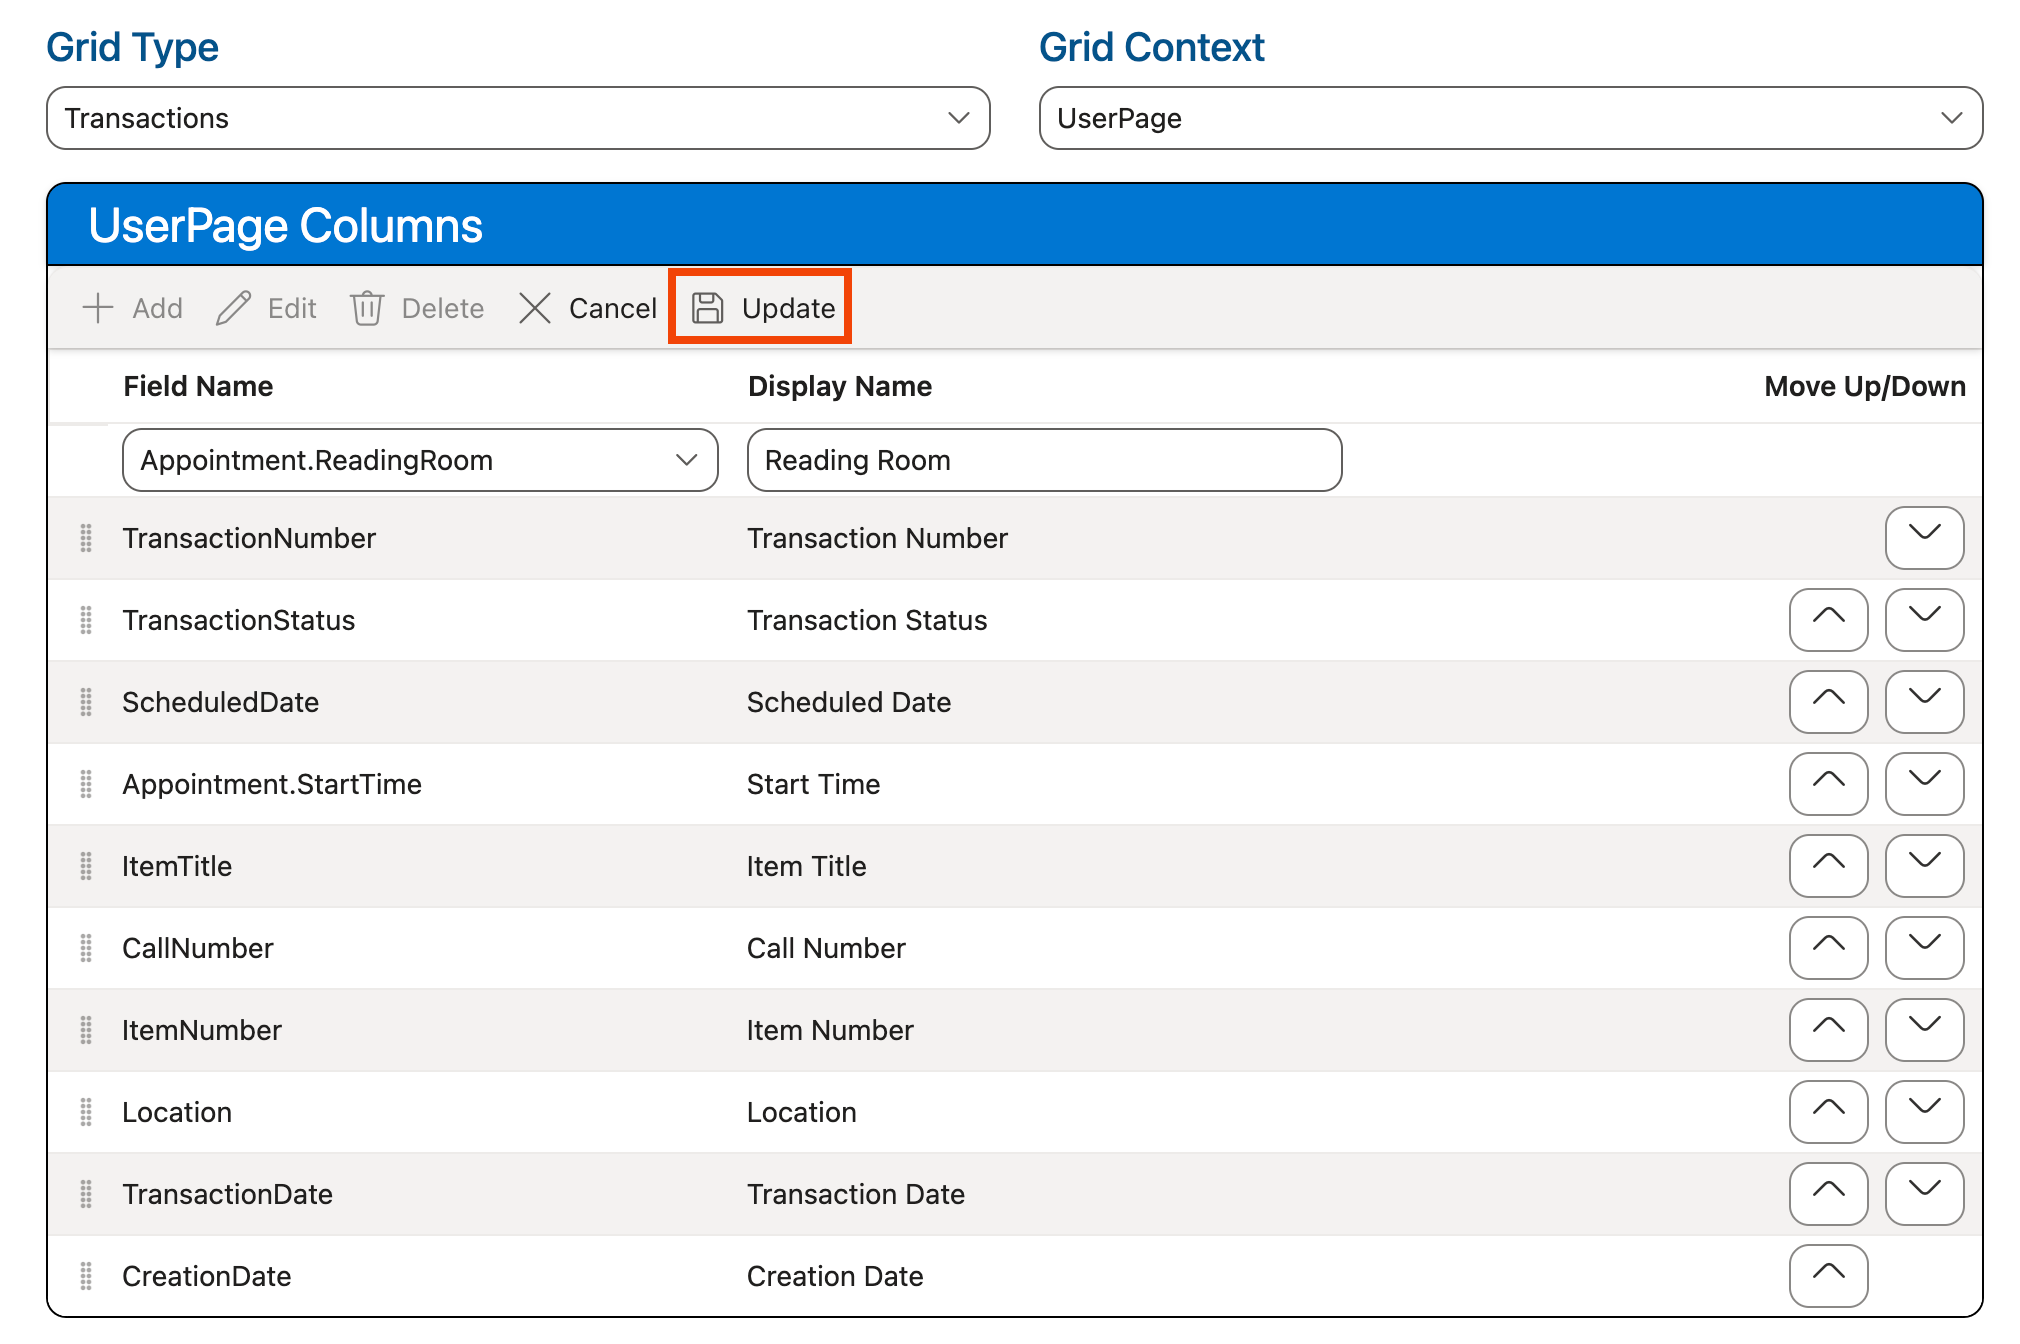
-
The Columns grid is updated with the newly added field at the top.
-
Use the drag-and-drop controls (
) or the Move Up/Down arrow buttons () in the Columns grid to move the new field into the position where you would like it to display on the grid, if necessary. -
Use the keyboard shortcut CTRL-S (Windows)/Command-S (Mac) or click the Save Layout option at the top of the screen in the Layouts section to save your changes:
Removing Fields from a Grid
To remove a field from a grid:
-
Ensure that the layout for which you want to apply the changes is selected in the Layout dropdown at the top of the page:
-
In the Grid Columns section at the bottom of the page, use the Grid Type and Grid Context dropdowns to choose the grid from which you want to remove the field. The Columns grid below will display the existing fields in the selected grid:
See Grid Customization Options above for detailed information on these options.
-
Click on the field that you want to remove in the Columns grid to select it.
-
Click Delete:
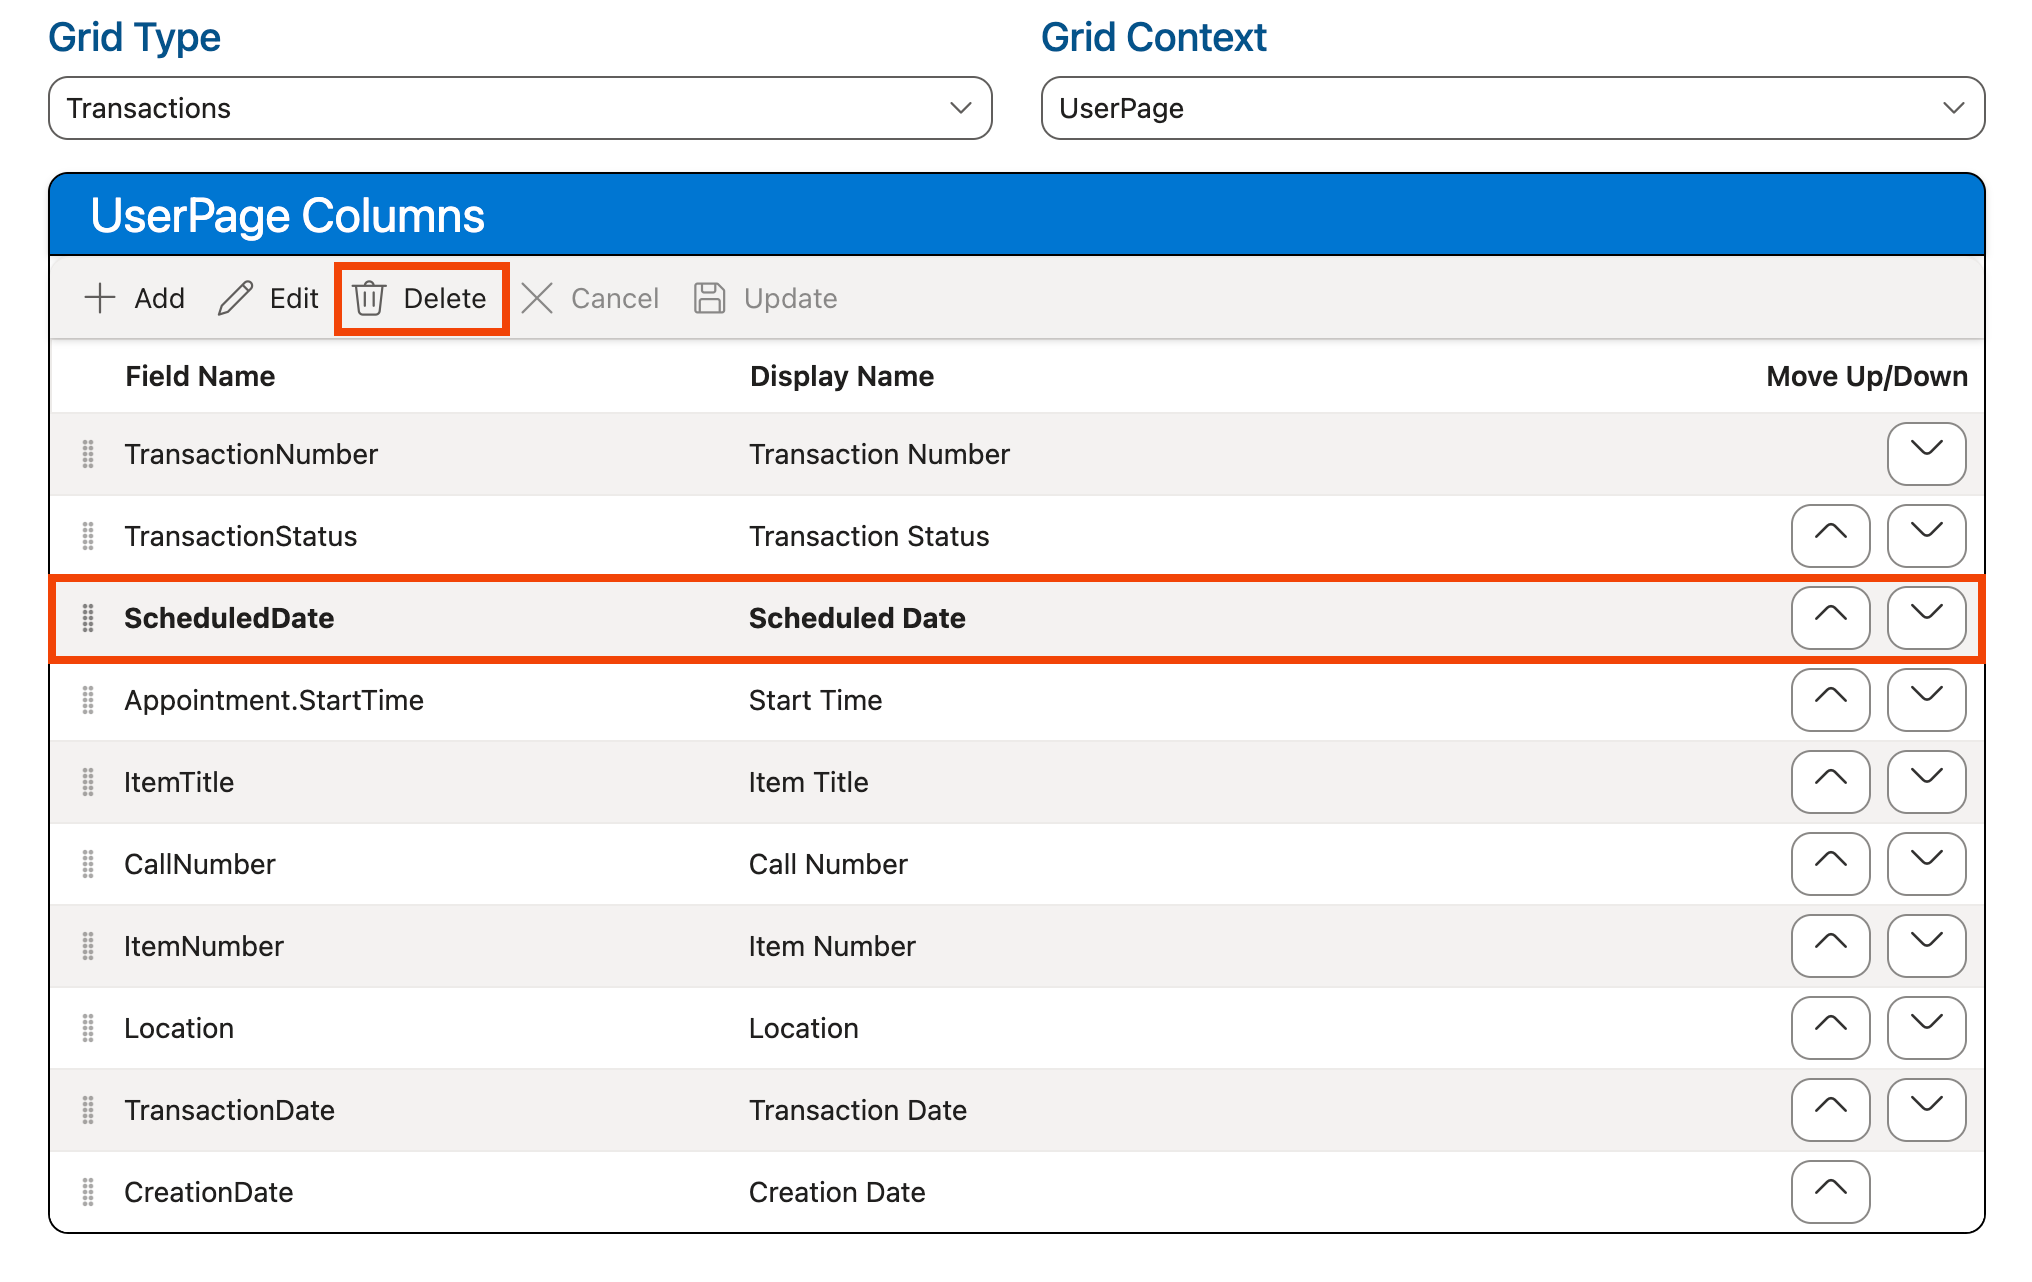
-
The field is removed from the Columns grid.
-
Use the keyboard shortcut CTRL-S (Windows)/Command-S (Mac) or click the Save Layout option at the top of the screen in the Layouts section to save your changes:
Changing Field Display Names
To change the display name for a field in a grid:
-
Ensure that the layout for which you want to apply the changes is selected in the Layout dropdown at the top of the page:
-
In the Grid Columns section at the bottom of the page, use the Grid Type and Grid Context dropdowns to choose the grid for which you want to rename the field. The Columns grid below will display the existing fields in the selected grid:
See Grid Customization Options above for detailed information on these options.
-
Click on the field that you want to rename in the Columns grid to select it, then click Edit:
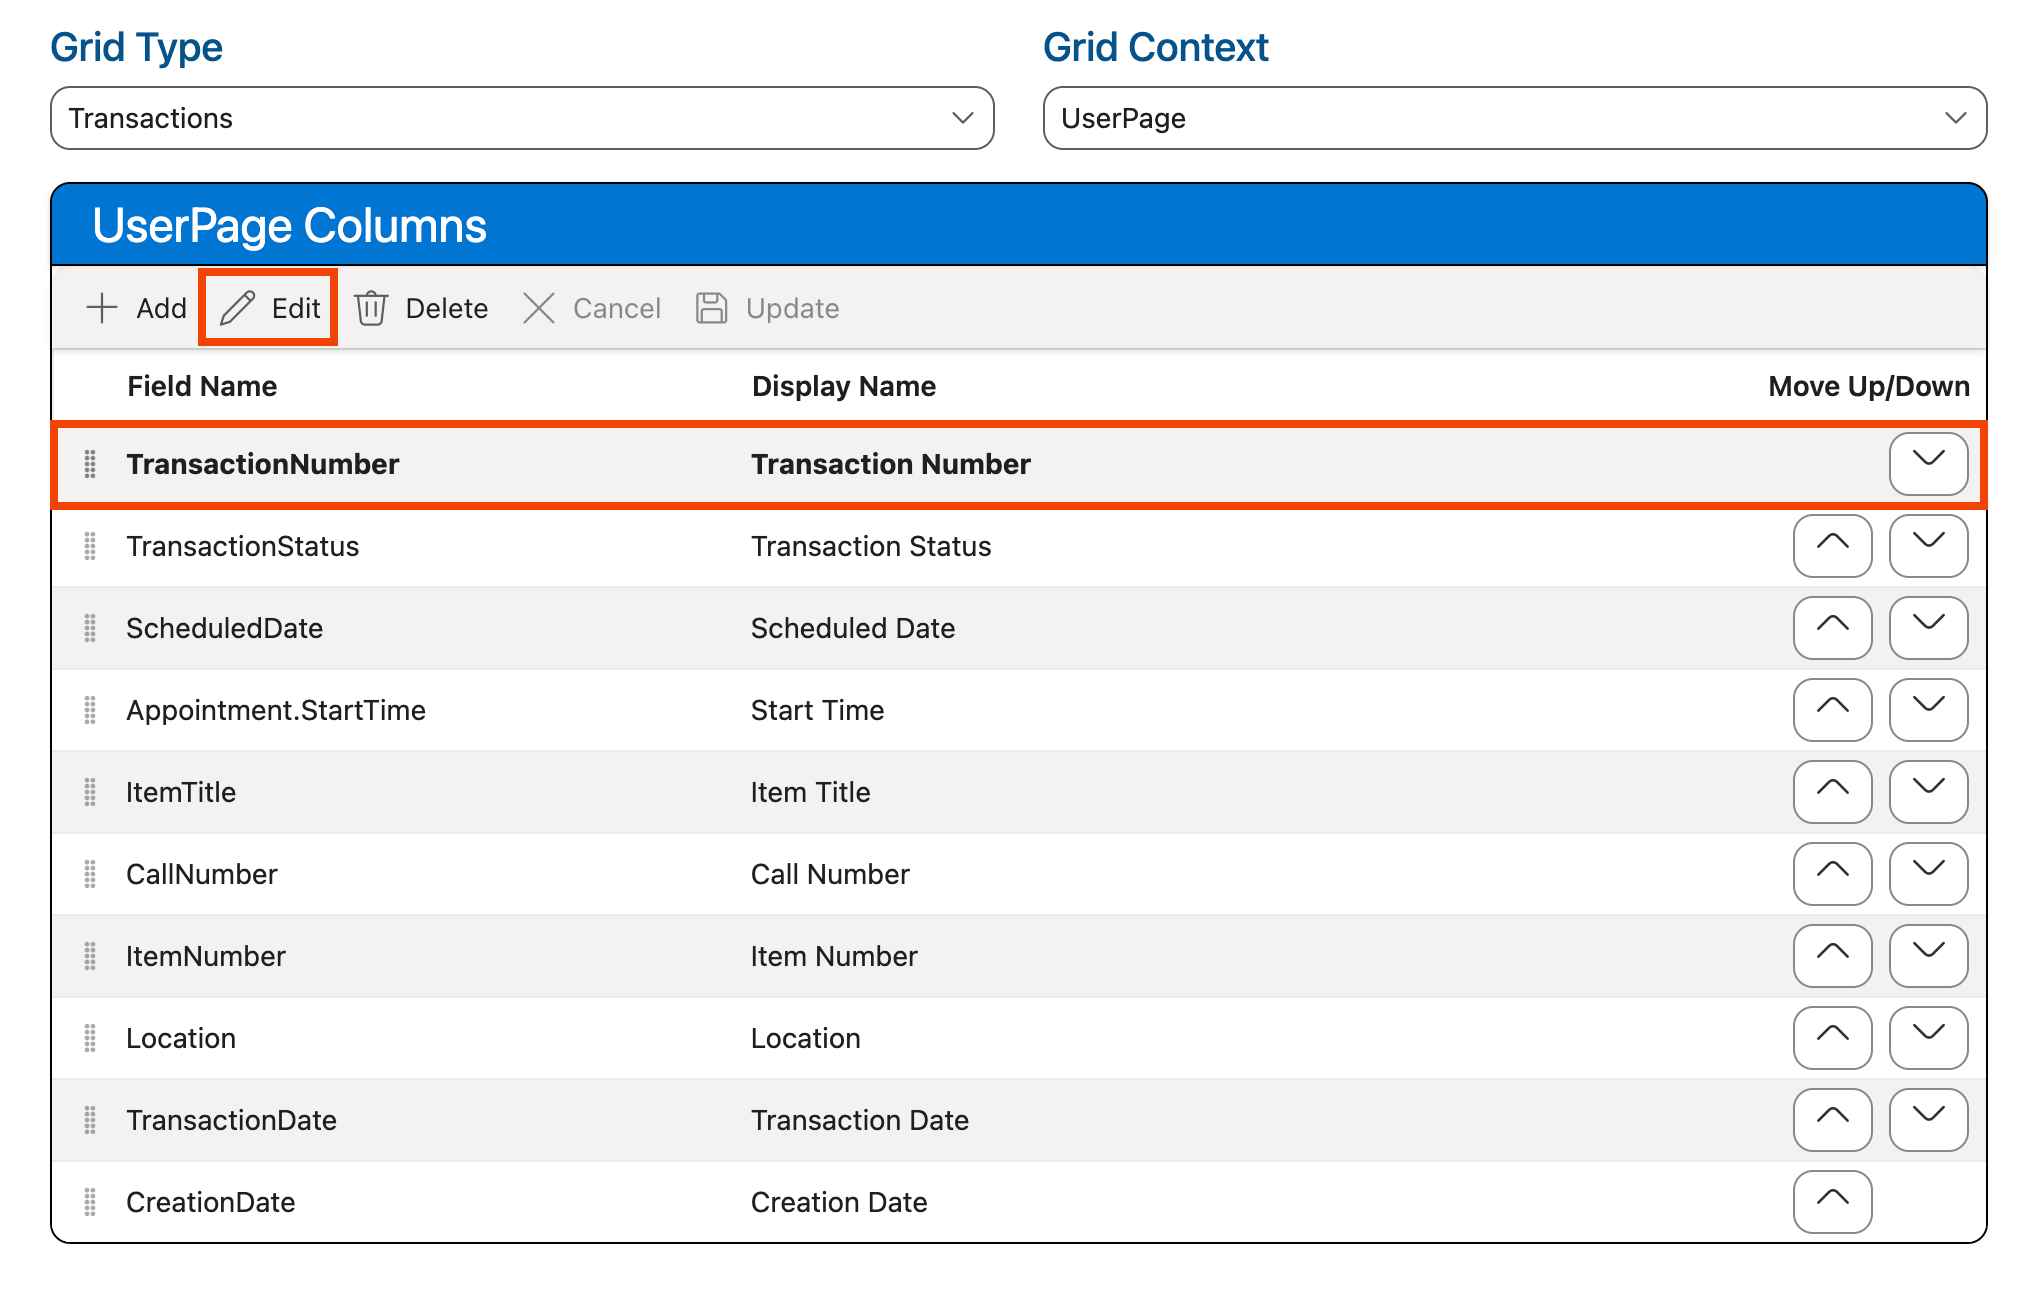
-
Use the Display Name column to edit the display label that will be used to display the name for the field on the selected grid.
-
Click Update:
-
The field is updated in the Columns grid with the new display name.
-
Use the keyboard shortcut CTRL-S (Windows)/Command-S (Mac) or click the Save Layout option at the top of the screen in the Layouts section to save your changes: