Customizing Form Layouts
The Layouts tab is where you'll customize how forms appear for different staff profiles in ILLiad. This powerful feature lets you tailor the interface to match your library's workflow and ensure staff see exactly what they need to do their jobs effectively.
Understanding the Layout Editor
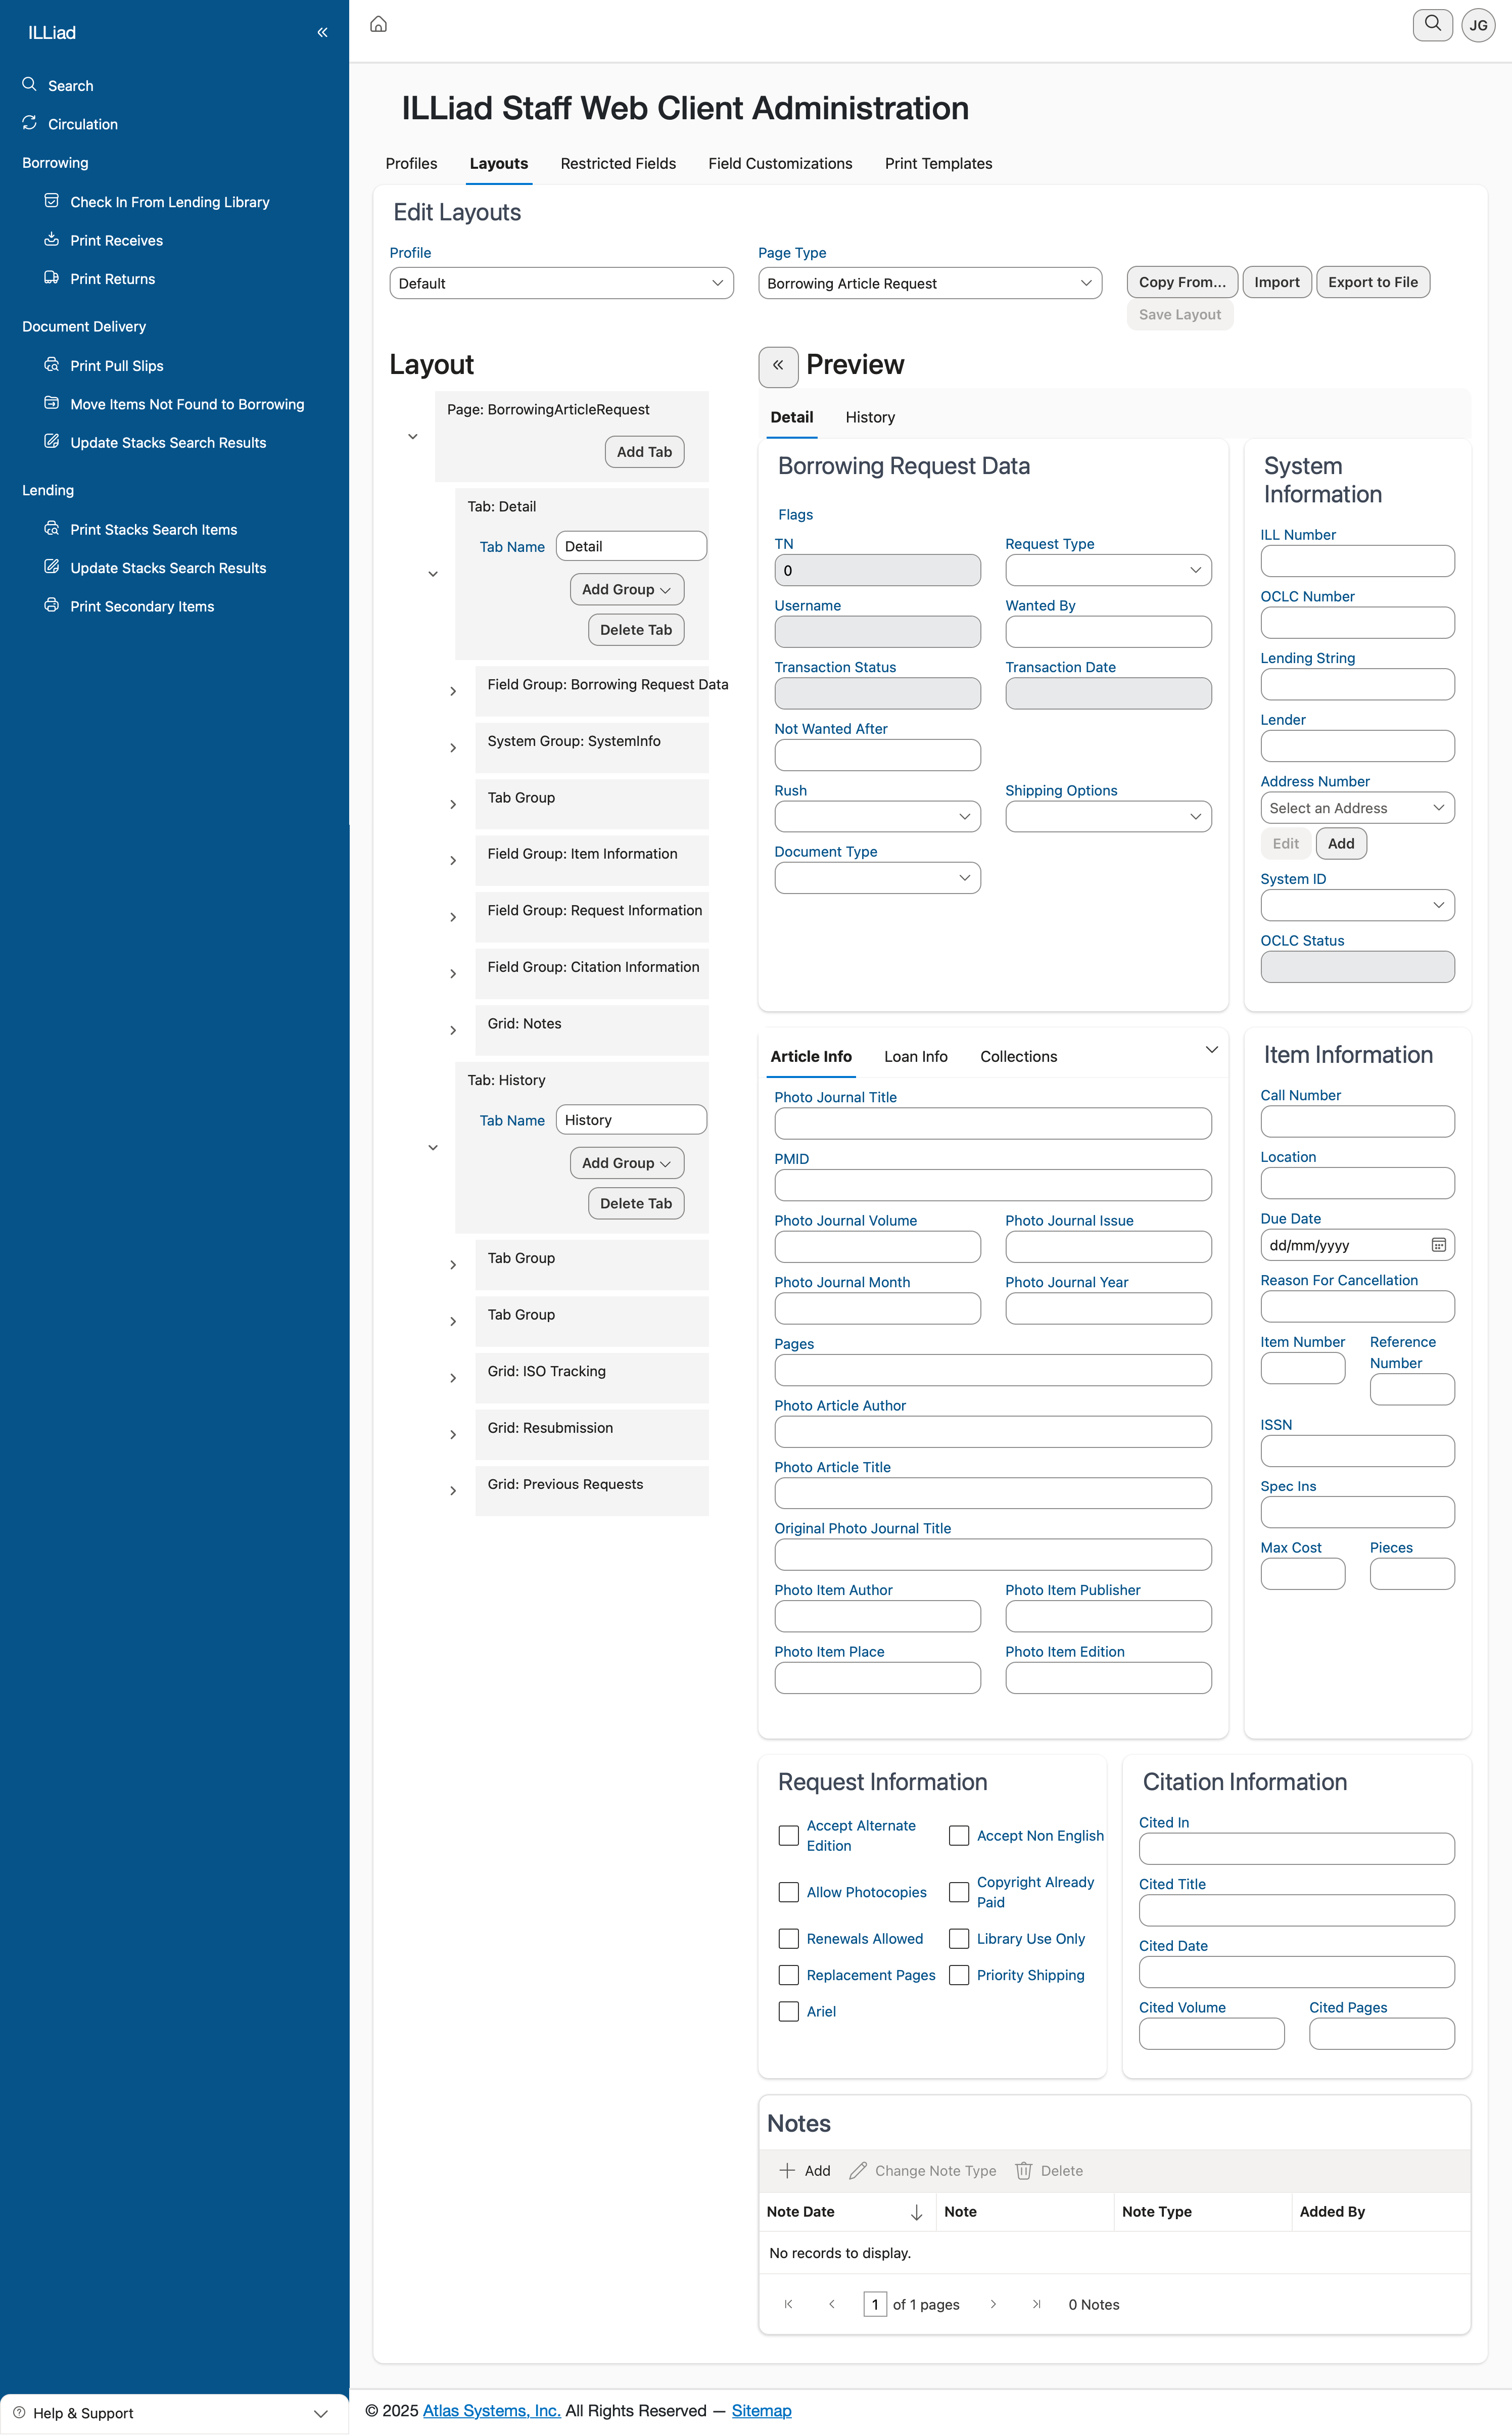
When you open the Layouts tab, you'll first select which profile you want to customize from the dropdown menu. Remember, you can't modify the Default profile directly, but you can create custom profiles and then adjust their layouts here.
The page type dropdown lets you choose which form to customize. Currently, the system focuses on the Borrowing Article Request form, with more form types planned for future releases. Once you've selected a profile and page type, you're ready to start customizing.
Working with the Layout Interface
The layout editor divides your screen into two main areas. On the left, you'll see the Layout section with collapsible field groups. On the right, there's a Preview area that shows you exactly how the form will look to staff members using this profile.
The field groups organize related information together. You can expand or collapse these groups to work with different sections of the form:
- Borrowing Request Data contains the core fields for request information
- System Information includes technical fields like transaction numbers
- Item Information holds details about the requested material
- Citation Information manages bibliographic data
Customizing Field Display
Each field group contains individual fields that you can show or hide. Simply check or uncheck the boxes next to field names to control their visibility. As you make changes, the Preview panel updates in real-time, letting you see exactly how the form will appear.
This immediate feedback is invaluable when you're streamlining forms for specific roles. For instance, student workers processing basic requests might not need to see all the technical fields that a supervisor would use.
Managing Field Groups
The editor gives you several options for organizing field groups:
Click Add Group to create a new section for organizing fields. This is helpful when you want to group custom fields or reorganize the form to match your workflow better.
Use Delete Tab carefully - this removes an entire field group and all its fields from the layout. The fields aren't deleted from the system; they're just hidden from this particular profile's view.
The Tab Name and Tab Group sections at the bottom let you rename groups and organize them into larger categories. Clear, descriptive names help staff understand where to find information quickly.
Understanding Tab Types
When you expand a field group, you'll notice different tab types:
- Field Group sections contain the actual data fields
- System Group sections include system-generated information
- Grid sections display data in table format
Each type serves a specific purpose in organizing information effectively. Field groups are most common for form data, while grids work well for displaying multiple related records.
Saving and Testing Layouts
The preview panel is your best friend when customizing layouts. It shows exactly what staff will see, updating instantly as you make changes. Take time to review the preview carefully - what looks good in the editor should also make sense in practice.
Once you're satisfied with your changes, click Copy From if you want to apply a layout from another profile as a starting point. The Import and Export to File buttons let you save layouts for backup or share them between systems.
Remember to save your work regularly. Layout changes take effect immediately for any staff members assigned to that profile, so they'll see the new layout the next time they access the form.
Best Practices for Layout Design
Start by observing how your staff actually use the forms. Which fields do they use most often? What information do they rarely need? Design your layouts to put the most important fields front and center.
Consider the workflow when arranging fields. Place fields in the order staff typically fill them out. Group related information together so staff don't have to jump around the form.
Less is often more. Don't feel obligated to show every available field. A cleaner, simpler form with only necessary fields reduces errors and speeds up processing. You can always add fields back later if needed.
Test your layouts with actual users before rolling them out broadly. What makes sense to you as an administrator might not work as well for front-line staff. Get feedback and be prepared to make adjustments.
Managing Multiple Profiles
When you're managing layouts for multiple profiles, the Copy From feature becomes especially valuable. Start with your most comprehensive layout, then copy it to other profiles and remove fields as needed. This ensures consistency while still allowing customization.
Keep notes about which profiles have which layouts. While the system tracks this automatically, having your own documentation helps when training new staff or troubleshooting issues.
Remember that changes to layouts don't affect existing data - they only change how information is displayed and entered. All fields remain in the database even if they're hidden from certain profiles.