Using Authorize.net
Authorize.Net has introduced a new payment integration method called Accept Hosted. This new payment method is intended to replace the Server Integrated Method (SIM), which is now deprecated. New sites implementing Authorize.Net as their payment provider should use the newer Accept Hosted method, and existing Authorize.Net sites should prepare to switch over to Accept Hosted once the end-of-life date has been announced for SIM. Please refer to Using Authorize.Net Accept Hosted with Aeon for information on how to implement the Accept Hosted method.
Credit card payments made using Authorize.Net are made on a secure page hosted by this provider. When a researcher chooses transactions to pay for and clicks the Pay Now button on the Aeon Orders to Approve/Pay form (ViewOrderApproval.html), they are taken to the Authorize.Net-specific CreditCardPayment form. Clicking the Pay Now button on this form takes them to a secure page outside of Aeon to perform the credit card transaction.
After the payment is submitted and the transaction is complete, the researcher is returned back to the Orders to Approve/Pay page in the Aeon web interface. The form shows an updated balance due and the status line at the top of the form notifies the researcher that the payment was successful and displays the payment confirmation code.
Configuring the Customization Keys for Authorize.Net
The payment provider keys used to set up Authorize.Net are located in the Aeon Customization Manager under System | Billing. You will need to set the following key values:
| Key | Description |
|---|---|
| PaymentProviderMerchantId | Enter the API Login ID provided to you by Authorize.Net, which can be obtained from the same page as in the PaymentProviderToken instructions. |
| PaymentProviderResponseToken | This is a MD-5 hash value used to authenticate responses sent from Authorize.Net to the Aeon system. This value is generated initially by Authorize.Net but can be configured by the site by logging into the Authorize.Net merchant interface, selecting the Account tab, clicking the MD5-Hash link, and setting a hash value. Note that the MD5 Hash Value can be up to 20 characters long, including upper- and lower-case letters, numbers, spaces, and punctuation. |
| PaymentProviderToken | This value is used for encryption when sending the initial request from Aeon to Authorize.Net. This value is also generated by Authorize.Net and can be obtained and regenerated by logging into the Authorize.Net merchant interface, selecting the Account tab, clicking the API Login ID and Transaction Key link, and creating a new transaction key. |
| CreditCardTransactionsDescription | This value is used as a product description on the Authorize.Net website to describe the researcher's purchase. The default value of this key includes the transaction numbers of the included requests: Aeon Photoduplication charges for transaction(s) <#PARAM name='TransactionNumbers'>. This key is located under **System |
Editing the Web Forms for Authorize.Net
Below are the steps necessary to set up the web forms to work with Authorize.Net. Specialized ViewOrderApproval and CreditCardPayment forms have been created to work with Authorize.Net. Your Implementation Coordinator or Customer Service Agent will supply these to you when you are setting up your payment provider information. They are also available as a zip file at the Aeon Downloads page.
ViewOrderApprovals Form
Replace the default ViewOrderApprovals form in the Web folder with the ViewOrderApprovals form designed to work with credit card payments. This form contains the Pay Now button that takes the researcher to the CreditCardPayment.html form.
CreditCardPayment Form
Replace the default CreditCardPayment form in the Web folder with the Authorize.Net CreditCardPayment.html form. Make the following changes to these hidden fields on the form:
-
x_relay_url. By default, this field is set to the value of the WebDLL customization key, but in some instances, it may be necessary to change this value to use a specific URL. The most common case is if you have both a protected and unprotected Aeon directory. For instance, if you are Shibboleth, you will want to set the x_relay_url to the unprotected directory.
-
x_test_request. By default, this field is set to TRUE in order to test your Login ID and Transaction Key against the live environment. in order to test your Login ID and Transaction Key against the live environment. No transactions sent with this value set to TRUE will be processed. This value should be set to TRUE until you have tested your payment provider implementation and verified that it is configured correctly. Once you have verified that it works correctly you can set this value to FALSE in order to begin processing live transactions.
-
transactionNumbers. This field provides the value that will be used on the Authorize.Net website to describe the researcher's purchase. The default setting simply pulls the value from the CreditCardTransactionsDescription customization key but can be changed if you wish to differentiate the product's description, and additional values can be added.
Note that the javascript of this page has been changed from previous versions. If a user cancels the page the account is returned to the Main Menu:
$("#cancel").click(function() {
                      window.location.replace("<#DLL queryFields=false>?action=10&form=10");
Web Changes for Aeon 3.8 & Authorize.net
See the Aeon Web Page Changes documentation for more information on the following changes.
-
In the form element with id="paymentformp", the action attribute has been changed from:
action="<#CUSTOMIZATION name=PaymentProviderURL />"to:
action="<#PAYMENTPROVIDERURL>" -
In the same form element, the x_test_request input has been changed from:
<input type="hidden" name="x_test_request" value="TRUE">to:
<input type="hidden" name="x_test_request" value="<#CONDITIONAL Type="CustomizationKey" Test="PaymentProviderTestModeEnabled" True="TRUE" False="FALSE">"> -
The change to the x_test_request input is not required, and the value of this input can still be hard coded. However, the default page now takes advantage of the new
<#CONDITIONAL>web DLL tag so that the value submitted for x_test_request is retrieved from the PaymentProviderTestModeEnabled customization key, meaning it is no longer necessary to edit the CreditCardPayment.html web page to switch from testing to live mode.
Editing Authorize.Net Settings
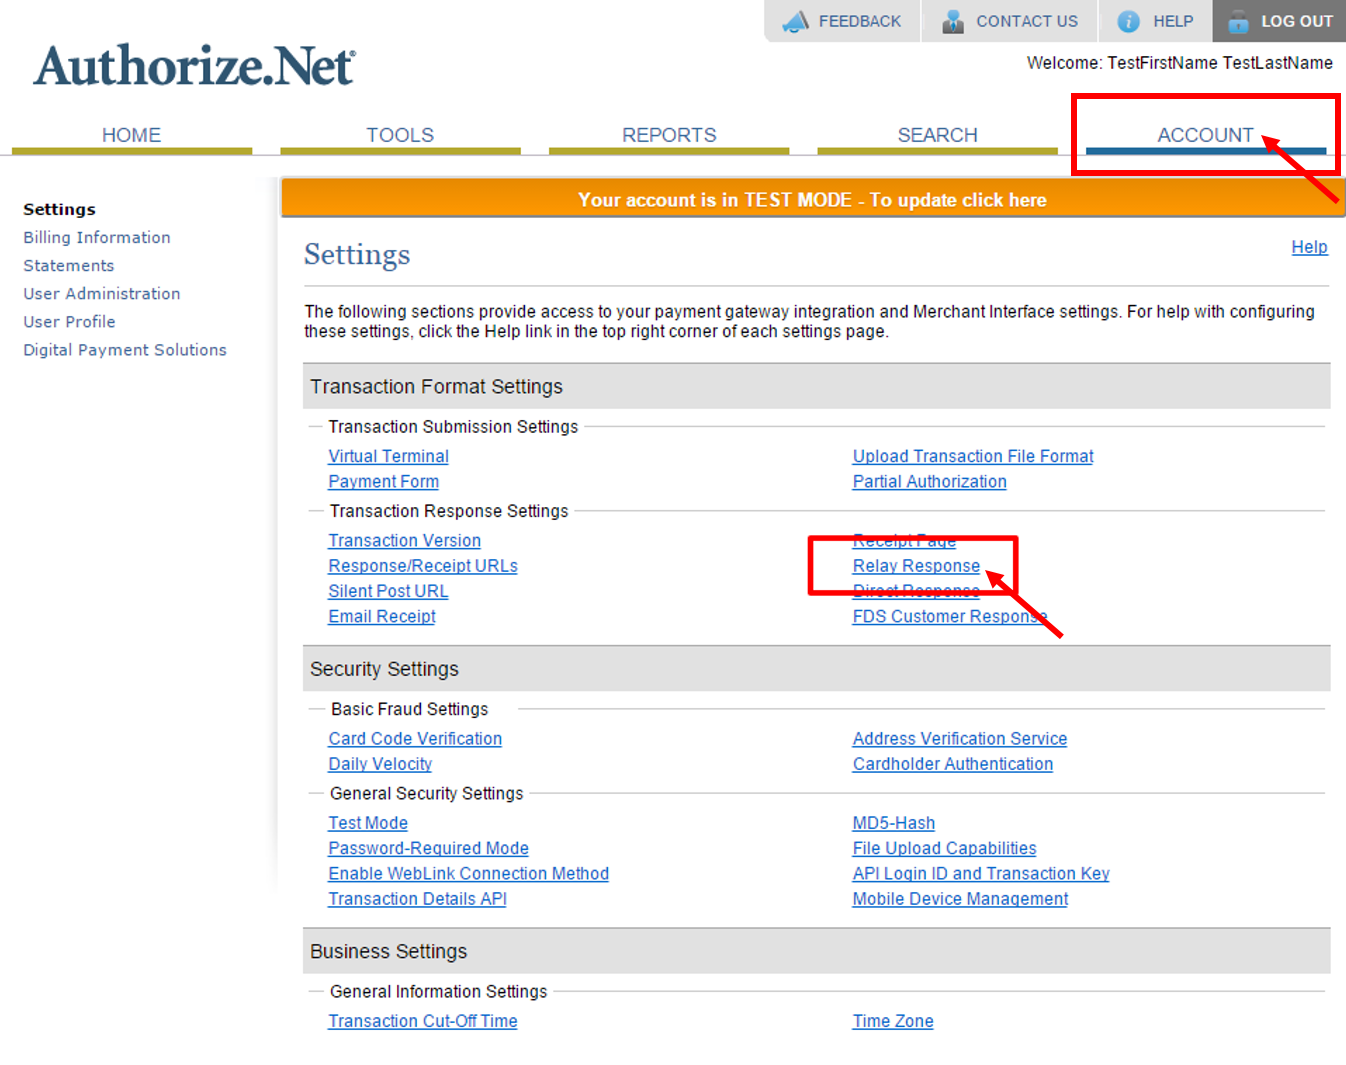
Log into your http://Authorize.net account, navigate to Accounts and then Relay Response (in the Transaction Format Settings section) to edit the Relay Response URL.
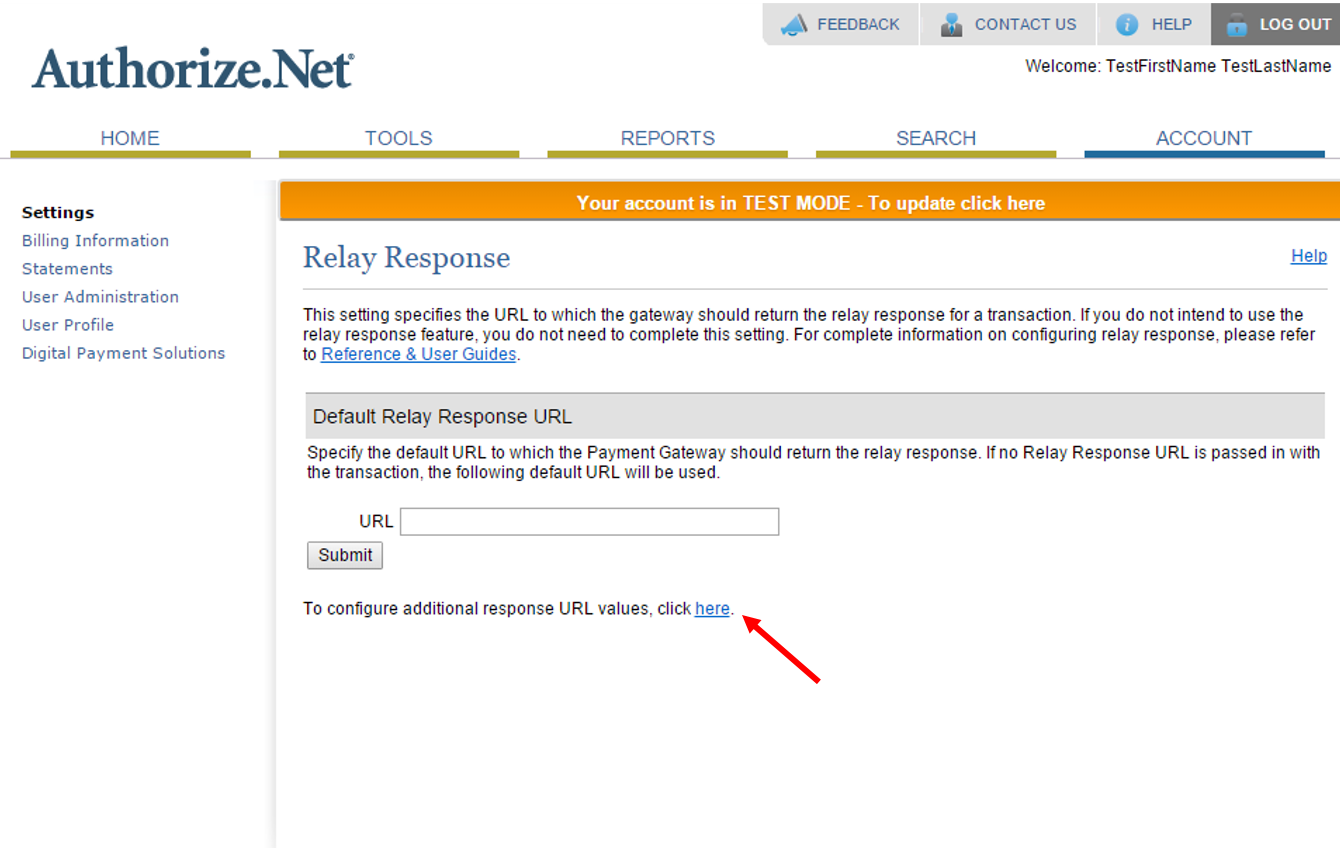
Use this page if no other Relay Response URL has been added to your Authorize.net account.
If a Relay Response URL already exists for your account, click the link next to Configure Additional Response URL Values
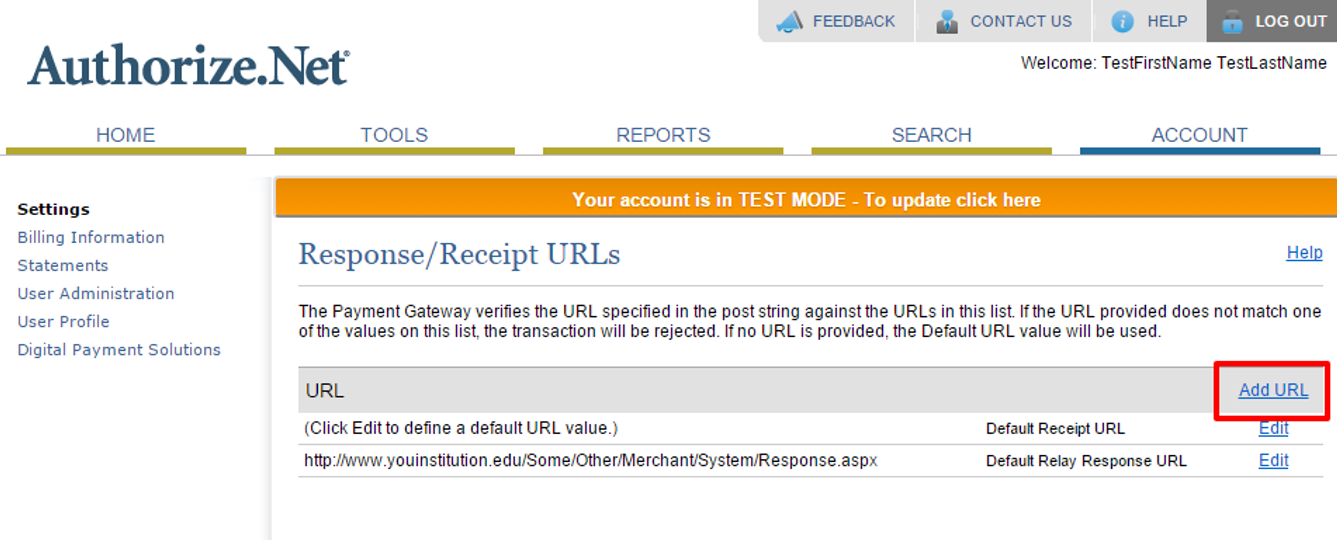
The following page will allow you the option to Add URL
Add the Aeon Relay Response URL to the Authorize.Net account. See the next section to format the Relay Response URL.
Aeon Relay Response URL
The Relay Response URL needs to be formatted very precisely in order for the successful integration of Aeon and Authorize.net.
The default URL is the value of the WebURL customization key with “aeon.dll?action=11&type=109” appended to the end
In some systems, such as those using Remote Authentication, the Relay Response URL is the value hardcoded in the CreditCardPayment.html page in the following tag:
<input type="hidden" name="x_relay_url" value="<#CUSTOMIZATION name="WebURL">aeon.dll?action=11&type=109">