Request Billing Tab
When a researcher orders copies — scans, photocopies, prints — the money side of that request is handled on its Billing tab. This is where you see what the order costs, record what the researcher has paid, and generate the invoice that drives the request through the photoduplication workflow.
The Billing tab lives inside the request detail view, alongside History, Notes, and Attachments. It only appears on requests that are part of the photoduplication (copy) workflow — a plain reading-room request has nothing to bill, so it has no Billing tab. The normal path is: a copy request comes in, charges are calculated automatically from your billing defaults, you confirm or adjust them, you generate the invoice, and then you record the researcher's payment as it arrives.
- A photoduplication request is ready to be billed and you need to generate the invoice.
- A researcher has paid and you need to record a payment (or a refund).
- The order changed — extra pages, a different format — and you need to add, edit, or remove a charge before invoicing.
- You want to print or email the invoice to the researcher.
The Billing tab appears on a request only once that request has a photoduplication status — and only if your role has View on Billing. A standard reading-room request has neither a photoduplication status nor a Billing tab.
Most copy requests arrive with it already. A request submitted as a photoduplication request is given the Awaiting Order Submittal photoduplication status the moment it's created, so its Billing tab is there from the start and nobody has to do anything.
Initialize Photoduplication is for the other case — turning a request that wasn't submitted as a copy order into one. If a request you expected to bill has no Billing tab, that's the step it's missing. See Photoduplication Initialization for it.
Opening the Billing tab
- Open the photoduplication request — for example, request #12345.
- Click the Billing tab in the request detail view.
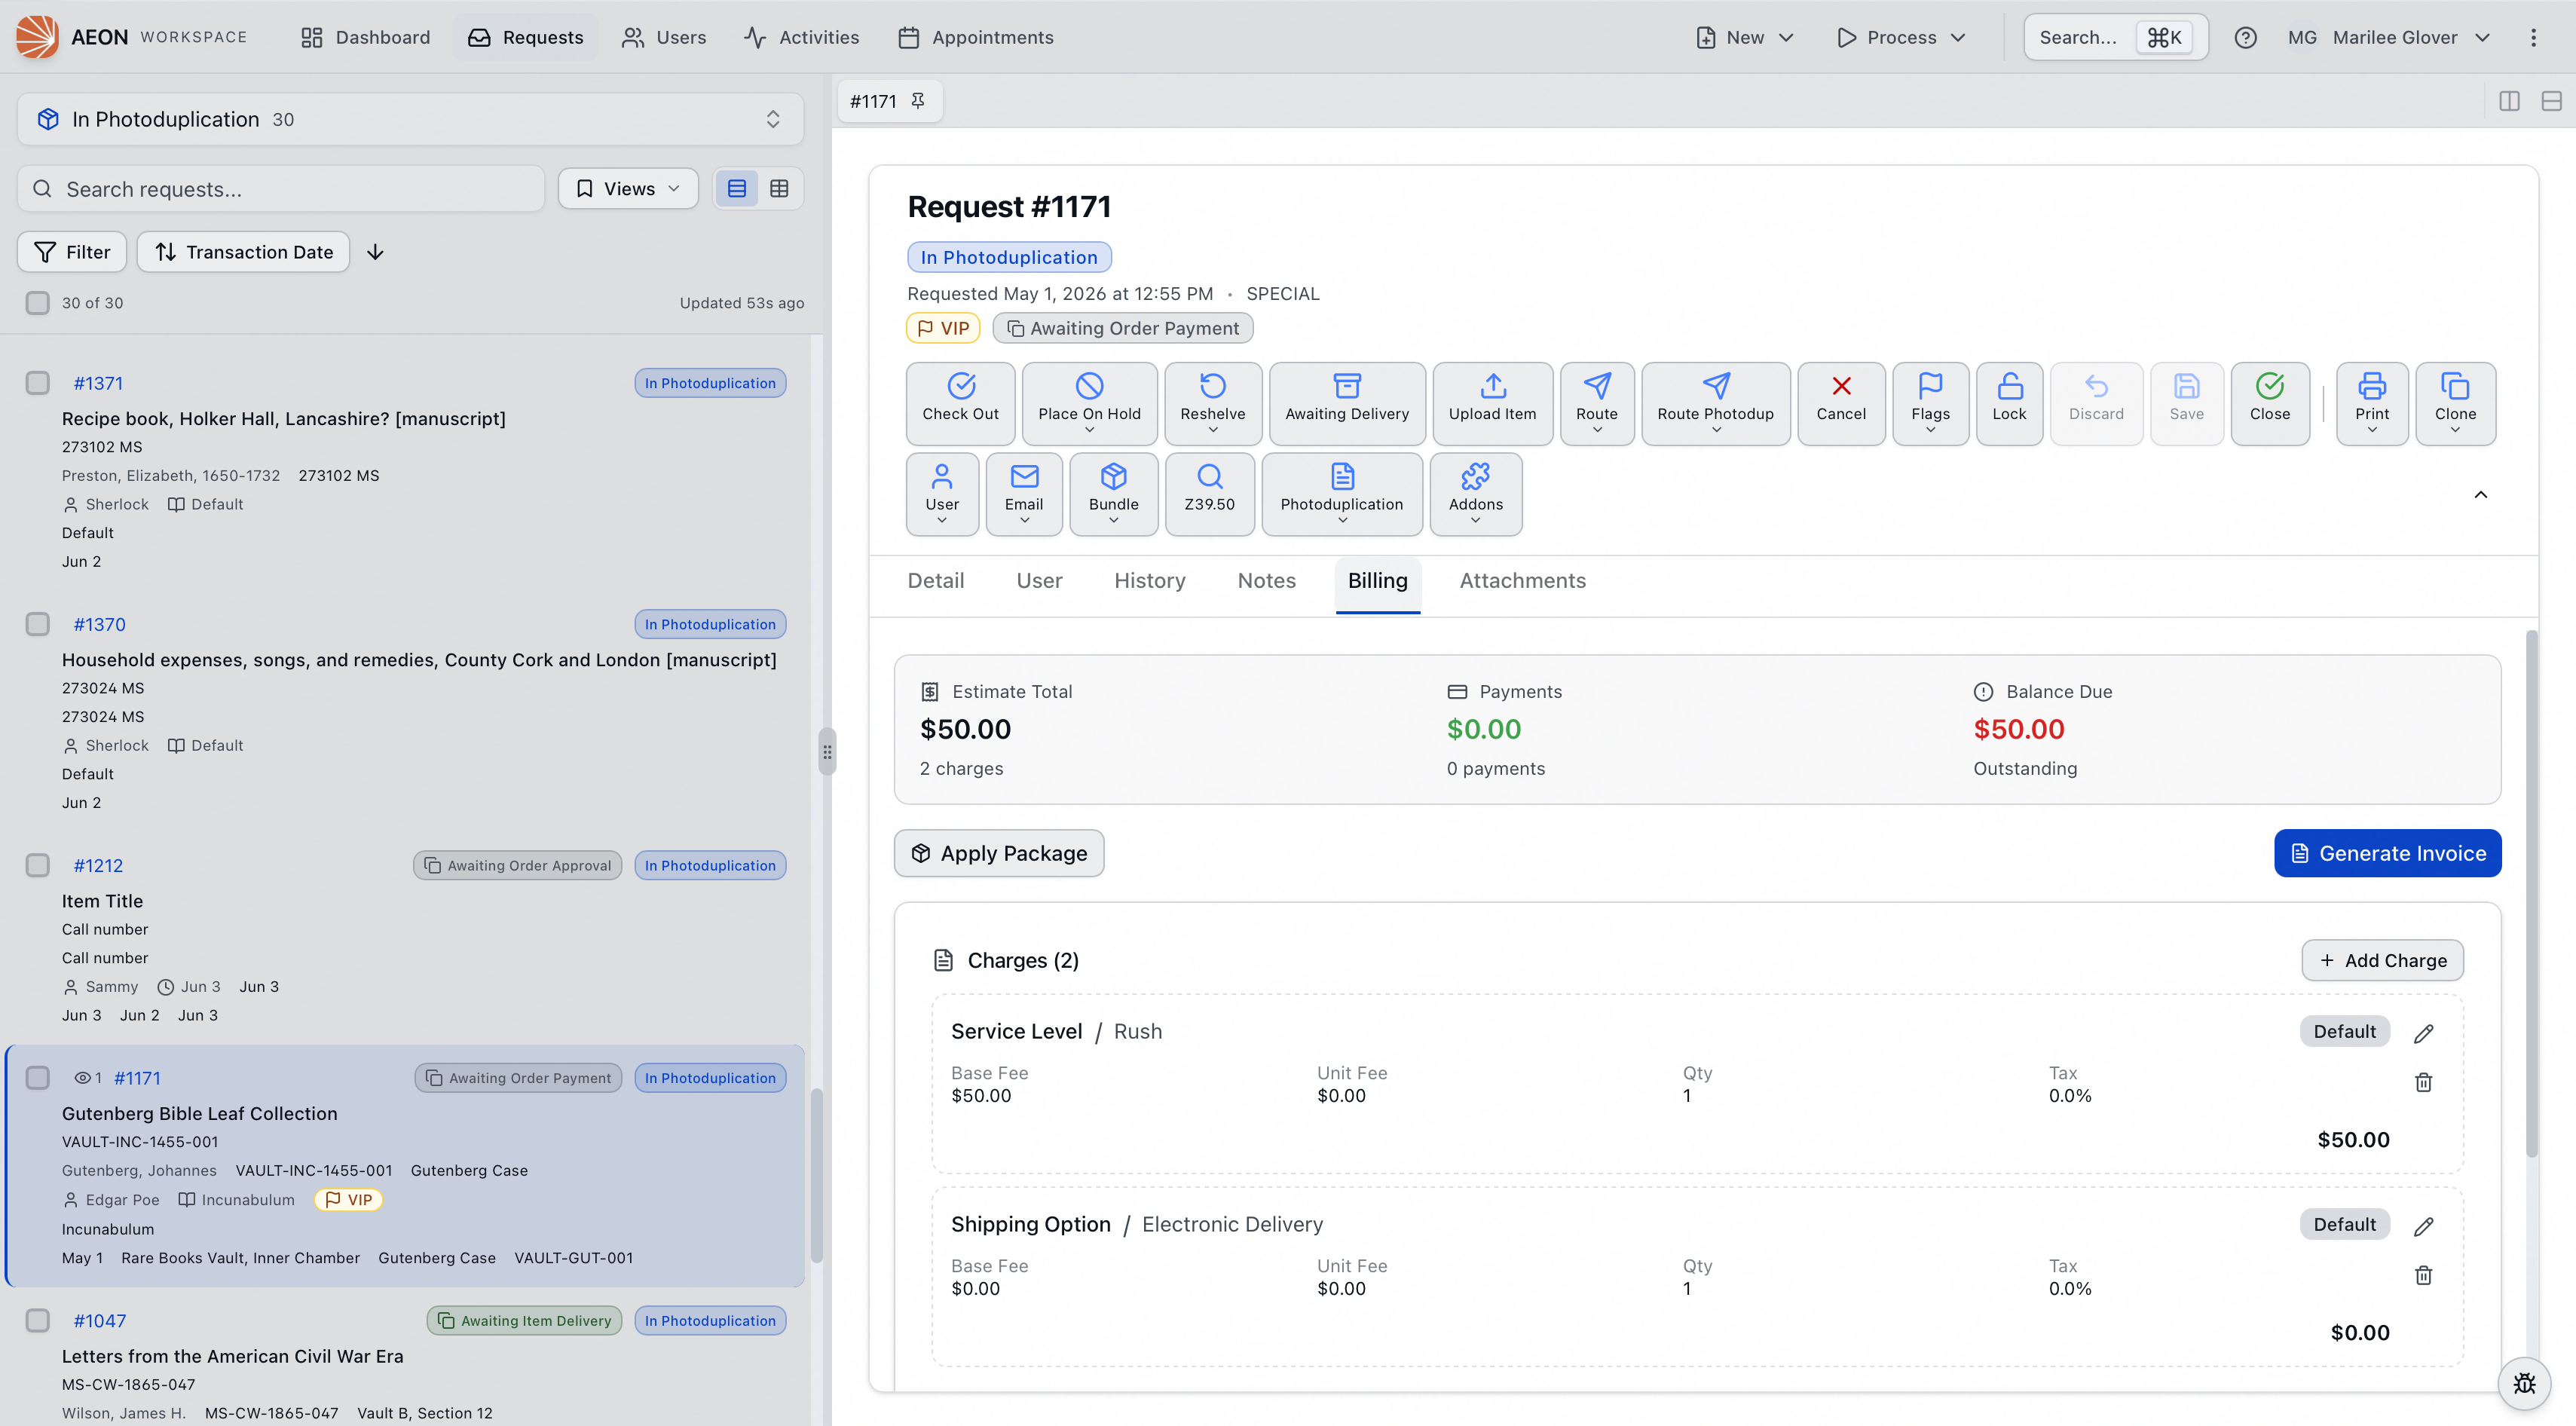
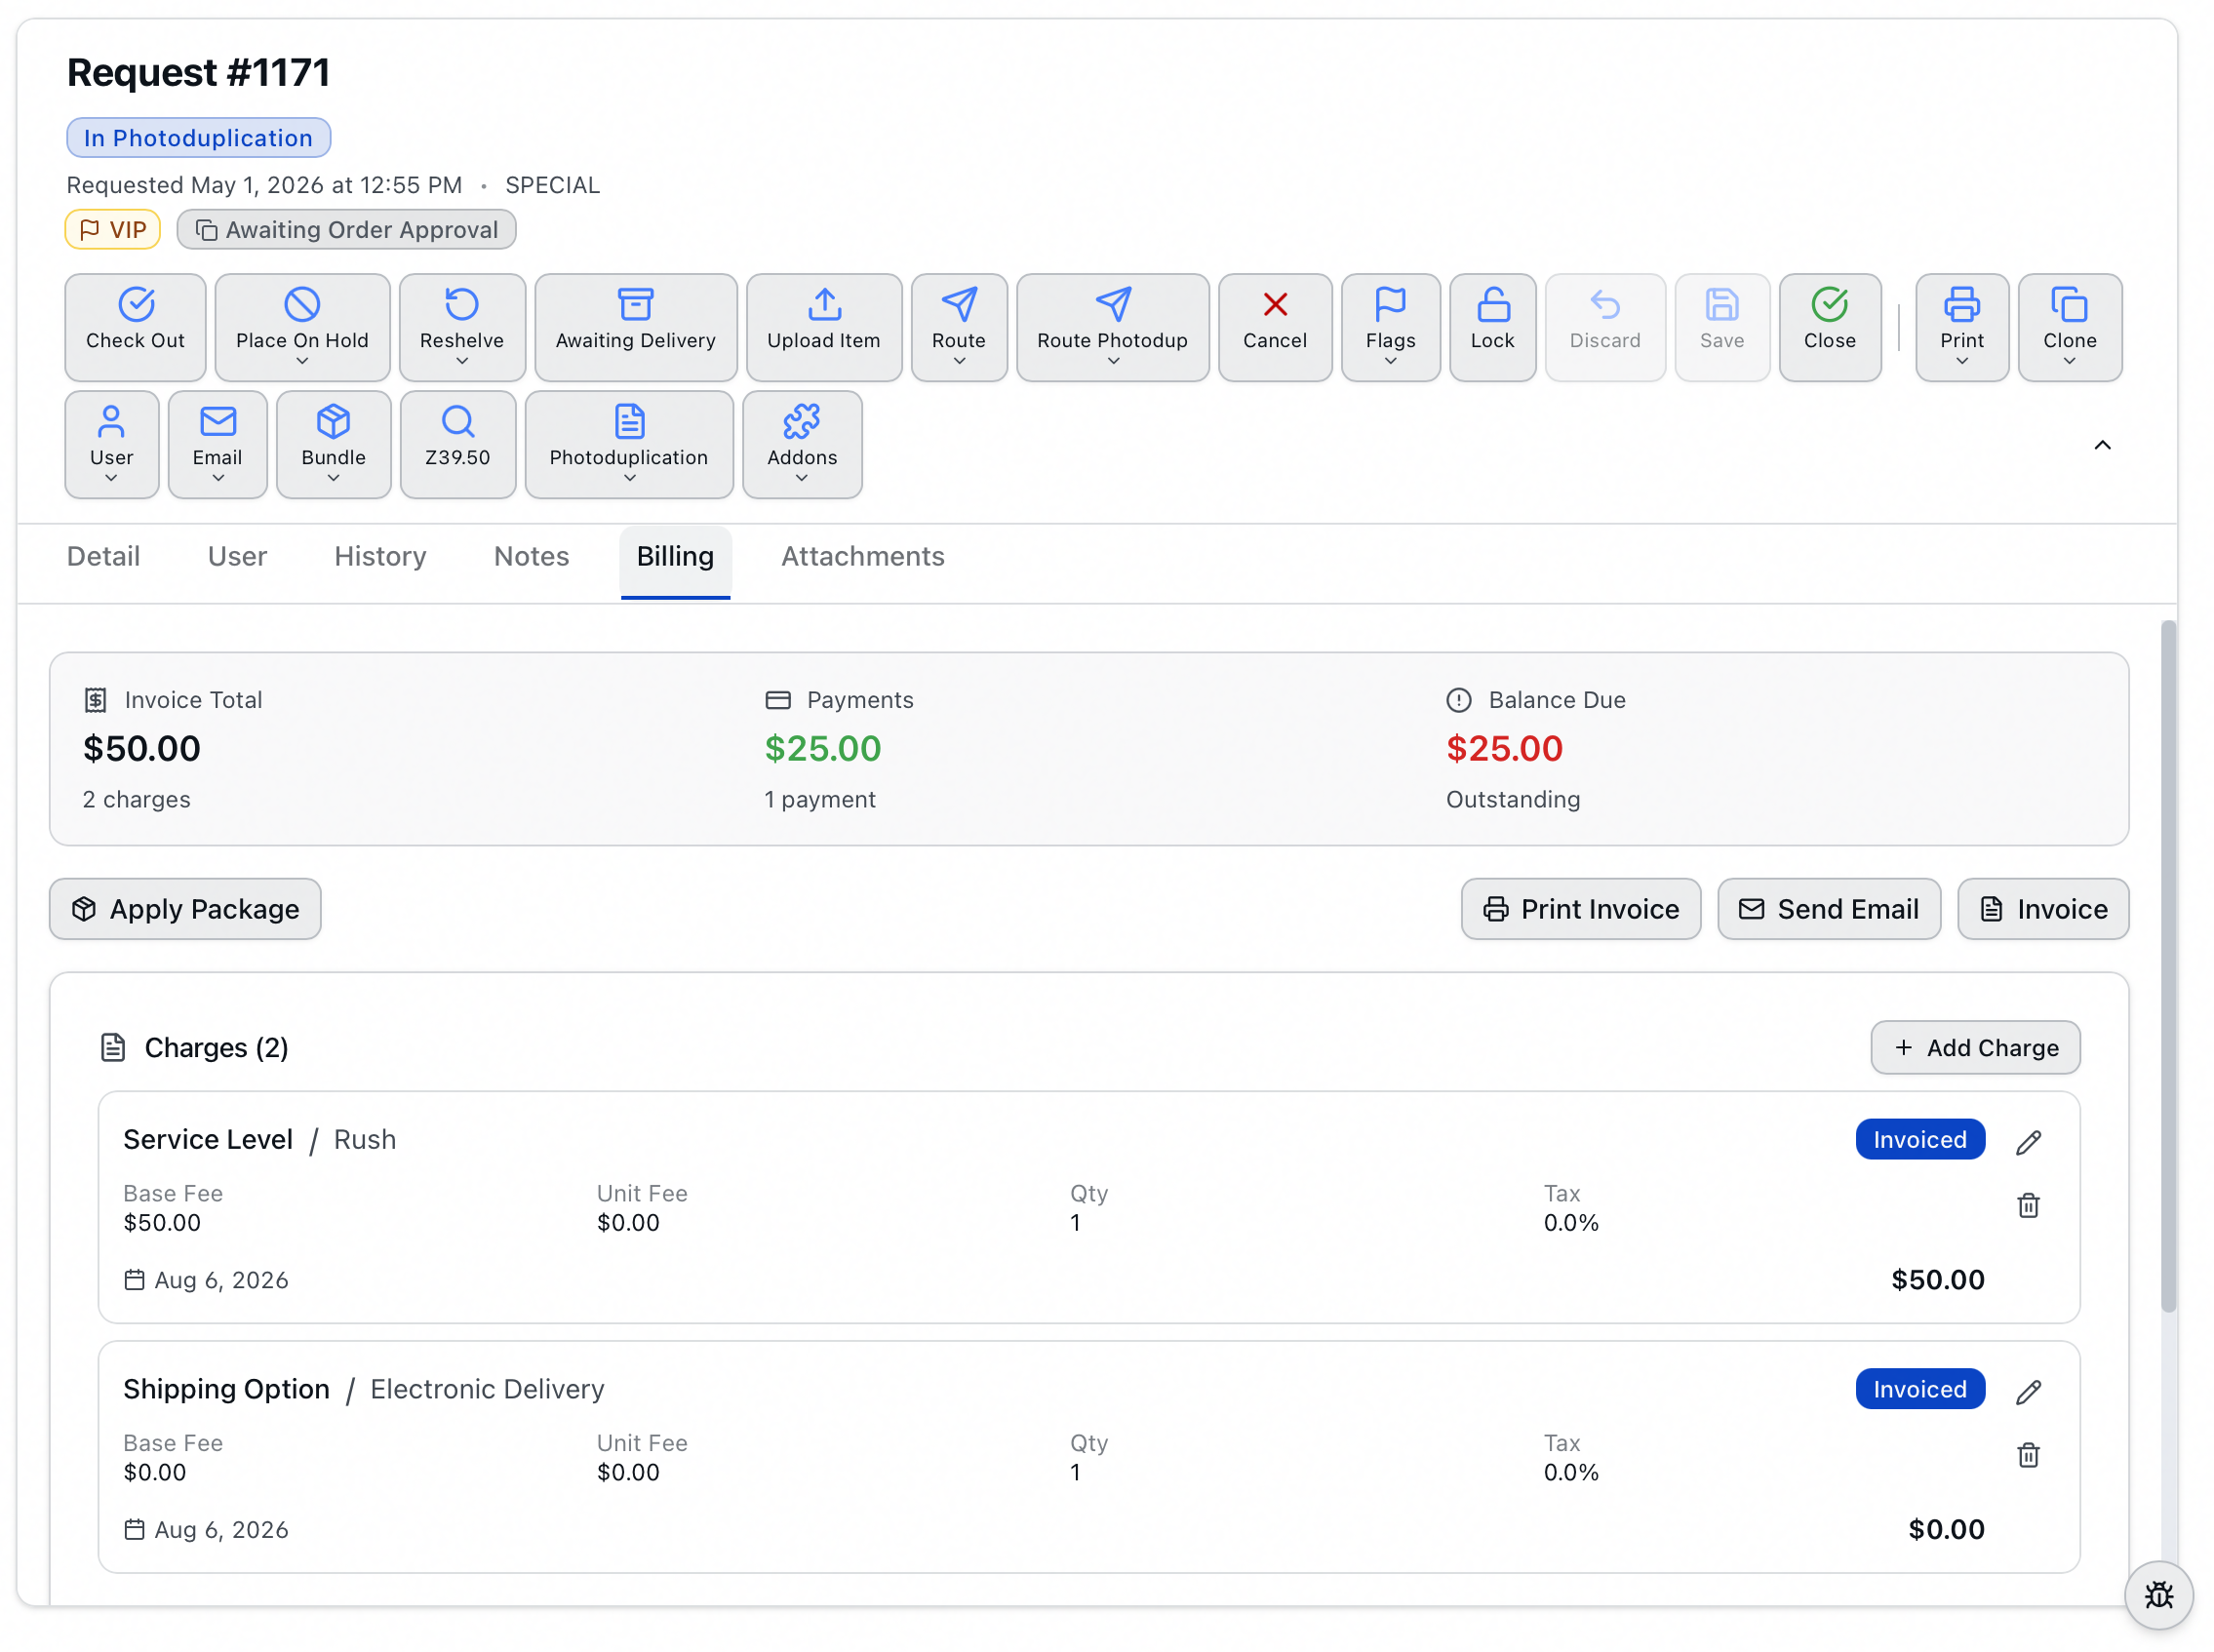
- The tab loads three things, top to bottom: a summary of the money, a toolbar of invoice actions, and two lists — Charges and Payments.
Reading the summary
The summary strip across the top gives you the whole financial picture of the request at a glance, in three figures:
| Figure | What it tells you |
|---|---|
| Invoice Total / Estimate Total | The sum of all charges. It reads Estimate Total before you've generated an invoice, and Invoice Total afterward. |
| Payments | The total the researcher has paid so far. |
| Balance Due | Total charges minus total payments. Shown in red when there's an amount Outstanding, green when Paid in full, and amber when the account is Overpaid (for example, after a refund). |
These figures stay current while you work. If a colleague adds a charge, records a payment, generates an invoice, or applies a service package on the same request, your Billing tab updates without you refreshing it.
Charges
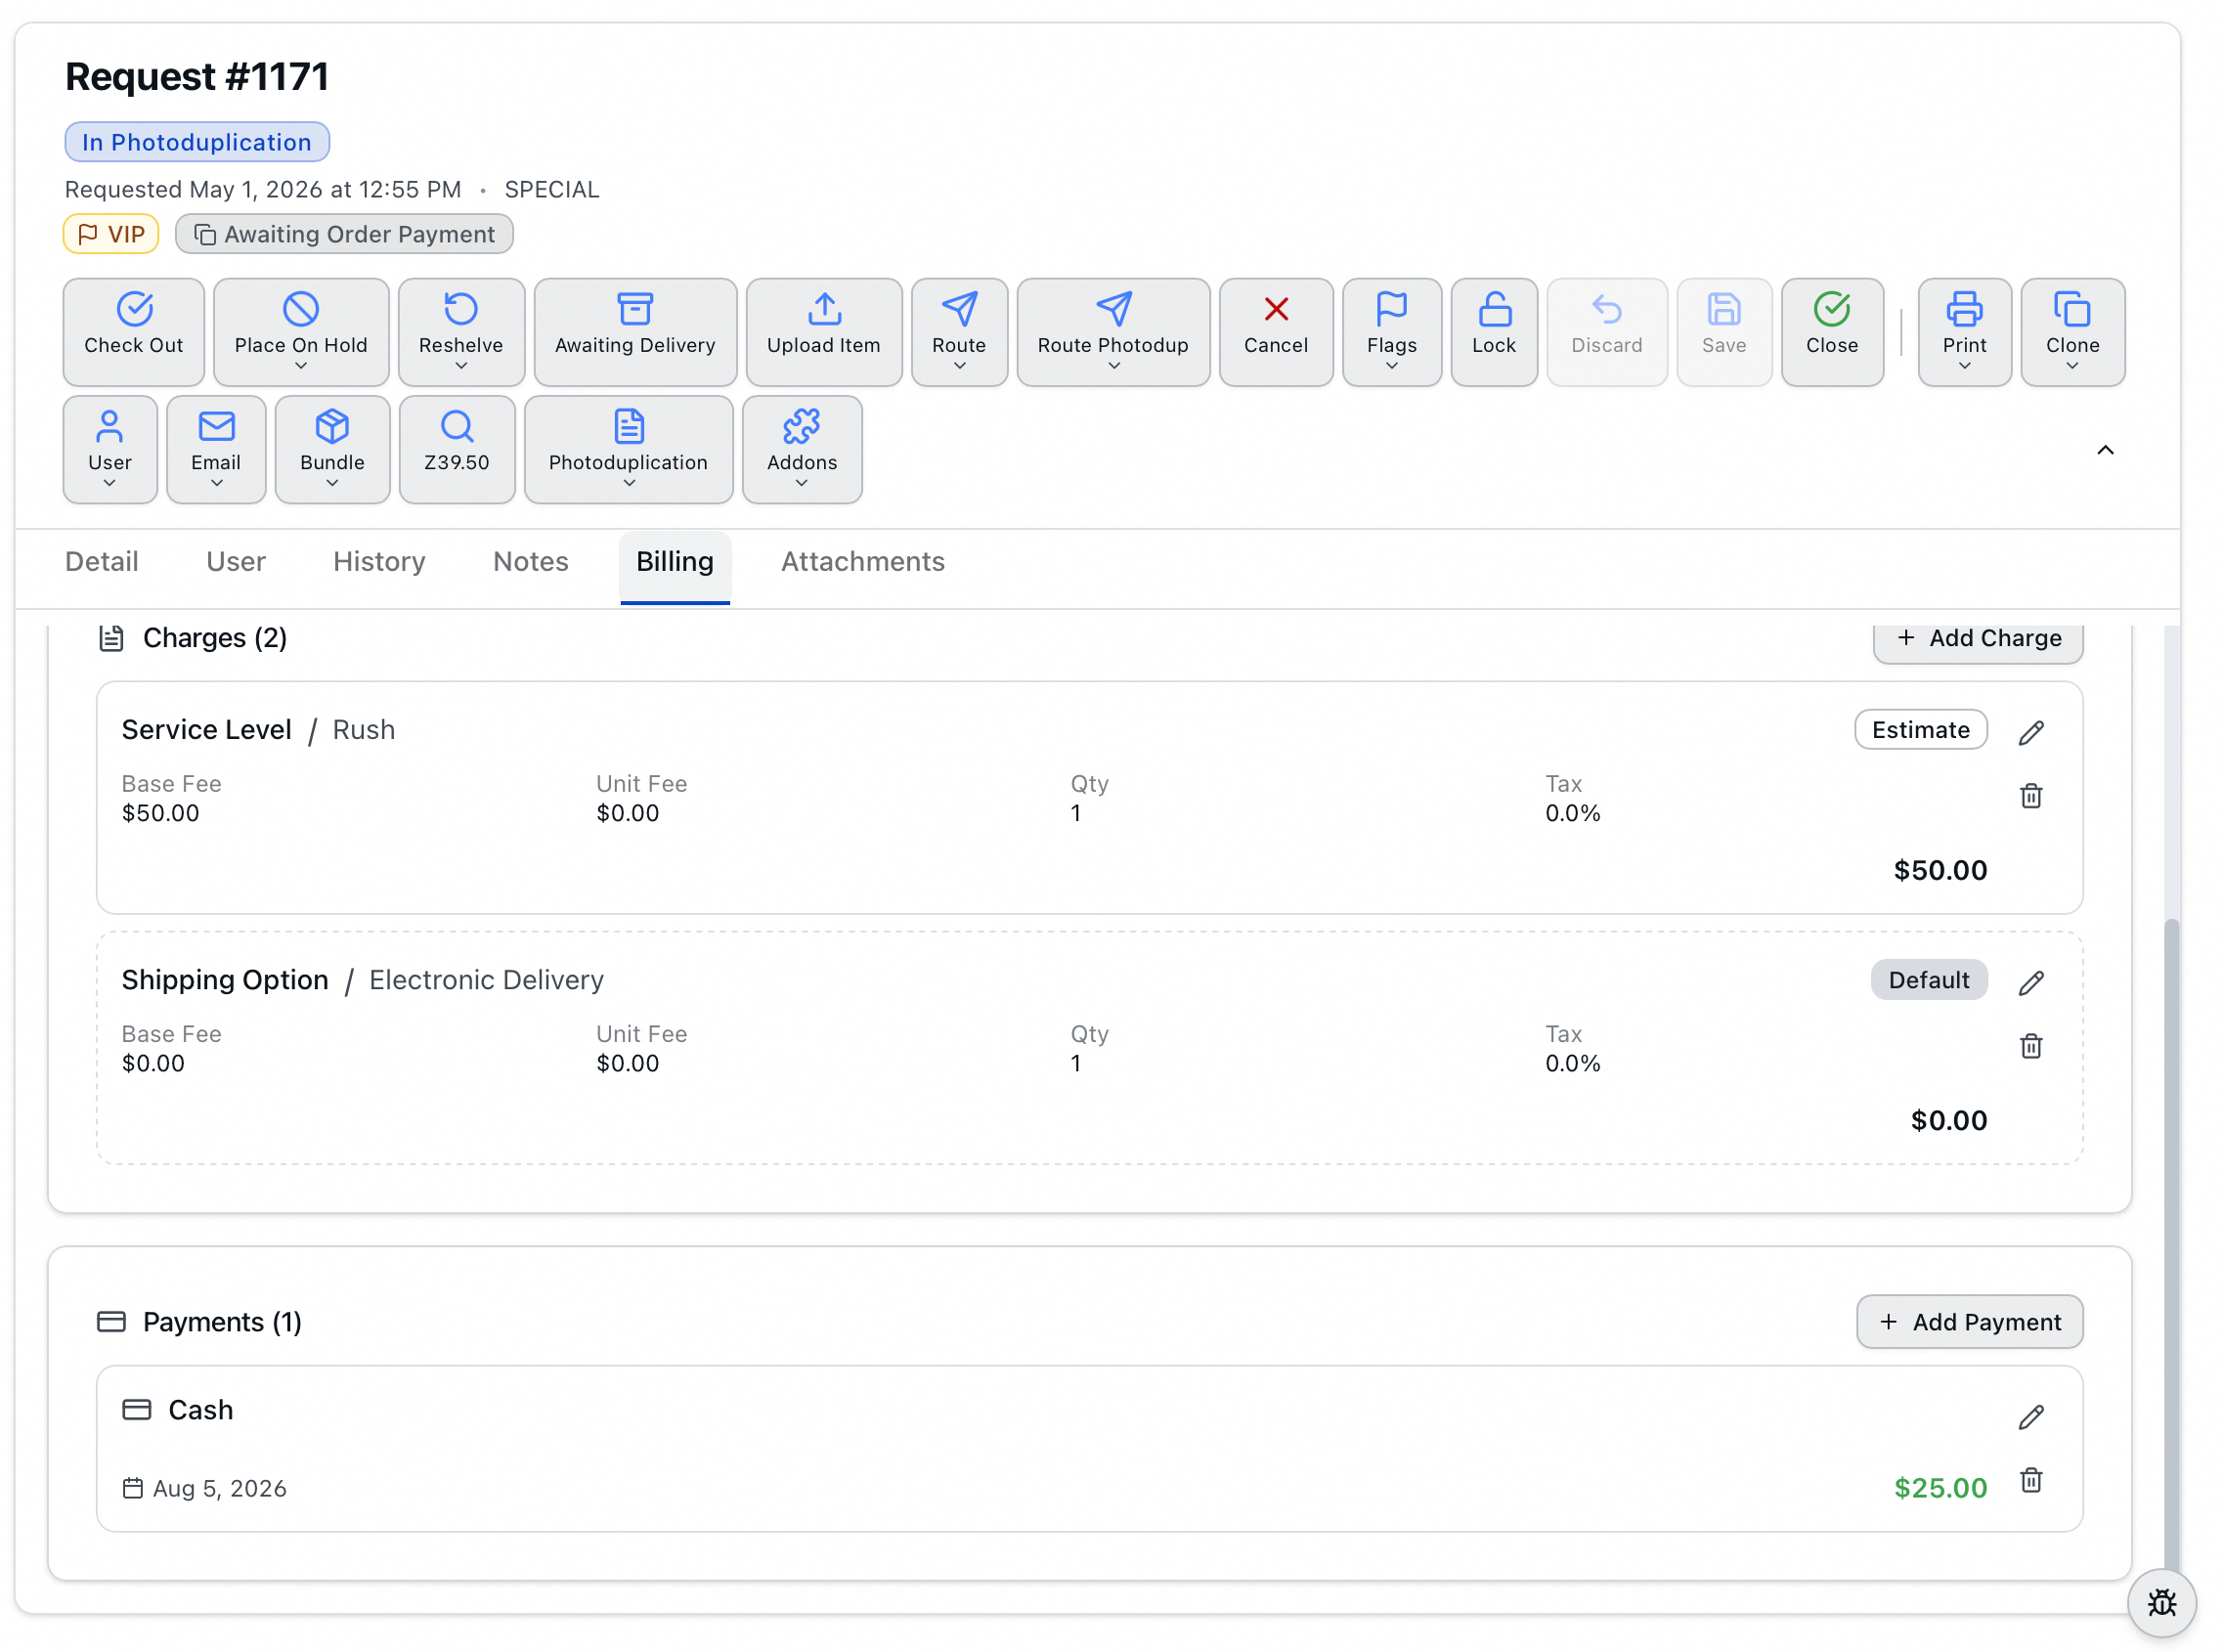
The Charges list shows every line item on the order. Each charge card shows its billing context and type (for example, Format / Photocopy), the base fee, unit fee, quantity, and tax rate, plus the line subtotal.
Estimates vs. invoiced charges
Before you invoice, charges are estimates and can be changed freely. Aeon helps you here: based on the request's Format, Service Level, and Shipping Option, it pulls the matching prices from your billing defaults and shows them as suggested charges, tagged Default. A charge you've added or saved yourself is tagged Estimate. Once the invoice is generated, every charge is tagged Invoiced and carries the invoice date.
Invoicing doesn't freeze a charge. You can still correct its fees, quantity, or tax rate afterward, and you can still delete it, provided your role allows. The one thing that locks is the Billing Context — it ties the line to the request field that produced it. Open an invoiced charge for editing and that field is grayed out, with a note underneath: "The billing context can't be changed on an invoiced charge."
The fees on each charge come from your Billing Defaults configuration, matched on billing category, context, and type. If a charge's quantity should track the number of pages, Aeon fills the quantity from the request's page count automatically — and on a request with no page count yet, a per-page charge is estimated at its base fee alone rather than being priced as a single page. See Billing Charges and Estimates and Billing Defaults Configuration for the underlying setup.
Adding a charge
- On the Charges card, click Add Charge.
- A panel opens on the right. Choose a Billing Context, then a Billing Type.
- The Base Fee, Unit Fee, and Tax Rate (%) fill in automatically from your billing defaults; adjust any of them, plus Quantity, if you need to. The running Subtotal updates as you type.
- Click Add.
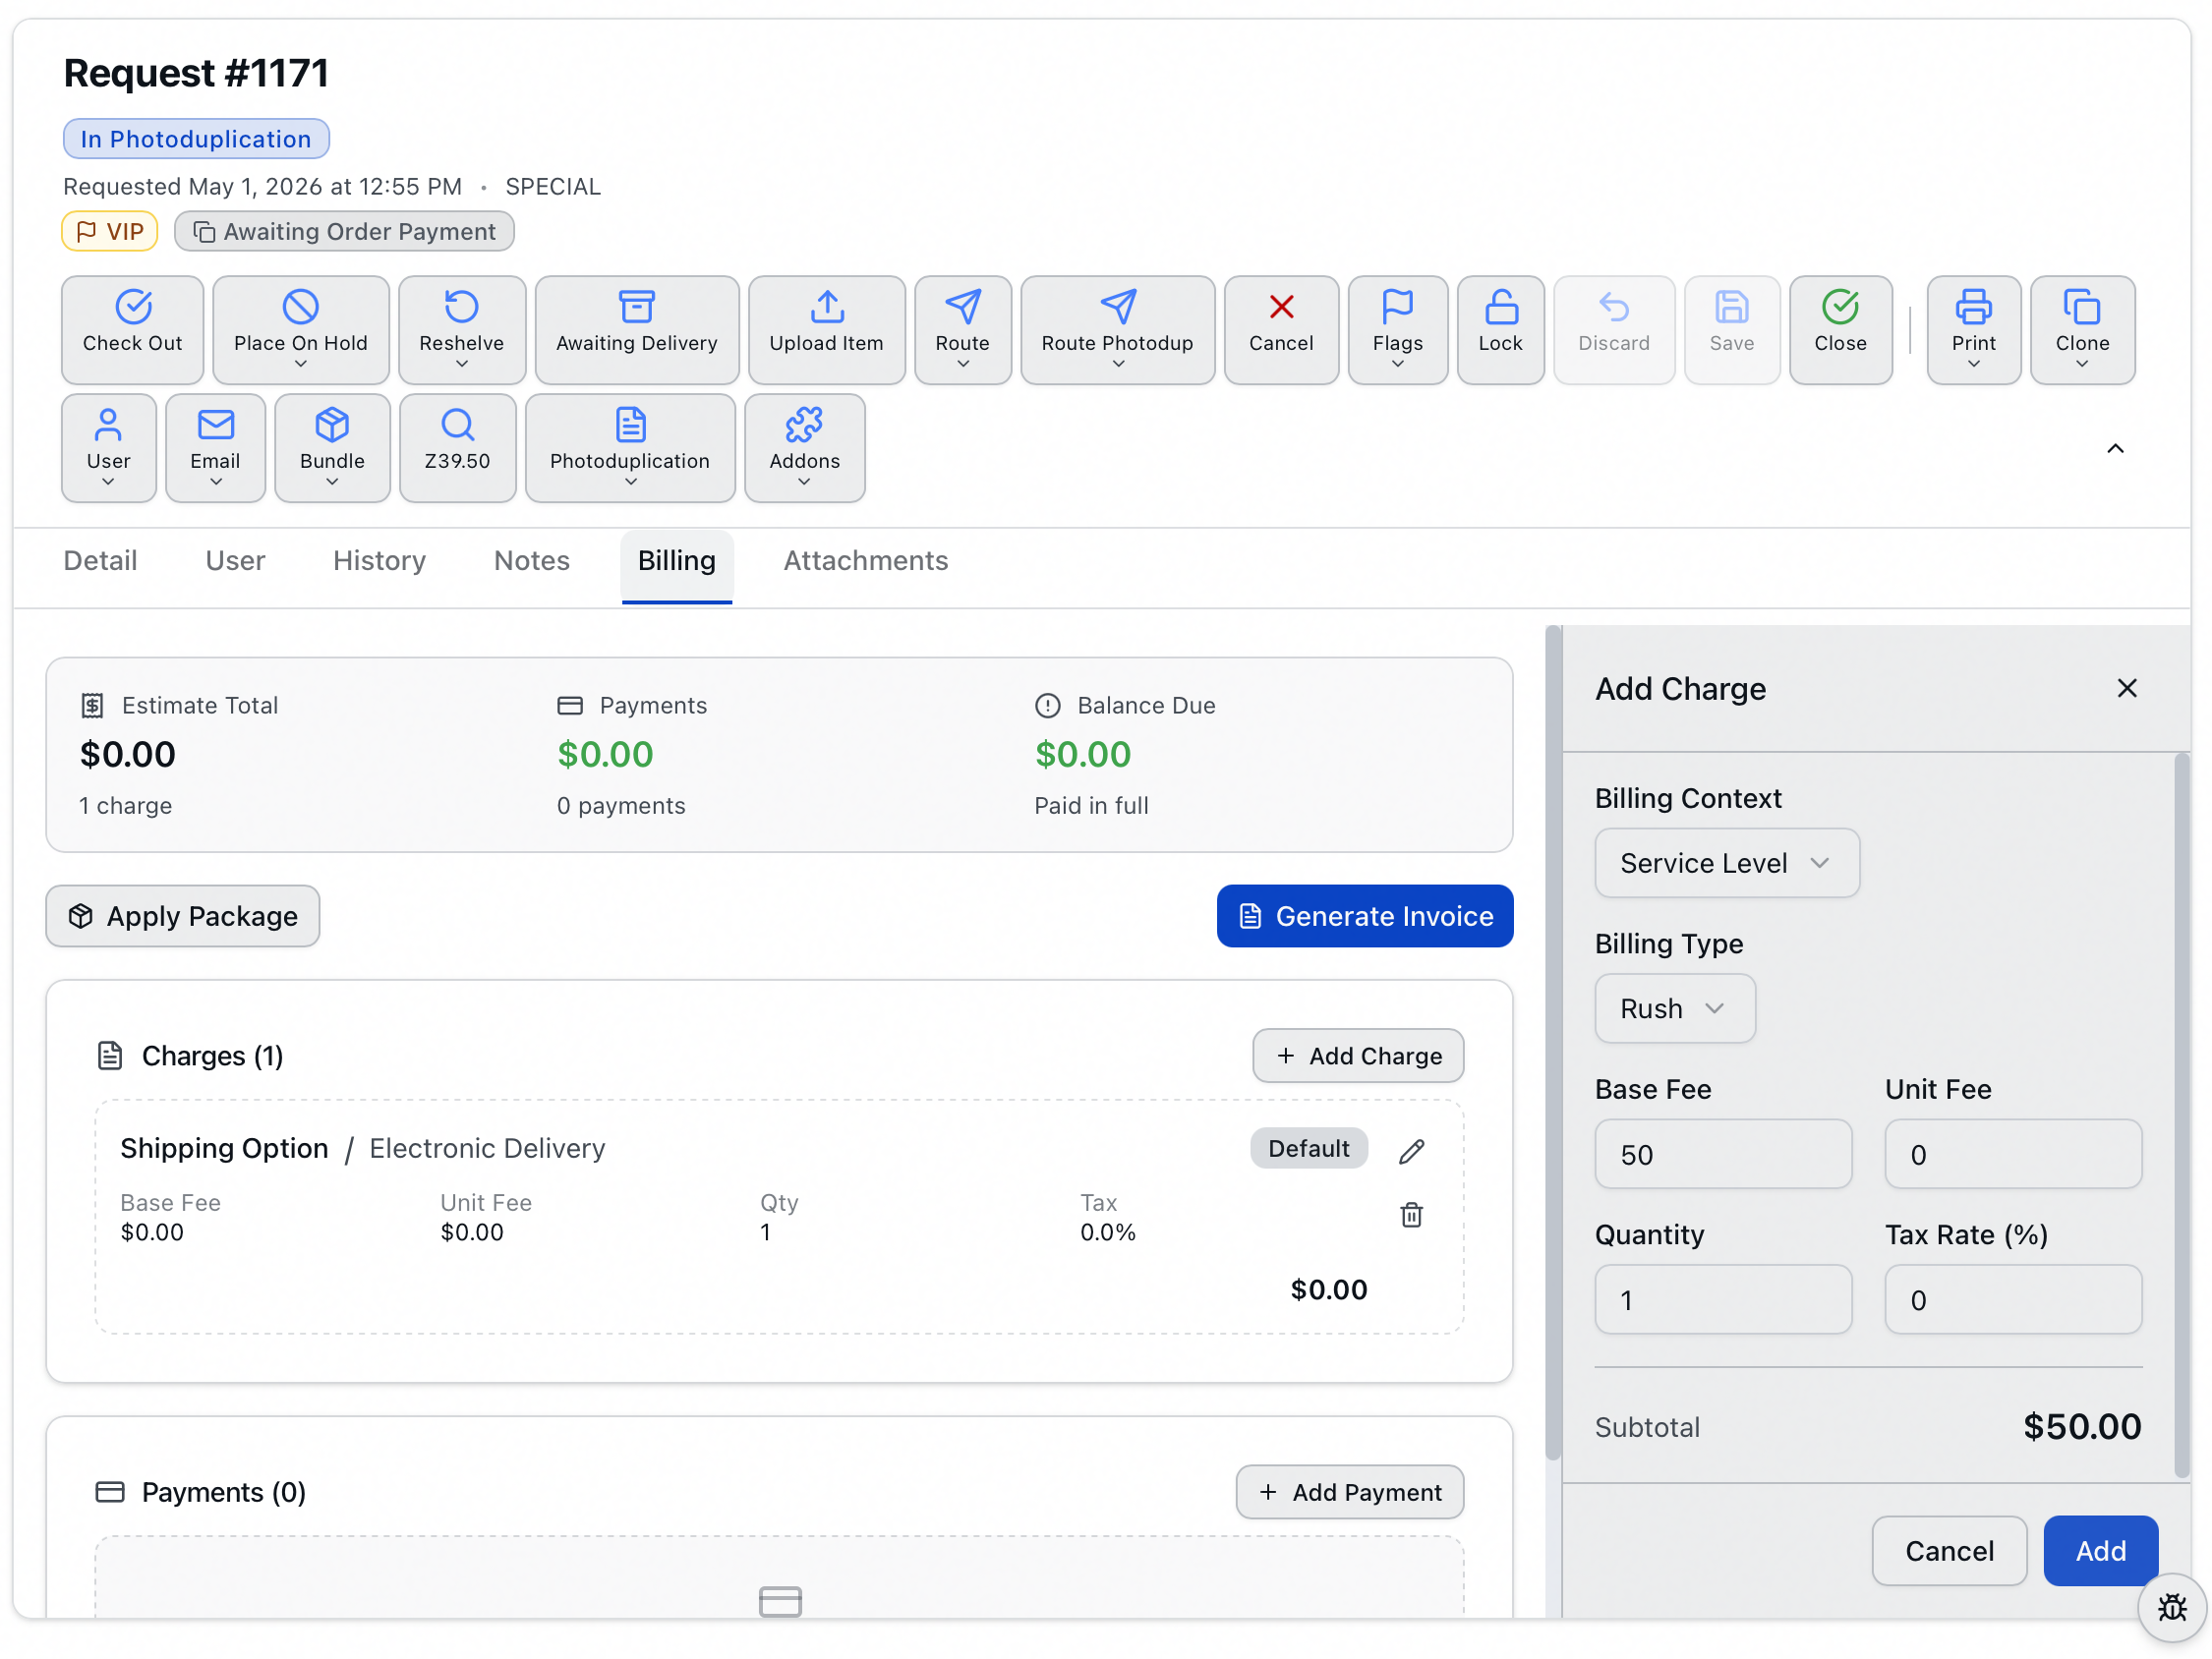
To turn a suggested Default charge into a real one, click its edit (pencil) icon — the same panel opens pre-filled, and saving adds it to the order.
Editing a charge
Click the pencil icon on a charge card, change any field in the panel, and click Update. While the panel is open, the charge you're editing is highlighted in the list, so it's clear which line the panel belongs to — useful when a request carries two charges of the same context and type.
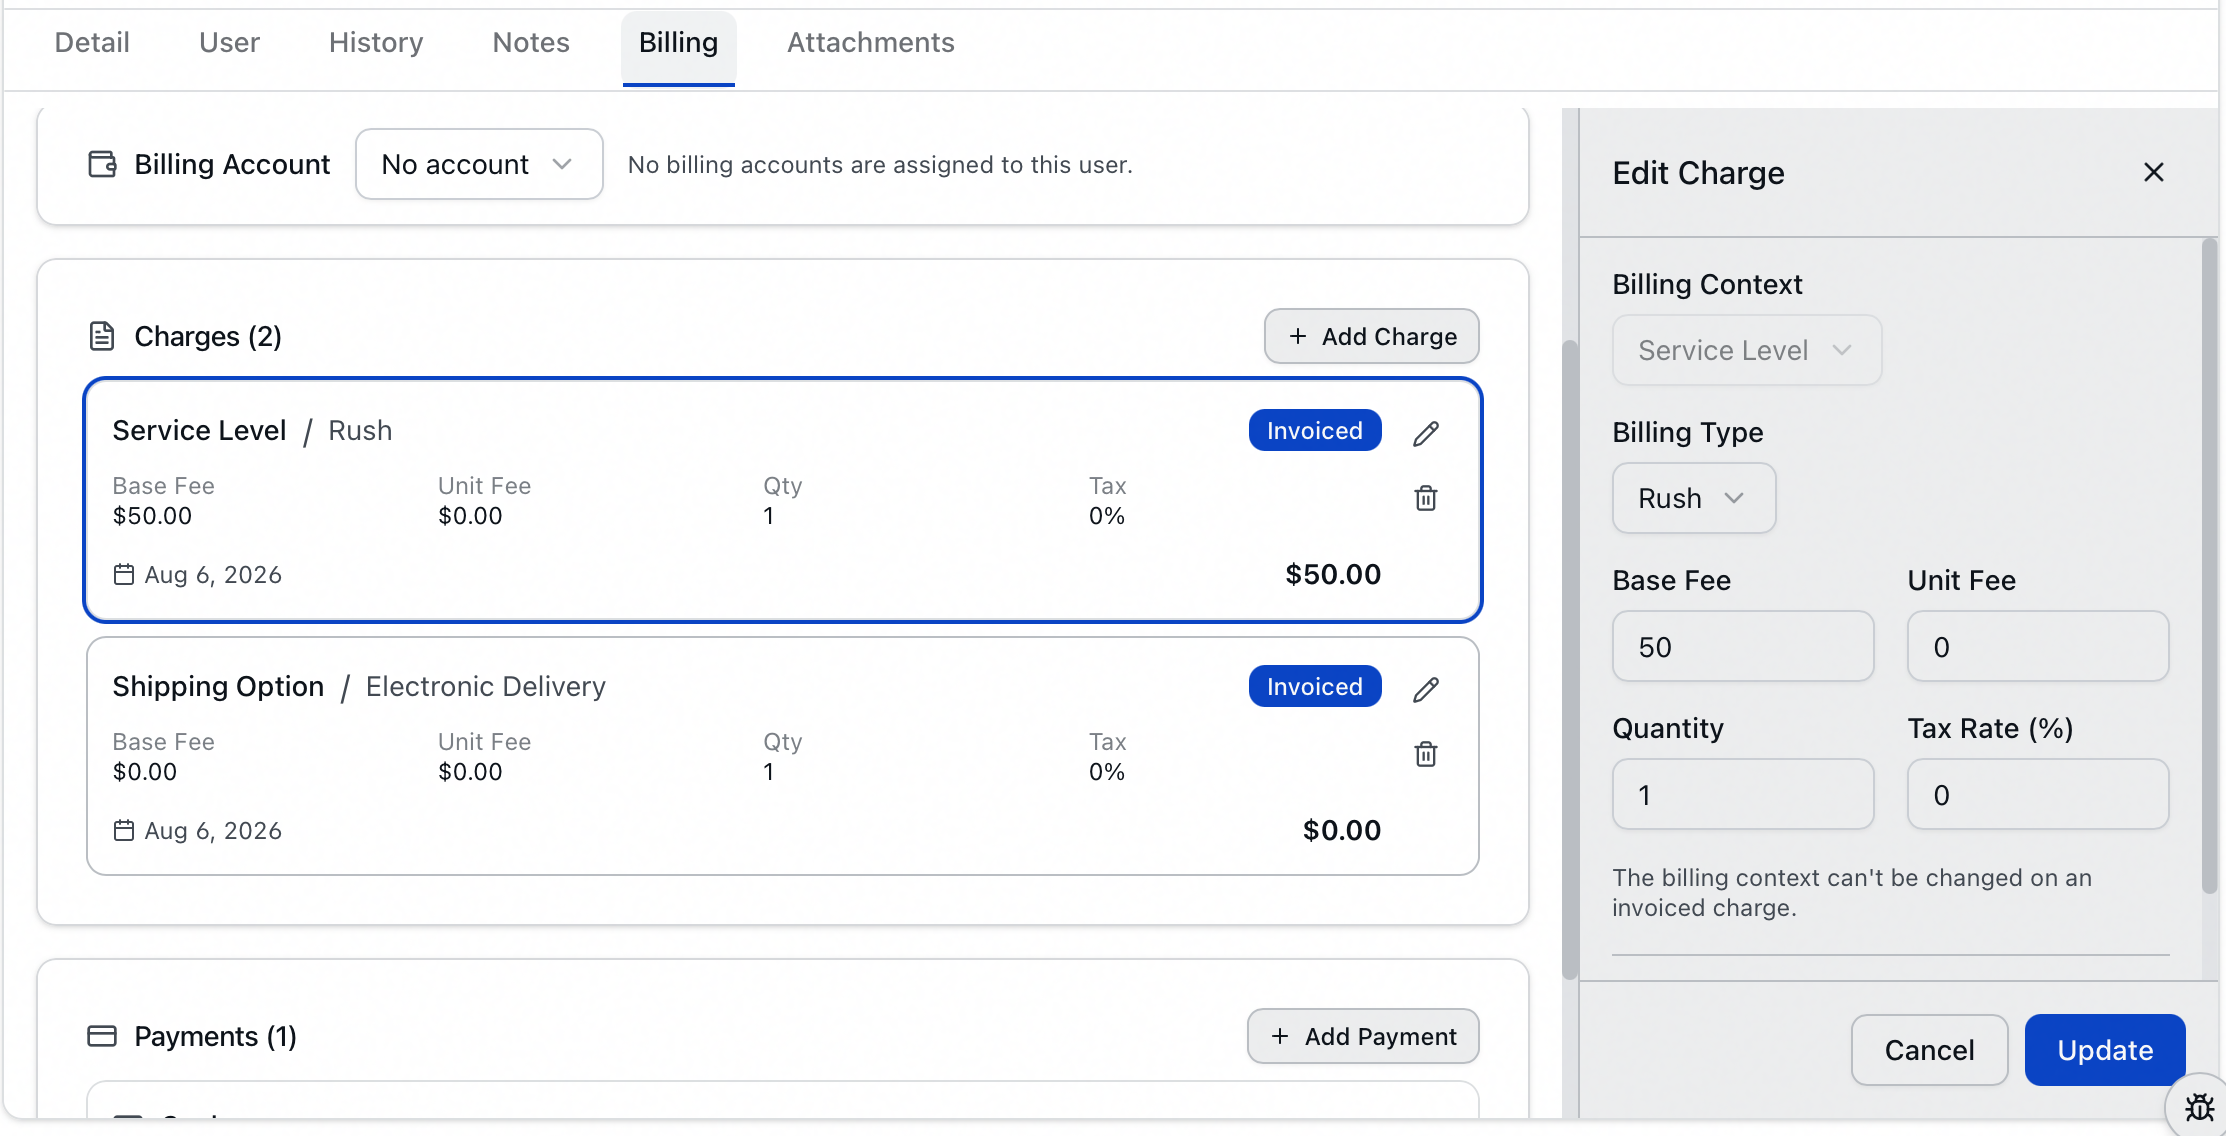
The charge above has been invoiced, which is why its Billing Context is grayed out — everything else on it still edits normally.
Removing a charge
Click the trash icon on a charge card and confirm in the Delete Charge? dialog.
Dismissing a suggested Default line works differently: click its trash icon and it goes without a confirmation prompt, because nothing is being deleted — it was only ever a suggestion. Two things to know about that. Dismissing one line clears every suggestion from the same billing context, not just the row you clicked. And the dismissal holds for as long as the request stays open, so switching to another tab and back no longer brings the suggestions back — but close the request and reopen it and they return, since they're recalculated from your billing defaults each time.
Payments
The Payments list records everything the researcher has paid. You don't have to wait for any particular status — a payment can be recorded against any request with an outstanding balance.
Recording a payment
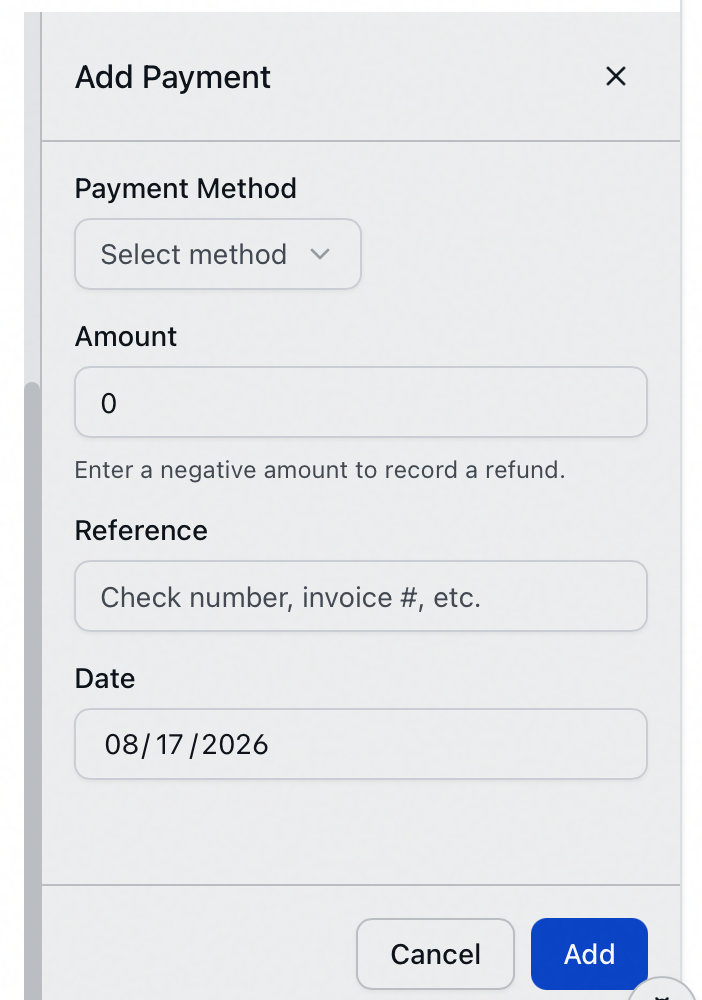
- On the Payments card, click Add Payment.
- In the panel, choose a Payment Method (the options come from your CustomDropDown values), enter the Amount, an optional Reference (a check number, for example), and the Date (today's date is filled in for you).
- Click Add.
If the request has a billing account linked to it, Billing Account appears at the top of the Payment Method list. Choosing it fills the Reference with the account ID for you, so the payment records against that account without any typing.
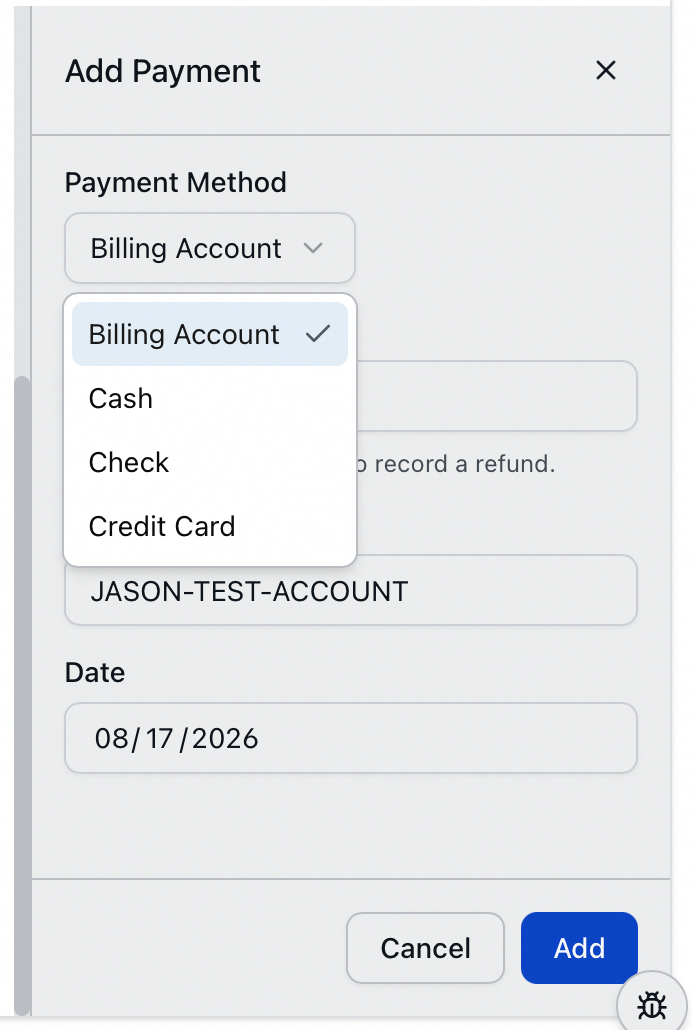
Two checks run on the amount. Zero is refused outright — "Payment amount cannot be zero." And an amount larger than what's owed asks first, because clearing the balance can move the request along on its own.
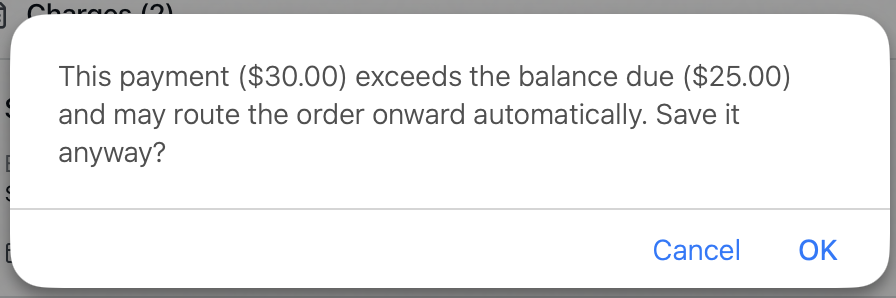
Refunds skip that prompt, since a negative amount can't clear a balance.
The payment appears in the Payments list with its method, date, and amount, and the summary updates straight away.
If recording a payment brings the balance to zero while the copy order is awaiting approval, billing, or processing, Aeon routes the request on to Awaiting Item Delivery for you and shows a brief confirmation. You don't have to route it manually.
Recording a refund
To record money returned to a researcher, add a payment with the amount entered as a negative number. The panel says so under the Amount field — "Enter a negative amount to record a refund." The balance adjusts accordingly, and the summary shows the account as Overpaid if the refund pushes payments above charges.
Editing or removing a payment
Click the pencil icon to edit a payment, or the trash icon to remove it (confirm in the Delete Payment? dialog).
Payments taken by credit card through the web interface carry an authorization code and are marked Credit Card. You can edit only their Reference — the amount, method, and date are locked — and they cannot be deleted (the delete icon is disabled with the note "Credit card payments cannot be deleted"). To refund a card payment, process the refund through your payment processor and record it here as a negative payment.
Generating and managing the invoice
Generating the invoice is what finalizes the charges and starts the copy order moving through its workflow.
Generate the invoice
Once the request has at least one charge, a Generate Invoice button appears in the toolbar. Click it to lock the charges in. Aeon stamps each charge with the invoice date, then routes the request to Awaiting Order Approval. Two messages confirm what happened — "Invoice generated successfully" and a second one naming the queue the request moved to.
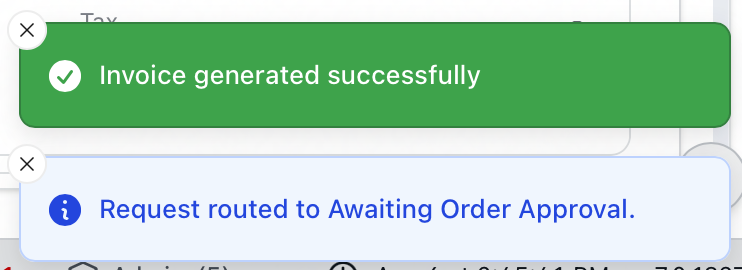
If the invoice total comes to $0.00, Aeon skips both Awaiting Order Approval and Awaiting Order Billing and sends the request straight to Awaiting Item Delivery — there's nothing to approve or collect. This is controlled by the AutoProcessZeroBalanceInvoices customization key, which is set to Yes out of the box, so it's the behavior you'll see unless someone has turned it off.
You can't generate an invoice for a request with no user on it, and you can't generate one for a user who has been anonymized — Aeon refuses in both cases. If a researcher's record has been anonymized after the fact, bill the request before anonymizing, not after.
After the invoice exists
Once an invoice has been generated, the summary switches from Estimate Total to Invoice Total, every charge picks up an Invoiced badge and the invoice date, and the toolbar changes. You'll see:
- Print Invoice — open the print dialog to print a copy of the invoice statement.
- Send Email — email the invoice to the researcher. Aeon opens a composer pre-filled from the ItemInvoice email template, so you can review and edit it before sending.
- Invoice (a dropdown) — containing Update Invoice and Delete Invoice. Update Invoice picks up charges you've added since, stamping those with today's date. Charges that were already billed keep the date they were given, so an update doesn't rewrite the history of what was invoiced when. The date the invoice reports is the most recent one on any of its charges.
Applying a service package
If your site has service packages available to the request, an Apply Package button appears in the toolbar. Choose a package to add its bundle of charges to the order in one click. The menu offers packages set up for the request's billing category, plus any in the Global category, which apply whatever the category is. See Service Packages.
Deleting the invoice
In the Invoice dropdown, Delete Invoice clears the billing on the request entirely.
Delete Invoice deletes every billing charge and every payment on the request — it can't be undone, and you'll be asked to confirm. If the request has any credit card payments, deletion is blocked outright (the option is disabled and labeled "(has CC payments)"); refund those through your payment processor first.
The Billing tab follows your Billing permission level:
- View — you can open the tab and see charges, payments, and the summary, but the Add Charge, Add Payment, edit, and toolbar action buttons don't appear.
- Edit — you can add and edit charges and payments and apply a service package.
- Full — additionally lets you delete charges and payments, generate and update the invoice, and delete the invoice.
Sending the invoice email requires Edit on Billing plus Edit on Email. If your role is view-only for Billing, the tab is read-only.