Print Designer: Invoice
An invoice is the document you hand or email a researcher that itemizes what a single request cost: the charges, any payments already made, and the amount still due. The Print Designer is where you decide what that invoice looks like — which details appear, how the charge and payment tables are laid out, and what your remittance block says.
This is the one print template where the tables matter. A callslip or a user card prints a fixed set of single values; an invoice prints rows — the charges, the payments, and the notes on the request — so the designer gives you three repeating tables that grow to fit whatever the transaction has.
- You're setting up billing and want invoices on your institution's letterhead with the right remittance address.
- Your finance office needs the invoice to show specific line items, a tax line, or a remittance address.
- You want to reword the totals block, or show payments received alongside the amount due.
- You're moving off the Aeon 6 Word templates and want to rebuild the invoice visually.
The invoice designer is one mode of Aeon's print designer. The Request, Callslip, User, Invoice Statement, and Digitization Request templates all use the same canvas and tools — only the available fields, the tables, and the sample preview data differ. If you've designed a callslip, this works identically; the addition here is the tables.
An invoice bills a single transaction — one request, its charges, its payments. An invoice statement bills a user across everything they owe. They're separate template types built around different records: this one around the transaction, the statement around the user.
Opening the invoice designer
- Open the Customization Manager.
- In the left navigation, under Designers, choose Print Designer. It opens on the Request template.
- Print Designer expands into one entry per template type — Request, Callslip, User, Invoice, Invoice Statement, and Digitization Request. Choose Invoice.
The designer auto-selects the default template and loads it onto the canvas — Aeon's built-in one is named Default Invoice. If no templates exist yet, you'll see "No Invoice templates found" with a Create Template button.
Creating, renaming, duplicating, deleting, importing, exporting, or saving a template requires the Designers configuration capability. Without it you can still reach the page and look at templates, but the save and template-management actions are blocked. Generating a Preview takes either the Designers capability or View access to Requests. See Roles & Capabilities.
The designer needs room to work. On a phone-sized screen it shows "Larger Display Required" and asks you to switch to a tablet or desktop.
How the designer is laid out
With a template open you have a toolbar across the top, a panel on the left, and the page canvas filling the rest:
| Area | What it's for |
|---|---|
| Toolbar (top) | The template selector and its ⋯ menu, undo/redo, page size, orientation, Margins, the layout-mode switch (Absolute or Flow), records-per-page, group/ungroup, Preview, zoom (50% / 75% / 100% / 125% / 150%), the save controls, and a ? button that opens the keyboard-shortcut list. |
| Left panel | Two tabs — Fields and Insert — for adding content to the page (see below). |
| Canvas (center) | The invoice itself, drawn to scale with rulers. You arrange everything here by dragging. |
You edit a piece of the invoice by selecting it — a small floating toolbar appears just above the selection with that element's settings. Nothing you place is permanent until you save, and the save indicator always tells you where you stand: Saved, Unsaved, or Saving....
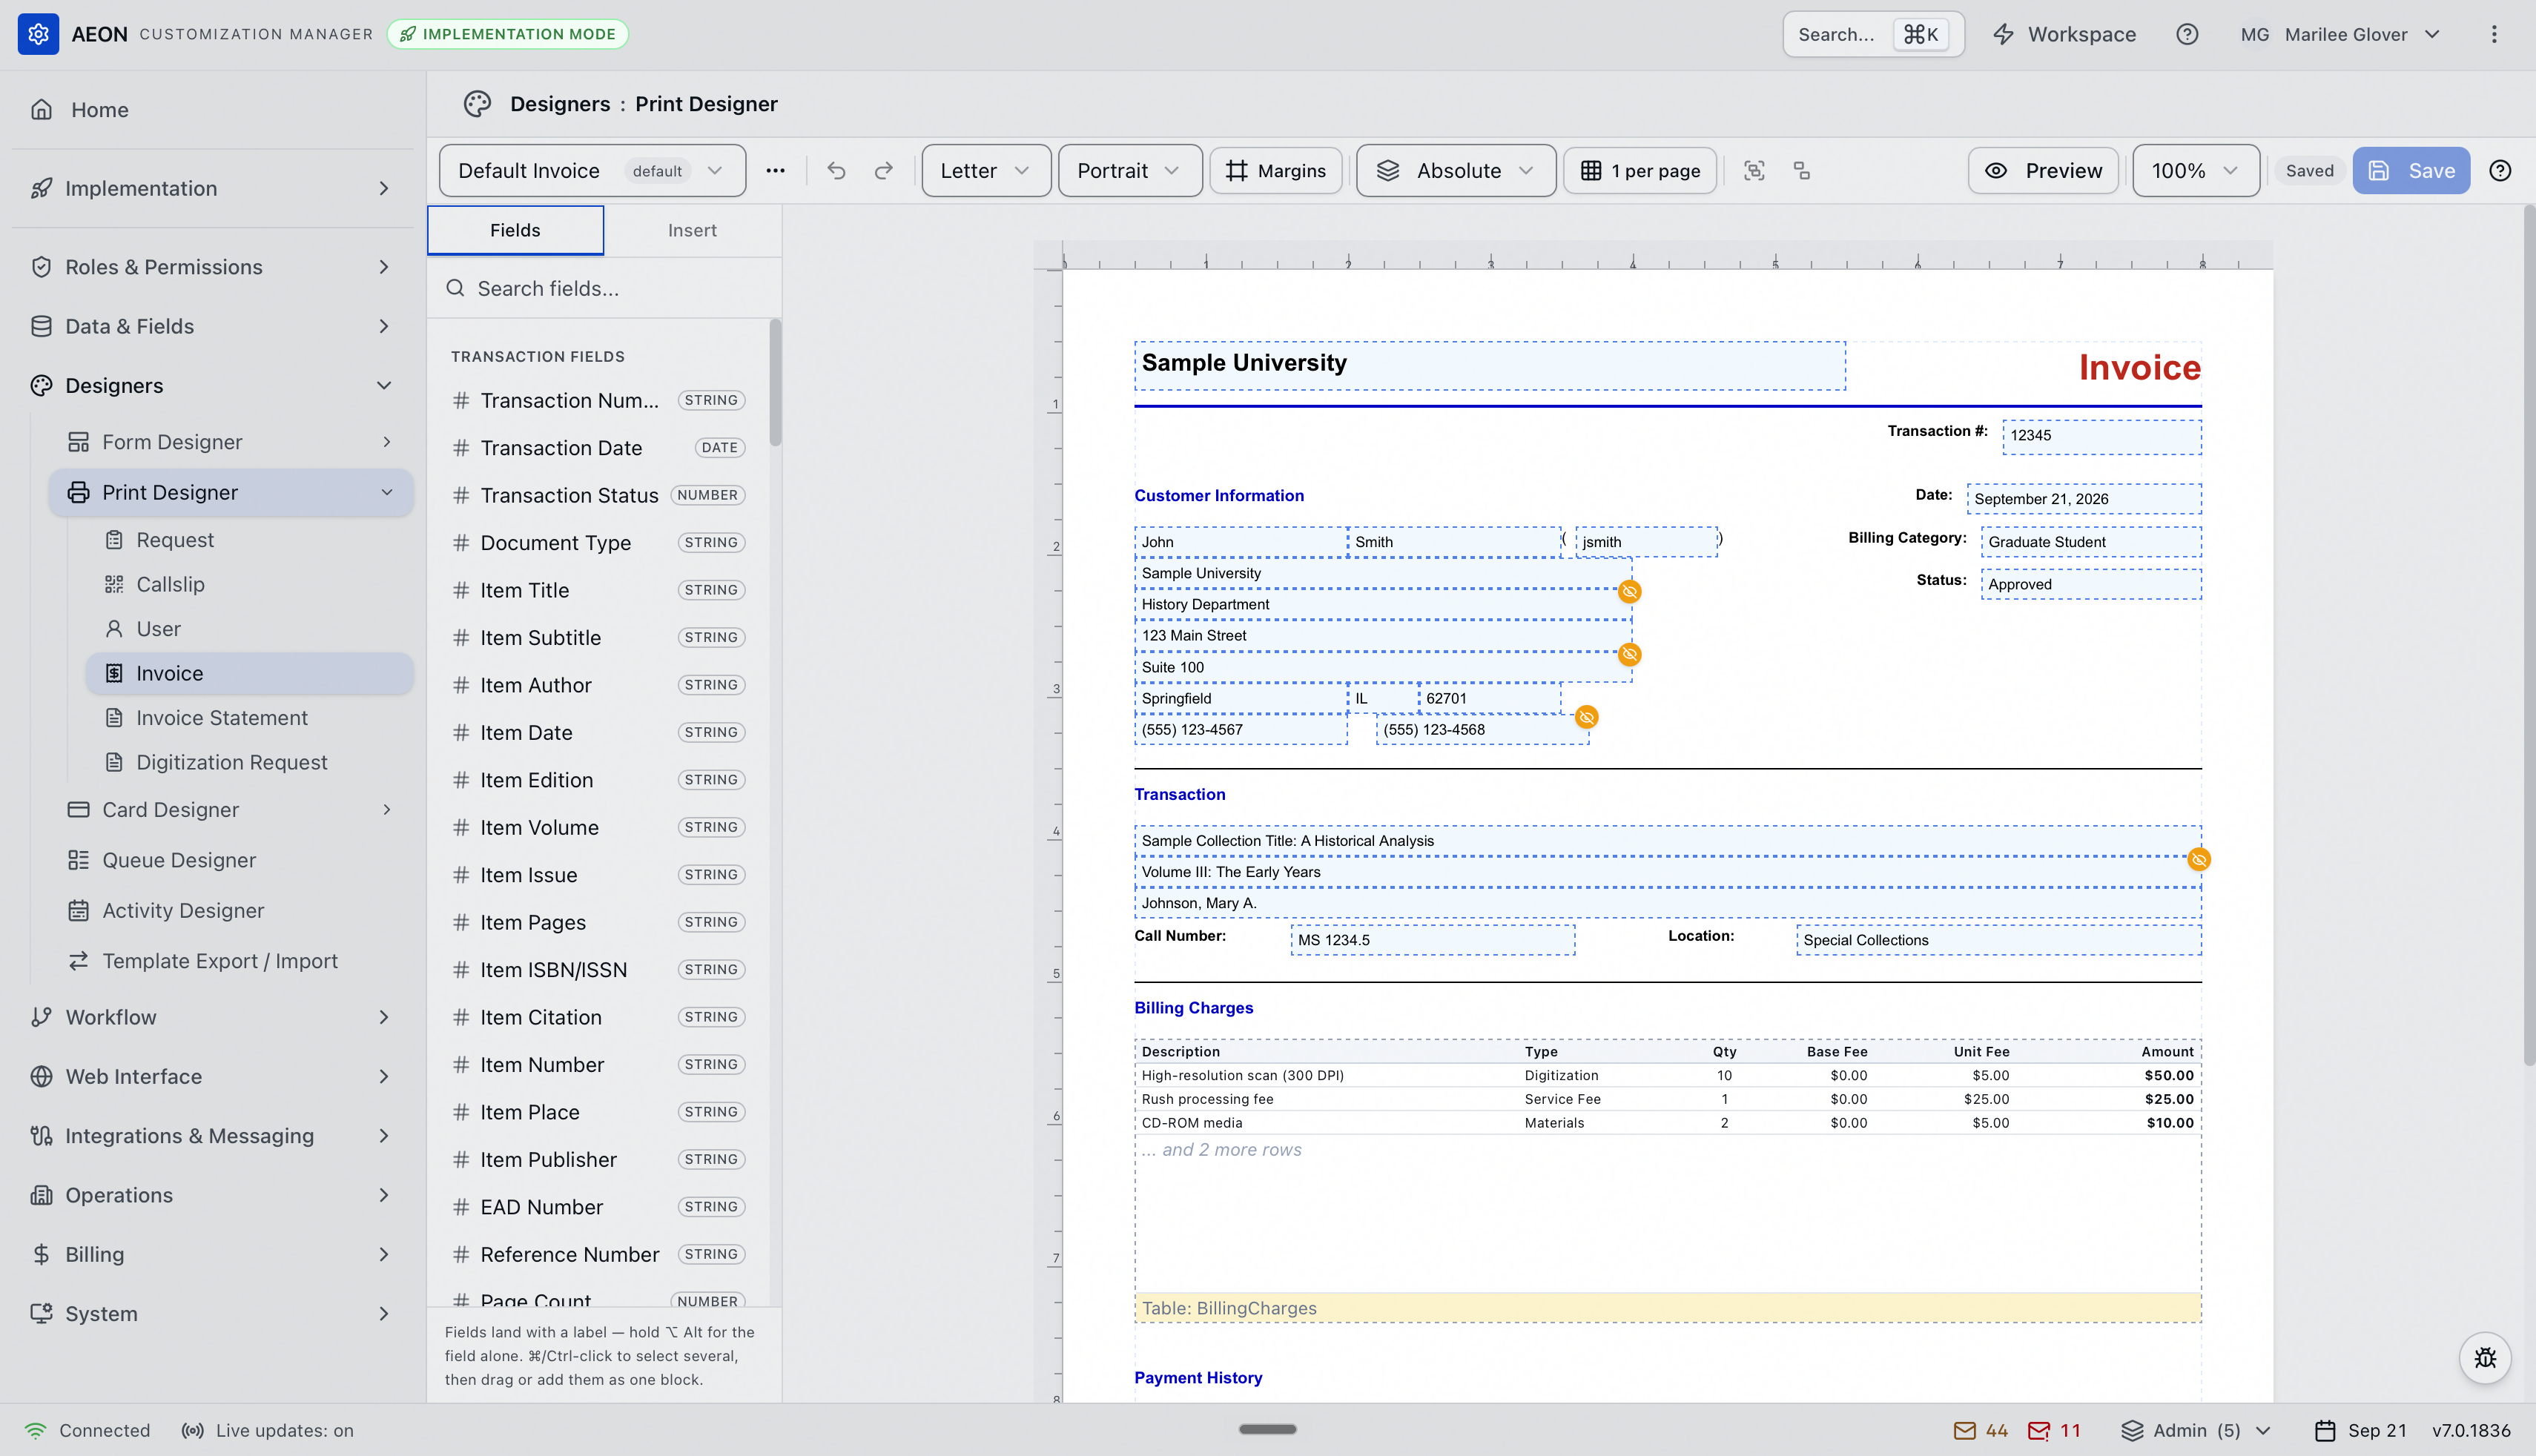
Aeon's built-in invoice is a good map of the parts: an institution header with a red Invoice title, a Customer Information block, a Transaction block, the Billing Charges table, the Payment History table, a "Make Checks Payable to" remittance block, and a totals box reading Invoice Total, Payments, and Amount Due.
Adding content: the Fields and Insert tabs
Everything on the invoice is an element. The left panel gives you two ways to add one.
The Fields tab
Because an invoice bills a transaction, its field list starts with the same transaction set the request slip and callslip use, and adds the billing-specific groups:
| Category | What's in it |
|---|---|
| Transaction Fields | Transaction number, date, status, item title, author, call number, location, and the rest of the request |
| User, Address, Secondary Address, User Status, and Research Fields | The requester's own record — name and contact details, both addresses, status, and research profile |
| Researcher, Activity, Appointment, Staff, and Institution Fields | The people and context around the transaction |
| Notes | Latest Note, Latest Researcher Note, and All Notes — the request's notes as single values |
| Billing Fields | Total Charges, Total Payments, and Amount Due — the three currency totals the totals box is built from |
| Institution Billing Address | Your remittance details: Address 1, Address 2, City, State, Zip Code, Country, Phone, Fax, and Email |
| Custom Fields | Any transaction custom fields you've defined |
Each field carries a small badge for its data type (STRING, NUMBER, DATE, and so on). Type in the Search fields... box to filter.
- Click a field to drop it on the page. It lands as a labeled row — the field's label next to its value.
- Hold
⌥ Altwhile clicking to drop the value alone, with no label. - Drag a field onto the canvas to place it exactly where you want.
- To add several at once,
⌘/Ctrl-click each field, then drag them on or use Add to page.
The panel reminds you of this at the bottom: "Fields land with a label — hold ⌥ Alt for the field alone. ⌘/Ctrl-click to select several, then drag or add them as one block."
The "Make Checks Payable to" block on the built-in invoice is built from Institution Billing Address fields rather than typed text — so when your billing address changes you update it once in Aeon instead of editing every template.
The Insert tab
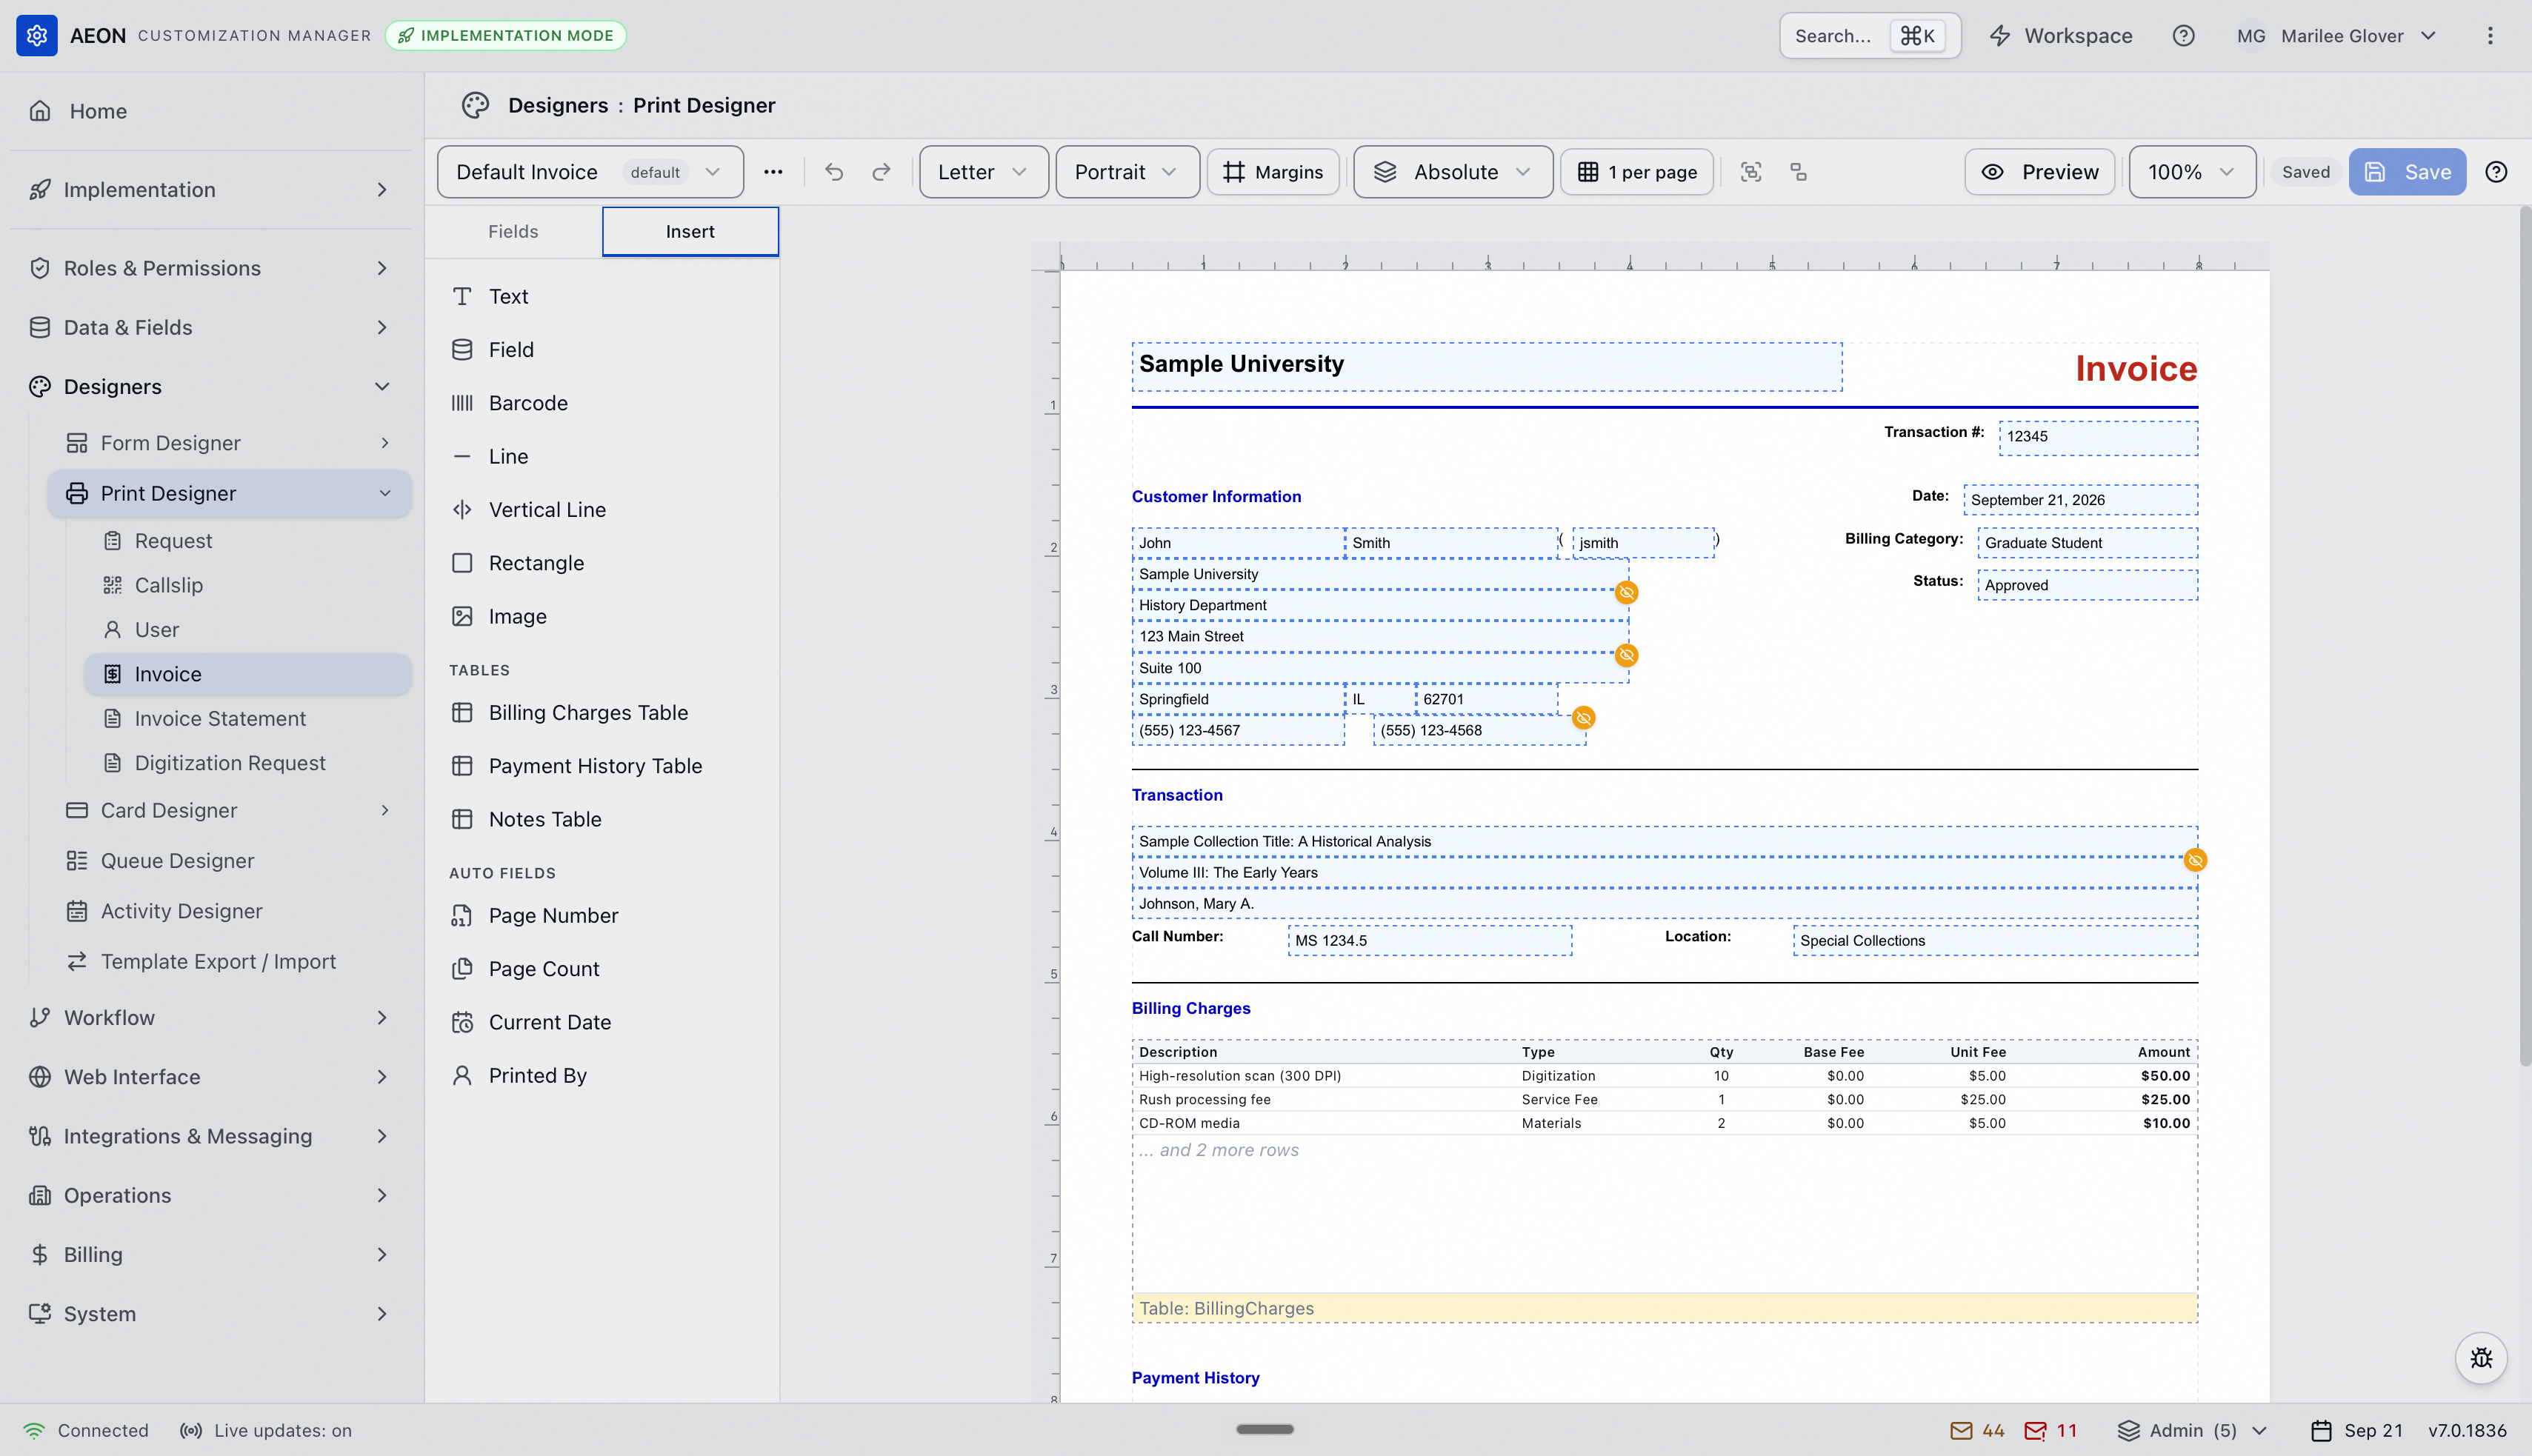
The Insert tab holds the building blocks that aren't tied to a single field:
| Element | What it puts on the invoice |
|---|---|
| Text | A static label that prints exactly as typed — "Invoice", "Make Checks Payable to:" |
| Field | A single data value, unbound at first — you choose which field after placing it. |
| Barcode | A scannable barcode generated from a field value, by default the transaction number. |
| Line | A horizontal rule — the built-in invoice uses these to separate its sections. |
| Vertical Line | A vertical rule — useful for dividing the charge columns. |
| Rectangle | A box or border, like the one around the totals. |
| Image | A logo from the image gallery. |
A Tables group offers the three repeating tables, and an Auto Fields group prints values about the printout itself — Page Number, Page Count, Current Date, and Printed By.
The three tables
This is what makes an invoice different from every other print template. A field prints one value; a table prints one row per record and grows to fit.
Billing Charges
Billing Charges — "Line items for billing charges" — is the itemized list of what the patron is being charged for. These columns are available:
Description · Type · Amount · Date · Quantity · Unit Fee · Base Fee · Tax Rate · Tax Amount
The built-in invoice shows a practical subset — Description, Type, Qty, Base Fee, Unit Fee, Amount — which reads cleanly for a patron. Add Tax Rate and Tax Amount if your institution itemizes tax.
Payment History
Payment History — "Record of payments made" — lists what's already been paid against the transaction. Its columns are:
Payment Date · Payment Method · Amount · Reference · Authorization Code
The built-in invoice uses Date, Method, Reference, and Amount, so a patron can see that their deposit was received and what's left owing. It also carries a Note column that has no value behind it and always prints empty — delete that column if you'd rather not show the gap.
Notes
Notes — "All notes on the request, oldest first" — prints every note on the request. It lands with three columns: Date, Note, and Added By. It's the same table the callslip offers, and it's rarely wanted on an invoice — reach for it when your patrons need the reason for a charge in writing.
They're different things with the same name. The Notes category on the Fields tab prints single values — the latest note, the latest researcher note, or all of them run together in one element. The Notes Table prints every note as its own row.
Drop a table from the Insert tab and it lands as a band on the page with sample rows in it, labeled with its data source — Table: BillingCharges, Table: PaymentHistory, and Table: Notes — so you can tell them apart while you're arranging the page. At print time each band fills with that transaction's real rows; a transaction with no payments prints no payment rows.
Editing an element
Select an element and its floating toolbar appears above it. What the toolbar offers depends on the element:
-
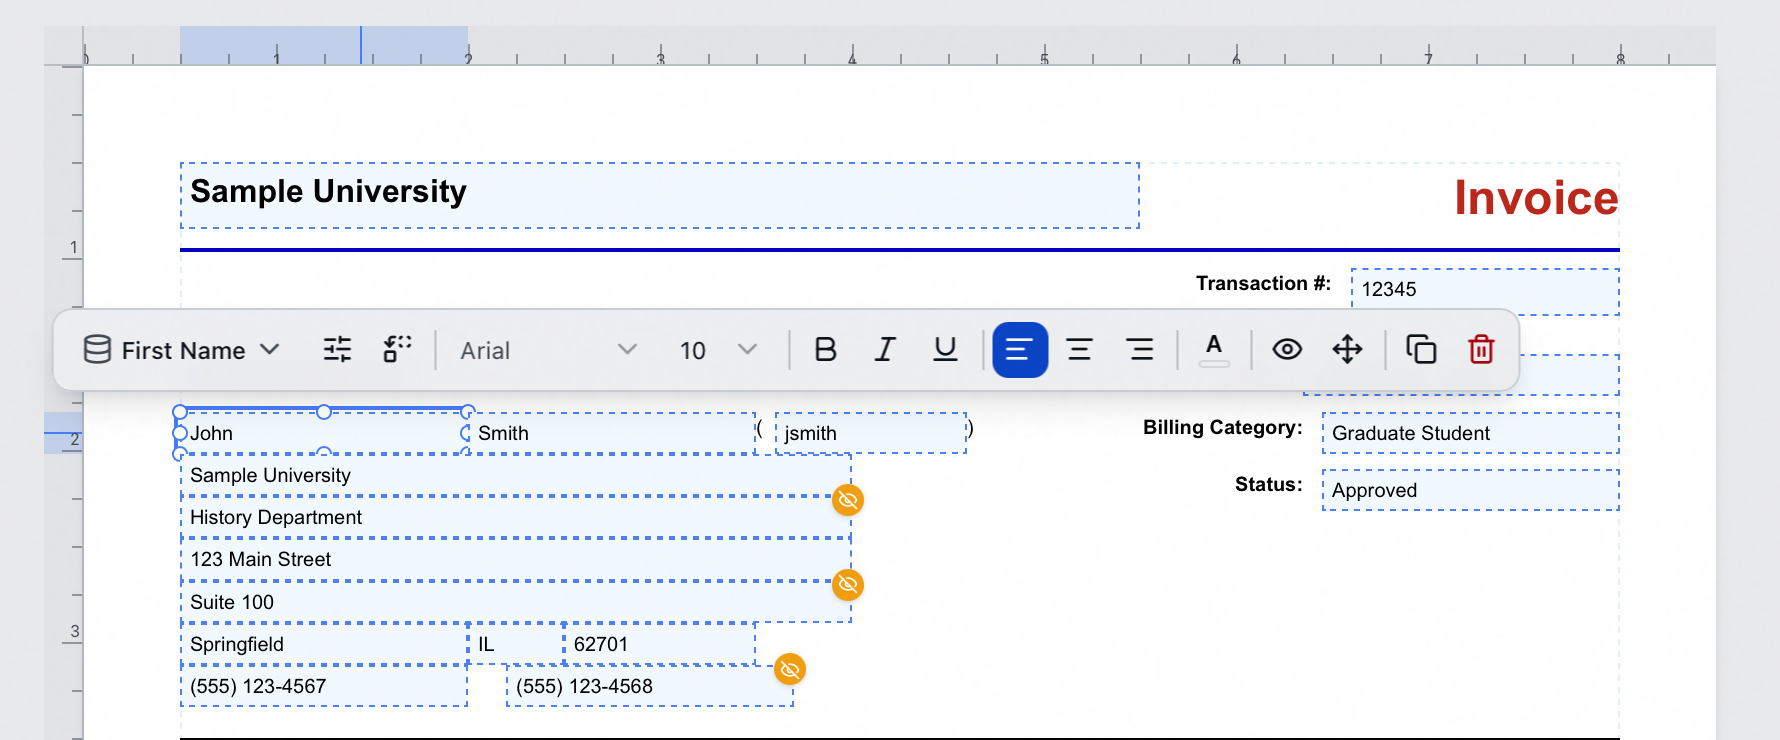
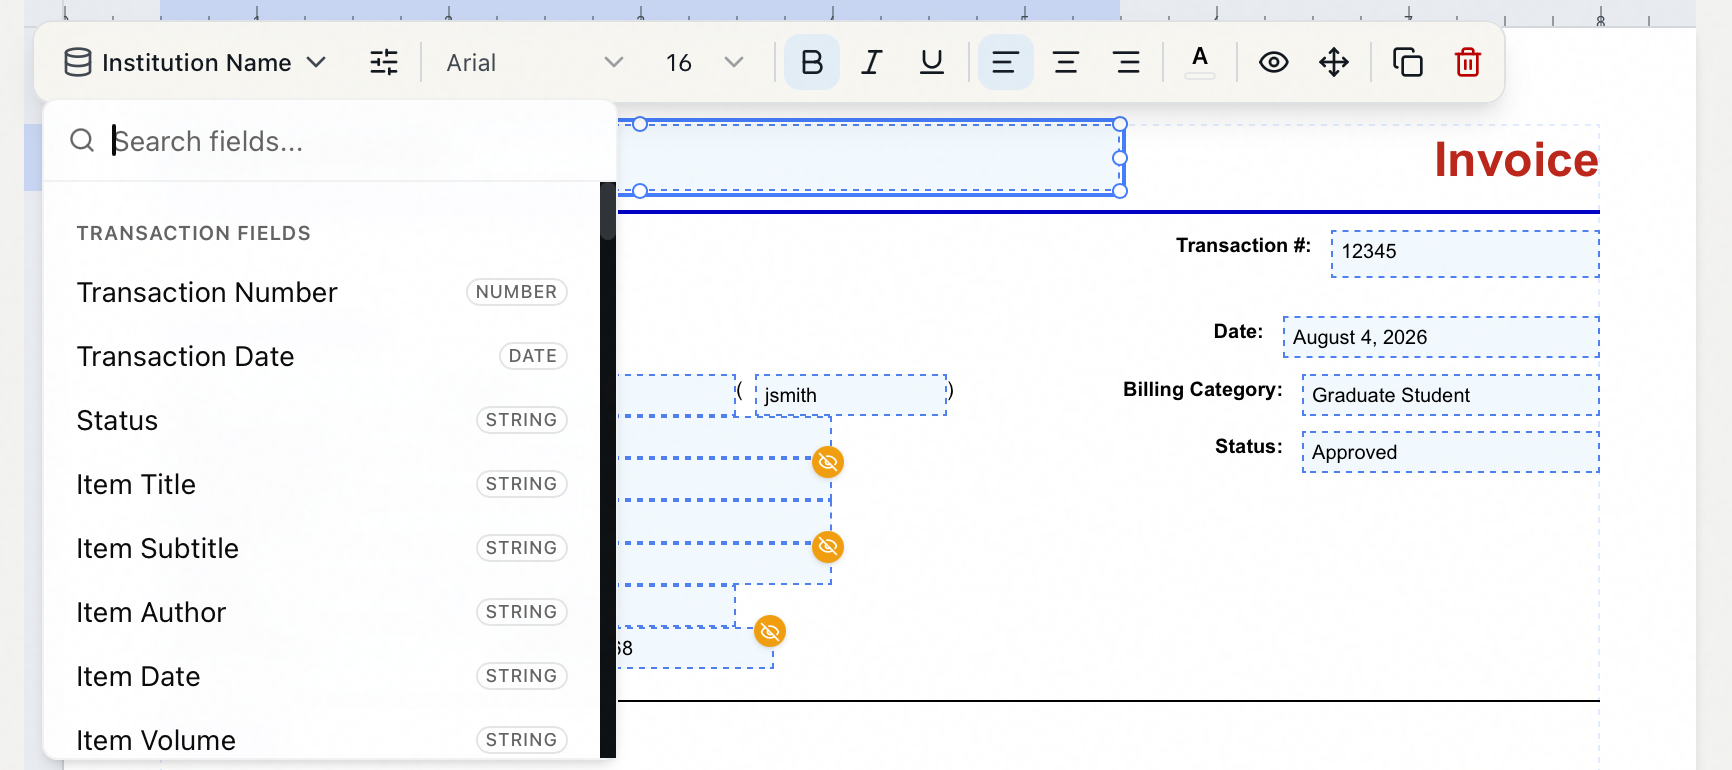
A field shows its field button (the bound field's name, with a chevron), a Format button, a fallback field button, and text-styling controls — font family and size, bold, italic, underline, alignment, and text color. Click the field button to open a searchable field picker and choose a different field; or double-click the field on the canvas to jump straight into that picker.
-
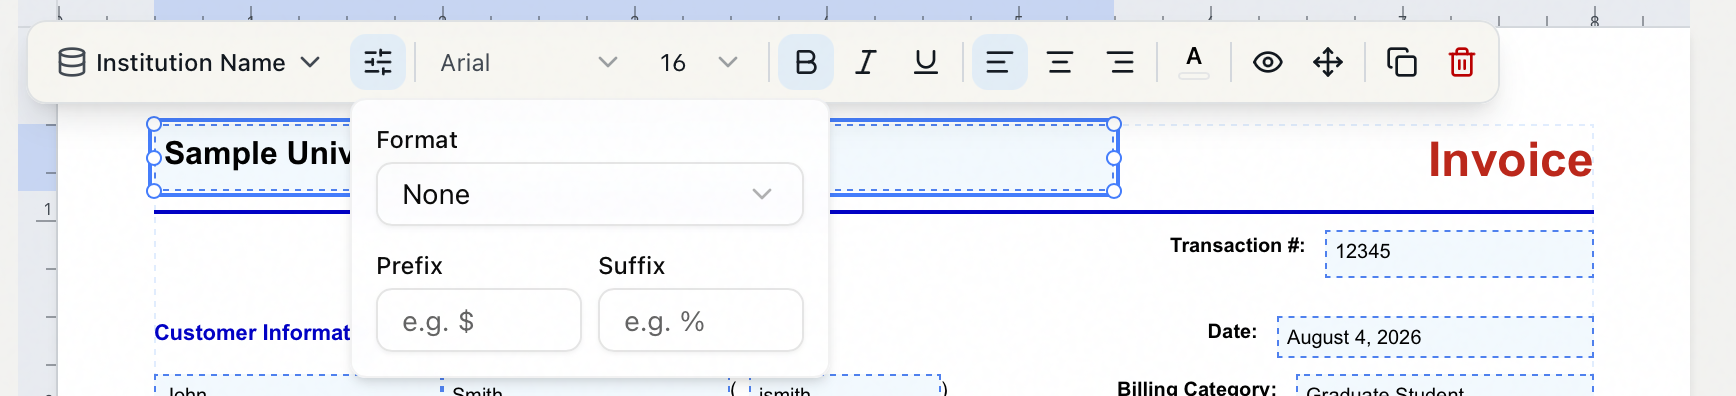
Format (the sliders button) opens a small popover: a Format menu — None, Currency, Number, Short Date, Long Date, or Date & Time — plus Prefix and Suffix boxes, hinted with "e.g. $" and "e.g. %". Currency is the one you'll reach for most on an invoice; picking a field also applies a default format for its data type, so the billing totals arrive already formatted as money.
-
Fallback field sets a second field to print whenever the first is empty — "print A; if empty, print B". With none set the button reads "Fallback field (printed when this field is empty)"; once you choose one it reads "If empty, prints: …", and Remove fallback clears it. A barcode gets the field button but neither Format nor a fallback.
-
Text offers typography controls; double-click a text element to edit its words in place.
-
Line, Vertical Line, and Rectangle offer a Stroke color swatch — whose popover also sets Stroke width — and a Stroke style menu of Solid, Dashed, or Dotted. A rectangle adds Fill & corners for its fill color and corner radius.
-
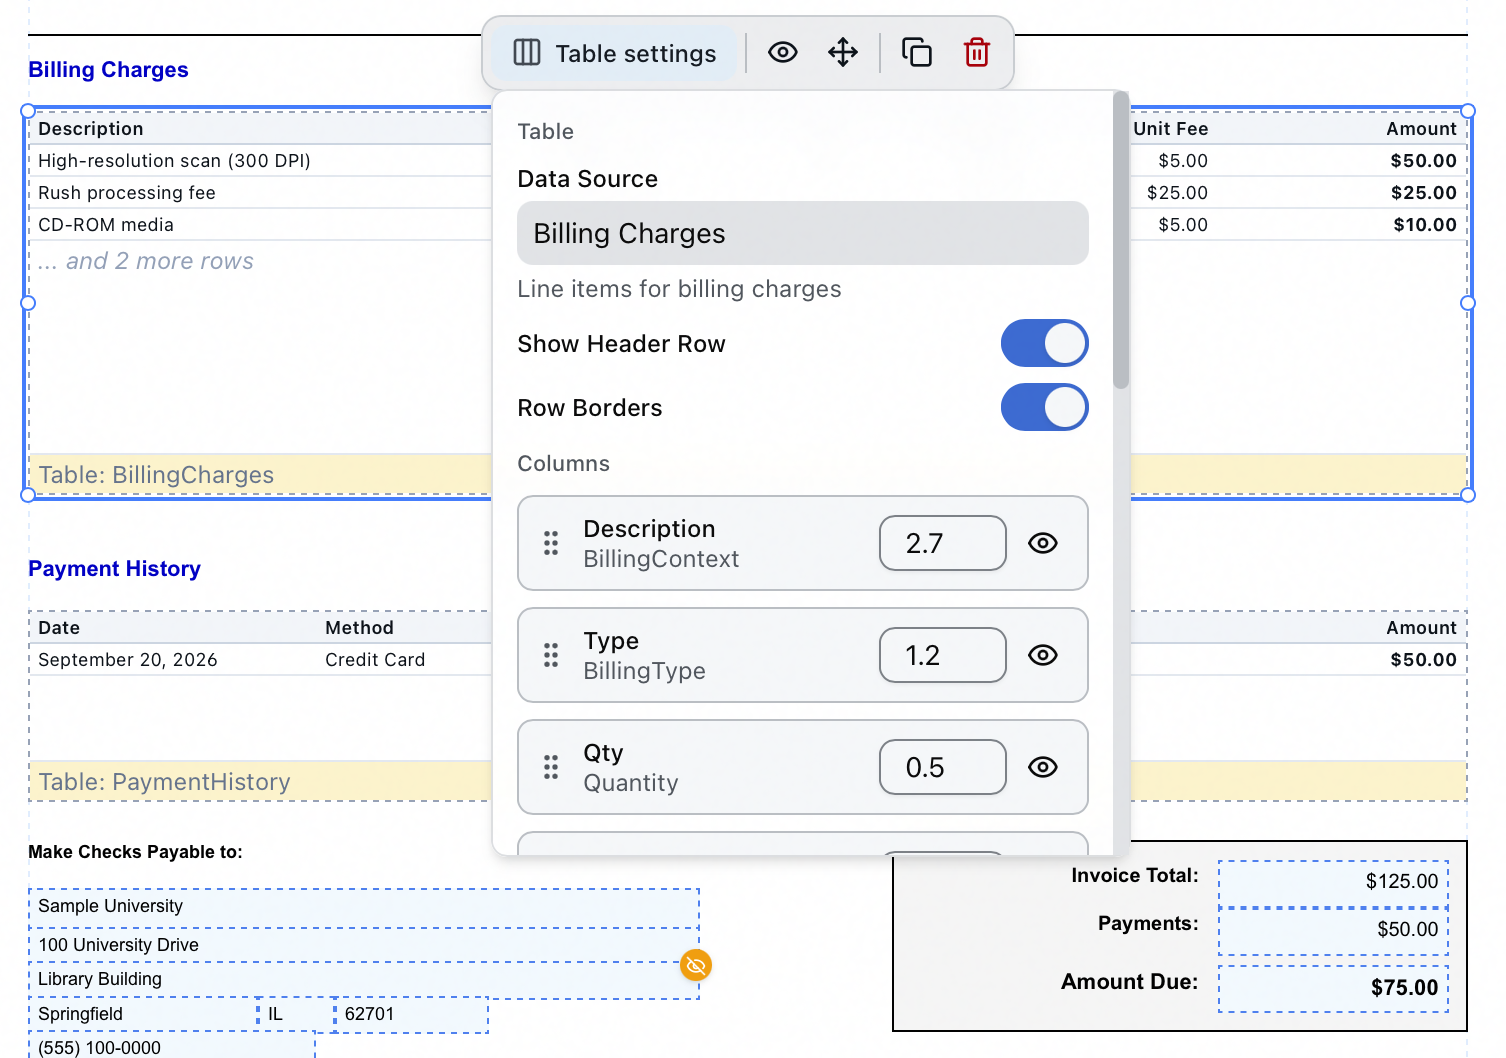
A table shows a Table settings button. The popover names the table's Data Source, toggles Show Header Row and Row Borders, and lists its Columns — each with the field it's bound to, a width in inches, and an eye button to hide it. Below that, Column Formatting sets each visible column's format and alignment.
-
Image and Barcode offer their own source/appearance controls.
-
Visibility conditions (the eye button) controls when the element prints — see Hiding an element that doesn't apply.
-
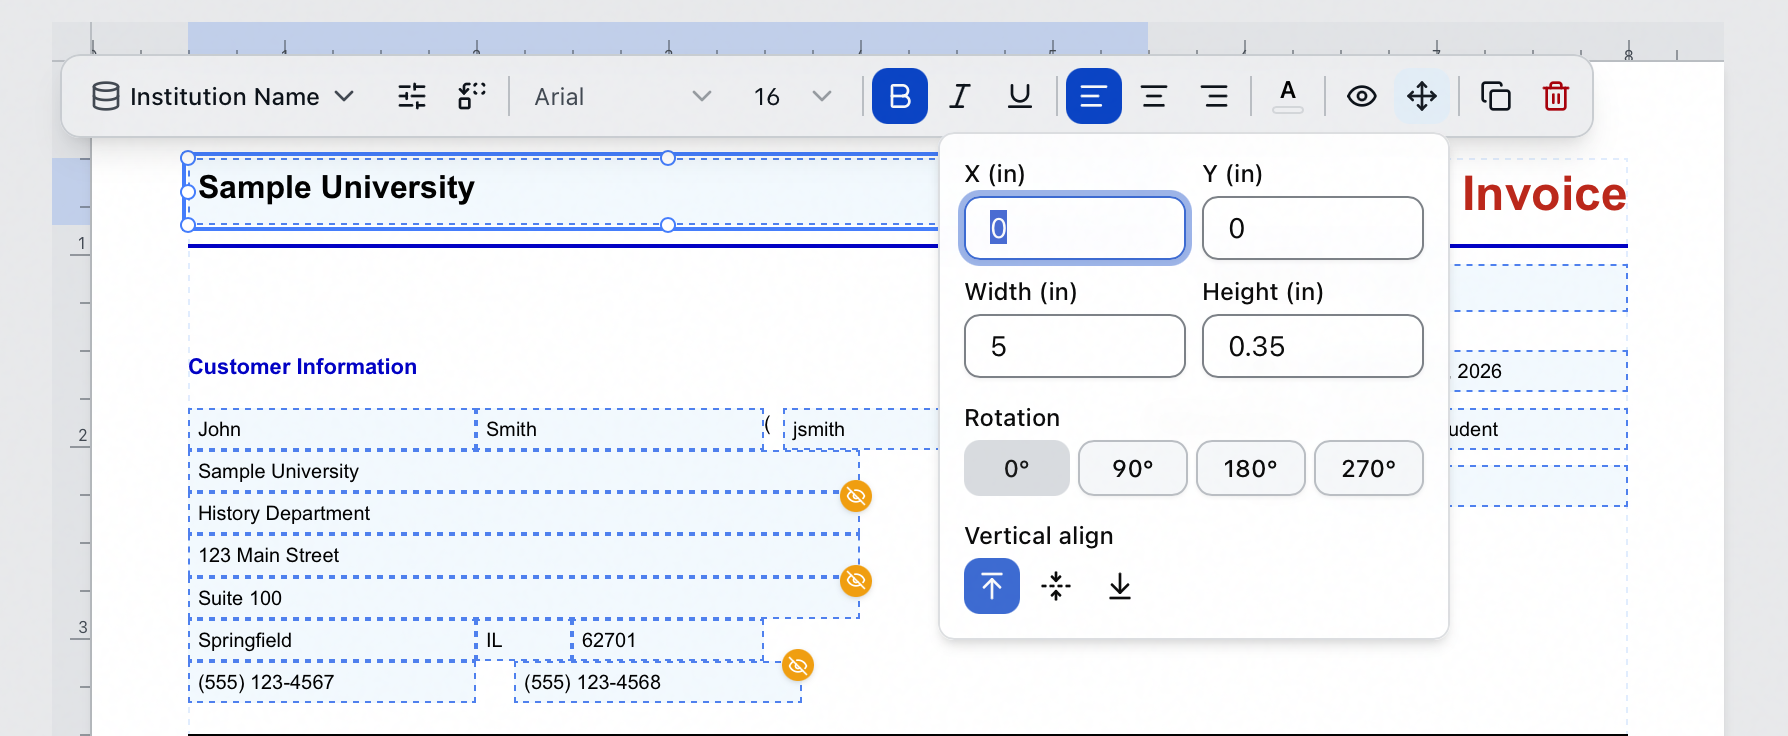
Position & size (the four-arrows button) places the element precisely: X and Y, Width and Height, all in inches. On text, field, and auto-field elements it also offers Rotation presets of 0°, 90°, 180°, and 270°, and vertical-alignment buttons. In Flow layout the popover gains a Band menu that moves the element into another band.
-
Duplicate (
⌘D) and Delete (⌫) finish the toolbar.
Arranging and fine-tuning
- Move an element by dragging it; resize it with its handles.
- Nudge a selection with the arrow keys — hold Shift for a larger step.
- Select several with Shift-click (or
⌘/Ctrl-click); a floating align/distribute toolbar appears, and you can Group them (⌘G) so they move as one. Ungroup with⌘⇧G. - Standard editing shortcuts work on the canvas: copy (
⌘C), paste (⌘V), duplicate (⌘D), delete (Delete/Backspace), select all (⌘A), and undo / redo (⌘Zand⌘⇧Z). - To move around without the mouse:
Tabcycles through the elements on the page (⇧Tabreverses),F6cycles between the panel and the canvas, andEscapeclears the selection.
Press ? anywhere in the designer for the full shortcut list on screen.
Page setup
- Page size — Letter, Legal, A4, or A5, plus any reusable sizes your site has defined. Custom… sets one-off dimensions for this template alone, in inches or millimeters; Manage page sizes… opens the site-wide list for editing.
- Orientation — Portrait or Landscape.
- Margins — top, right, bottom, and left in inches; type the values and click Apply.
- Layout — Absolute places elements at fixed coordinates. Flow stacks them in bands that grow and break across pages, which suits a long invoice. See Flow layout.
- Records per page — in Absolute layout, the grid button (it reads, for example, 1 per page). An invoice is normally one per page; leave it at 1 unless you have a reason not to, since a table that grows needs the room. In Flow layout this is replaced by a record-separation menu — New page per record or Continuous (separator band between).
Hiding an element that doesn't apply
Not every transaction has every detail — a second address line, a volume, a payment. Rather than printing a stray label with nothing after it, hide the element when its data is blank.
-
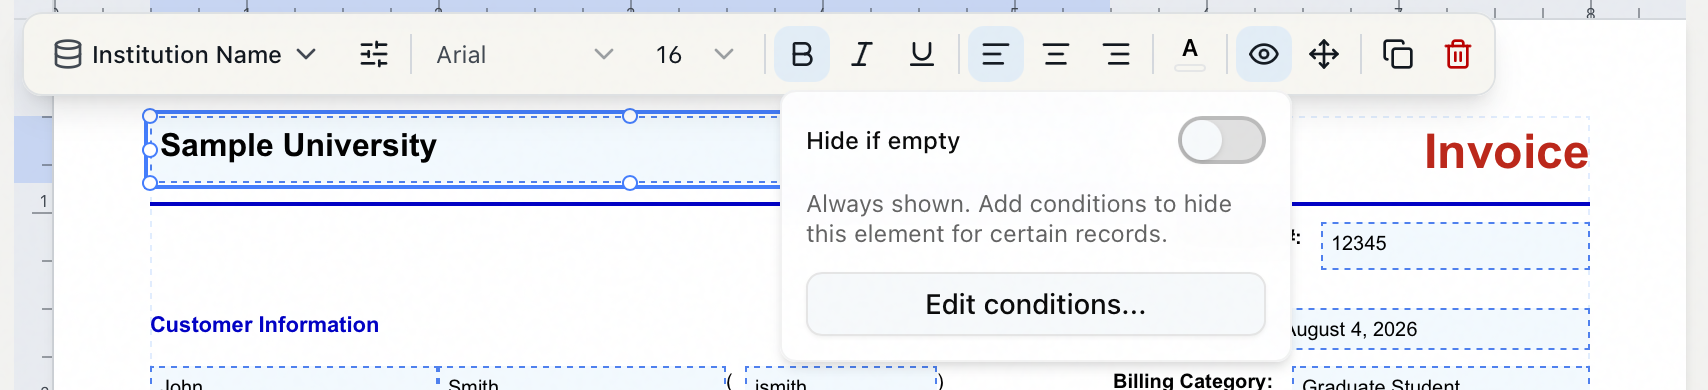
Select the element and open its Visibility conditions popover (the eye button). With nothing set it reads "Always shown. Add conditions to hide this element for certain records."
-
On a field, the quickest case is the Hide if empty toggle — the element drops off any invoice where that field has no value. Other elements go straight to the next step.
-
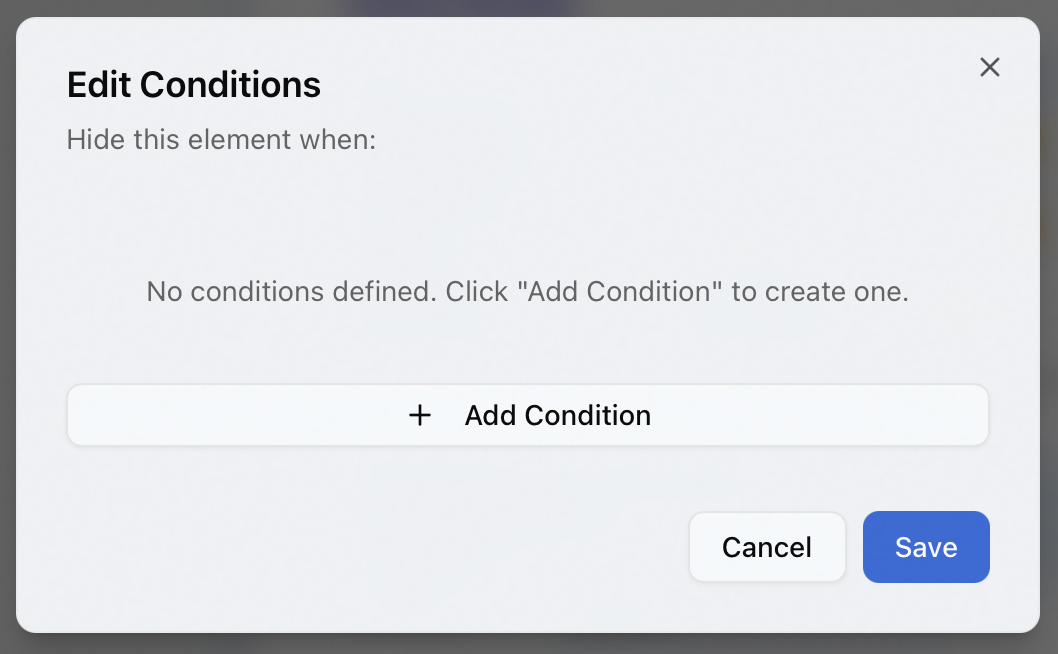
For anything more involved, click Edit conditions... to open the Edit Conditions dialog, headed "Hide this element when:". Until you add one it says "No conditions defined. Click "Add Condition" to create one." Click Add Condition, choose a field and an operator — is empty, is not empty, equals, does not equal, contains, is greater than, or is less than — and a value where one's needed, then Save. With more than one condition, the element hides when any of them match.
Any element carrying a condition gets a small amber badge with a crossed-out-eye icon in its top-right corner. Hover it to see how many conditions the element has — or "Hidden: Conditions not met" when the sample data would drop it.
A condition says when to hide an element, not when to show it. To print a late-fee notice only when a balance exists, hide it when Amount Due equals 0. Select a group and its floating toolbar has its own visibility control, so an entire block — a tax line, or the payment section — shows or hides as a unit.
Previewing before you commit
Click Preview in the toolbar at any time. Aeon renders the current template to a PDF using sample data — a transaction with five charges and one part-payment — and opens it in a dialog headed Preview: followed by the template's name (for example Preview: Default Invoice). From there you can Download the sample PDF or send it to your Print dialog. Preview reflects the canvas as it stands, including edits you haven't saved yet.
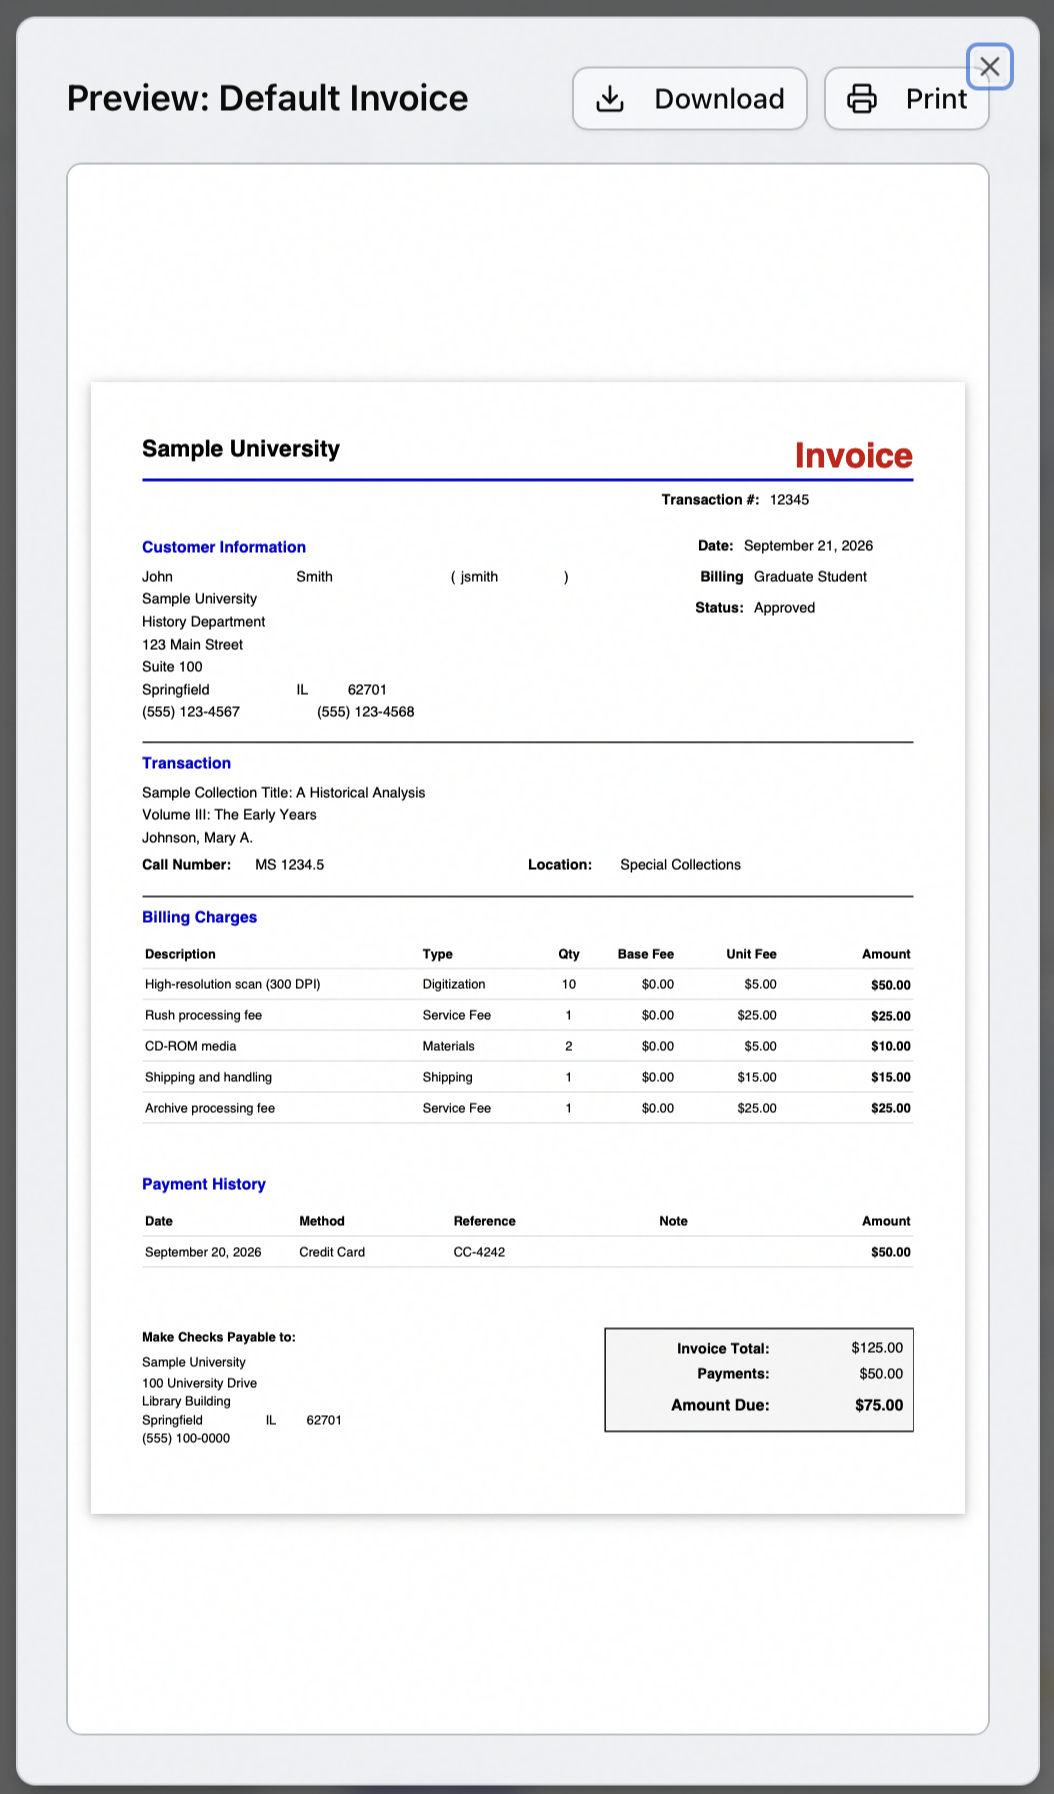
Preview is worth doing on an invoice more than on any other template, because the tables change height with the data. Check that a long charge list still leaves room for the totals, and that a transaction with no payments doesn't leave an awkward gap.
Saving and managing templates
- Save with the toolbar's Save button or
⌘S; the indicator switches to Saved. - Discard changes with the discard button that appears next to the save indicator while you have unsaved edits — it reverts to the last saved version.
The designer tracks unsaved changes per template. Save before you switch to a different invoice, move to another template type, or import — selecting another template loads its saved state and your in-progress edits are not kept.
You can keep several invoice templates — a full itemized invoice and a short receipt, say — and mark one as the default. The template selector on the left of the toolbar switches between them, and its ⋯ menu manages them:
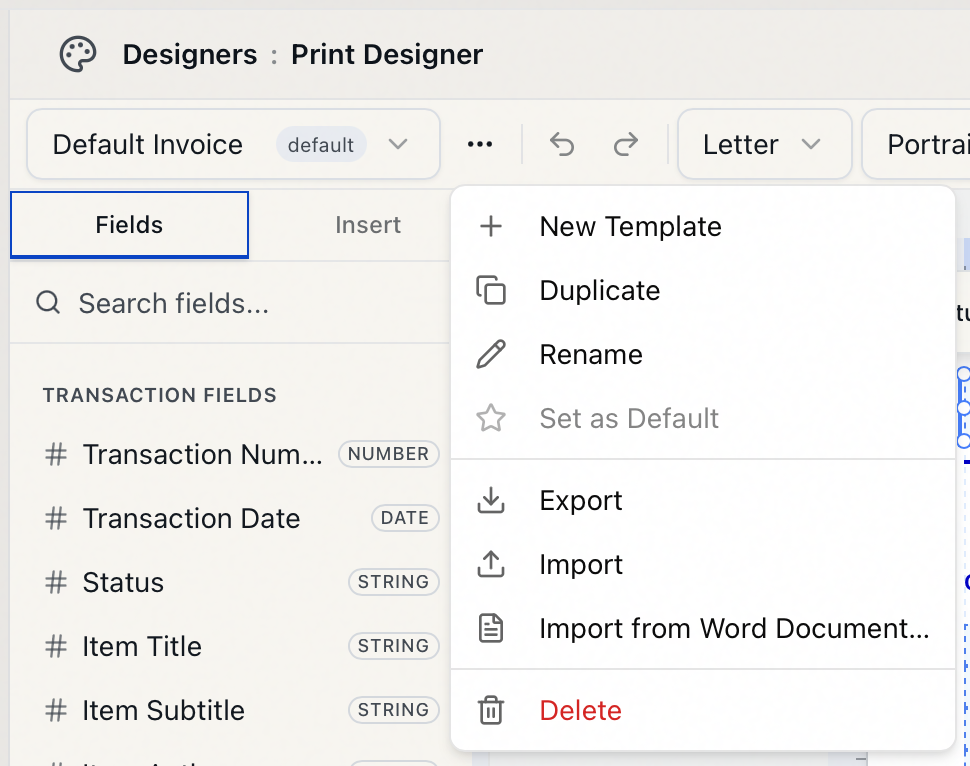
- New Template — start a fresh invoice.
- Duplicate — copy the current one as a starting point (the copy is pre-named "… (Copy)").
- Rename — give it a meaningful name.
- Set as Default — mark which invoice Aeon reaches for first. Only one template per type is the default; setting a new one clears the old, and it's per type — marking an invoice as default never changes which callslip or user card is default.
- Export / Import — download the template (with its images) as an
.aeon-print-template.zippackage, or load one back in. - Import from Word Document… — bring a Word template in (see below).
- Delete — remove the template.
Bringing a Word template across
- Open the template ⋯ menu and choose Import from Word Document….
- Pick your existing
.docor.docxfile. - Aeon parses it, converts the merge fields it recognizes into designer fields, pulls in images, and creates a new invoice template — then shows an Import Summary of what came across.
- Importing creates a new template and switches to it. If you have unsaved edits, Aeon warns you first — they'll be lost, so save before importing.
- Unmapped fields: merge fields Aeon can't match come in unmapped and carry a warning badge on the canvas. Select each and choose the right field from its picker.
- Conditional
IFfields are not converted. Rebuild that logic with element conditions. - Word's charge tables sometimes do come across as Aeon tables. A table converts when it carries a Next Record field, or when two or more of its merge fields match a data source Aeon recognizes — and in both cases only if Aeon can name that source. Billing Charges and Payment History are the only two it recognizes, so a notes table is never one. Aeon builds the columns from the table's first row, one per cell, splitting the width evenly, so check the headers and the widths. A cell with no merge field in it binds to Description as a fallback, and a column bound to a name Aeon doesn't render prints empty without the warning badge a stray field would get. Any table Aeon can't classify is flattened into separately positioned elements instead. Always Preview before making an imported invoice the default.